Antilhue - Chile

![]()
![]()
![]()
![]()
![]()
![]()
![]()
![]()
Antilhue - Chile
|
|
The Robofocus electric focuser system is an often used aftermarket solution to allow software control of all kinds of mechanical focusers. It is made by Technical Innovations http://www.homedome.com/robofoc1.htm Starlight Instruments are the makers of the well-known high quality Feathertouch precision focusers that can be found on many premium telescopes. This page shows how to easily attach the Robofocus motor to the large 3.5" Feathertouch focuser, model FTF3545 http://www.starlightinstruments.com/refractorFocuser3545.htm The Robofocus kit contains two thin perforated aluminum plates. These are meant to function as a mounting bracket for the Robofocus motor by bending them into a shape that will align the motor coupling sleeve with the focuser shaft. Although this method works, the result is almost always a wobbly and clumsy looking solution. A much tidier and stronger configuration is achieved by using the "Robobracket" (Astro-Physics part number JRFBRK). Although it was originally designed for use with Astro-Physics focusers, the Robobracket can be easily adapted to the Feathertouch focuser as follows: - remove the friction adjustment screw on the bottom of the Feathertouch focuser's pinion housing. For electric focuser control, this screw is not needed: the Robofocus motor's reduction gearbox has sufficient holding power on the focuser shaft. - remove the non-reduced focuser knob and store in a safe place. Robofocus has very small steps, reduction is not needed. - mount the Robofocus motor loosely on the bracket and attach the coupling sleeve to the motor shaft. Then fasten the coupling sleeve on the focuser shaft, leaving a small gap between sleeve and pinion housing. - with a pencil, make a mark on the centerline of the Robobracket over the location of the threaded hole where the Feathertouch friction adjustment screw was. The hole is covered by the bracket, so you either must eyeball it or make a reference measurement to a visible edge or screw. - disassemble everything, punch mark the bracket and drill a single hole that will accept the friction adjustment screw's diameter.
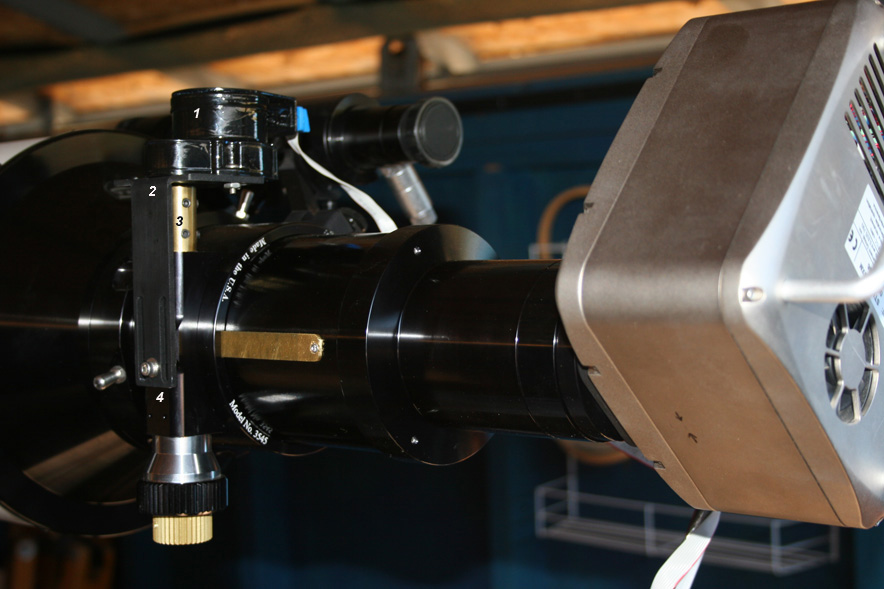
Top to bottom on the left side of the picture: 1. Robofocus motor, 2. Robobracket, 3. coupling sleeve (brass), 4. pinion housing After reassembly, use the friction adjustment screw or a short Allen screw with washer to mount the Robobracket flush to the Feathertouch pinion housing and tighten all screws. A strip of self-adhesive felt or flocking paper on the inside of the Robobracket will prevent marring of the surfaces. If you keep the Robofocus motor + Robobracket + coupling sleeve mounted together as one unit, it will take you only a minute to go from manual to electric focusing (or back). <end> |