IRIS TUTORIAL
Save an image
Save
an image on a disk
After a processing, the result can be saved on a disk. The symetric command to LOAD is the command SAVE. The use of SAVE simple, the only one parameter is the file name where the in-memory image saved. If no path is indicated, the image is saved into the working directory. For example:
>SAVE MYPROCESS
If the current image format is the proprietary PIC format, Iris add the extension .pic to the file name. If the curent format is FIT(S), Iris add the extension .fit to the file name.
You can also use the Save dialog box from the File menu. From this same dialog box you can export the in-memory in an infographic file. If TIFF or PNG is selected the exported file is in a 48-bits format.
Console commands can be also used. For example:
>SAVEPNG MYPROCESS
produce on the working directoy the 48-bits file "myprocess.png".
For save a JPEG image from console, you have to indicate the quality criteria of the compression. For the better quality enter:
>SAVEJPG MYPROCESS 1
For the lower quality, but also the more compact image, use
>SAVEJPG MYPROCESS 5
Intermediate values are possible for the compression parameter.
You can export an image on a PSD format file (Photoshop) with SAVEPSD command.
A sequence of PIC images can be easily converted to a FITS sequence by using PIC2FITS command (symetric to FITS2PIC). For example:
>PIC2FITS IN OUT 37
convert the IN1.PIC, IN2.PIC, ... IN37.PIC sequence to OUT1.FIT, OUT2.FIT, ... OUT37.FIT sequences.
The PIC2BMP convert a sequence of PIC files to a sequence of BMP files.
The EXPORT command make a "raw" file from a 16-bits in memory image. The syntax is:
EXPORT [NAME] [HEADER] [BYTE PER PIXEL] [REVERSE (0 or 1)]
The first parameter is the name of the image saved on the disk. It is your responsibility to add an extension to this name (.dat for exemple). Header is the size of the header (in byte unit). This header if filled by zero. The parameter 3 is the number of byte used for code the image (usualy 2 bytes per pixel). Finally, the latter parameter is the order of the two bytes in a pixel. If this parameter value is zero the Intel arrangement is used. If the parameter is 1, Iris use the Motorola model for byte order. Example:
>EXPORT FILE.DAT 0 2 0
An equivalent exists for importation (IMPORT command).
Tip: EXPORT2 is similar to EXPORT, but the natural internal coding of Iris [-32768..32767] is mapped from [0..65535].
The EXPORT_ASC offer the possibility to store the in-memory image in a three column ASCII file (readable with a word processing for example). The first column contain the X coordinates index of a pixel, the second column contain the Y coordinates index of a pixel, the third parameter contain the intensity values of the pixel. The symetric function is IMPORT_ASC.
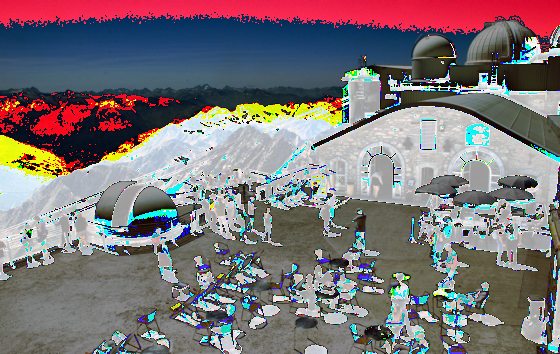
The aspect of my exported TIFF or PNG image is very strange !?
If the aspect of the exported image is....
...the reason is that the image contains negative values. It is easy to realize it by typing command STAT.
>STAT
The result is displayed in the output window:
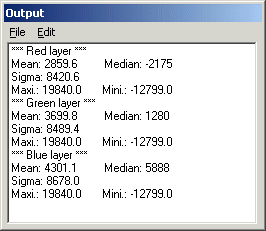
Survey the min. value: -12799. The solution is simple here, add a constant to all the pixels:
>OFFSET 12799
or from the menu Processing, open the Add dialog:
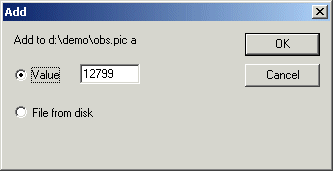
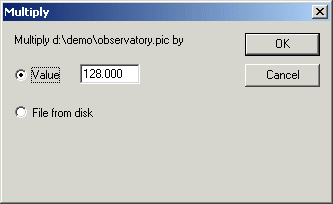
Another traditional problem: the image appears very dark in your graphic software. You can adjust the levels of this one, but when this is not possible, it is necessary to act since Iris. Often, the problem is that the dynamic of the exported image lies between 0 and 255 (runcommand STAT for check it), which fill only one small fraction of the entire dynamic of the exported 48 bits image (0 to 32767). To obtain an image more immediately readable, before exporting, enter the command:
>MULT 128
or since Processing menu, open the Multiply dialog:
Export "RAW" 48 bits files toward Photoshop
A solution for export RGB 48-bits (16-bits
per color plane) images is to use the SAVEPSD command (PSD
format of Photoshop), of TIFF/PNG files. An alternative solution is to use the EXPORT command
(compatible with 48 bits data). For example:
>EXPORT COMET.RAW 0 2 0
The first parameter is the file name for the exported image (note the extension .RAW), the 2nd is the size of the header block, the 3rd indicates a two byte per pixel format, and the 4th specifies IBM byte order (as opposed to the Motorola, reversed, order).
In Photoshop do File, Open, select the Photoshop RAW format, and load the image. The Raw Options box opens: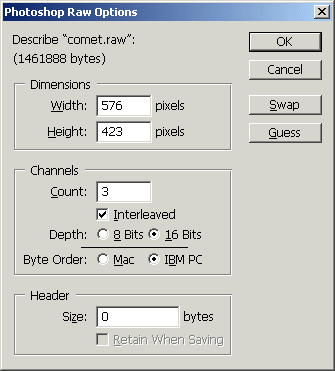
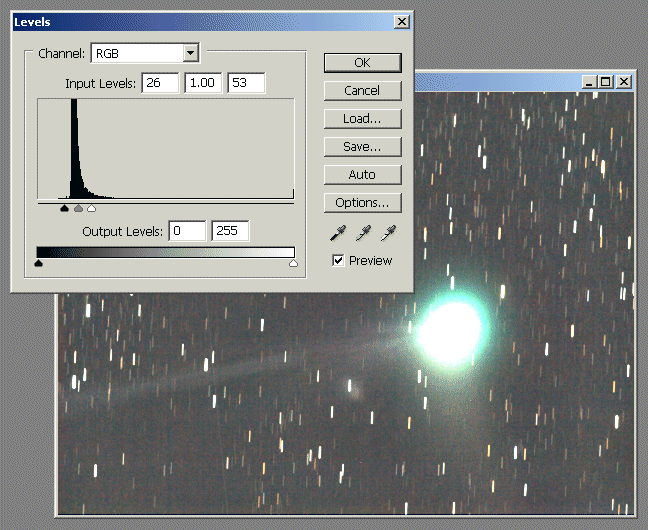
In general the image is very dark. Use the Levels... function of Photoshop for adjust the histogram (many time if necessary).
Note: Remove negative value is necessary (remember, Photoshop do not accept this values). A solution is
>CLIPMIN 0 0
For force positive intensities you can also run the OFFSET command. For example "OFFSET 300" if the most important negative valeur of the entire image is -300 (the STAT command return this information for the three layers of the image).
How to extract the R, G and B channels of a true colors 48 bits image ?
Open a 48 bits image and, from the Digital photo menu, run the command RGB separation:
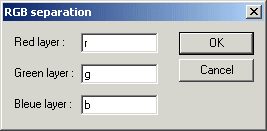
The R.PIC, G.PIC and B.PIC are created in the default directory. They are black and white images, in gray level, coded on 16 bits. You can easily visualize them:
>LOAD R (the red layer)
>LOAD G (the green layer)
>LOAD B (the blue layer)
To separate the layers, you can also run from the console the command SPLIT_RGB:
>SPLIT_RGB R G B
The split of the RGB components is very useful to apply some specific processing to a given layer or to exploit some tools of Iris which operate only on 16 bits images.
It is easy to reconstruct a color image starting from three distinct files (normaly the primitive colors). For example, type from the console:
>TRICHRO R G B
or, more compact:
>TR R G B
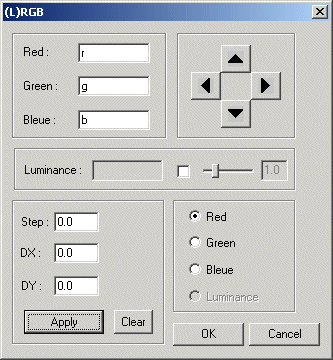
or from the (L)RGB command of View menu (click on Display for view the true color image, then OK):