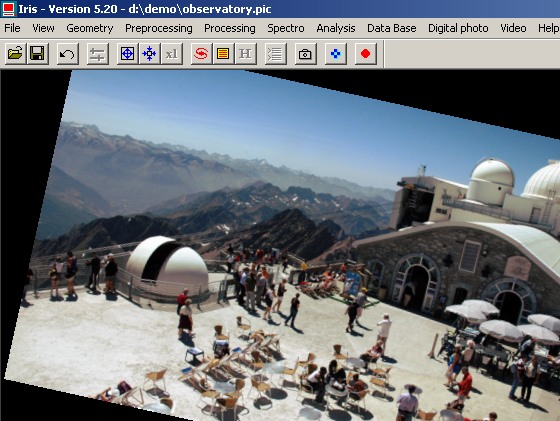
IRIS TUTORIAL
Geometric transformations
Scaling
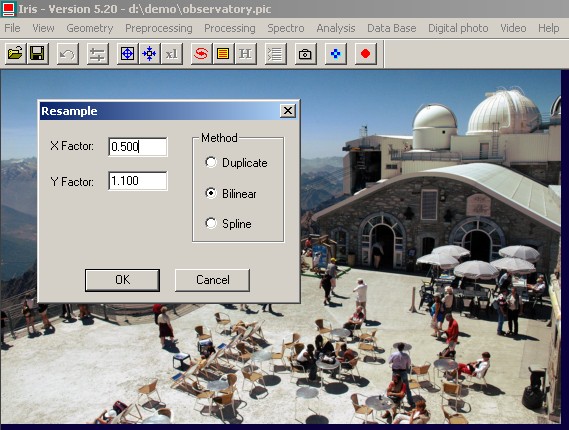
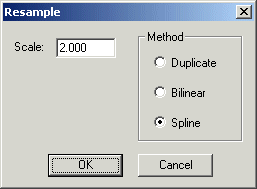
The Resample command allows you to change the size and/or aspect ratio of an image. This command is located in the Geometry menu. Enter the scaling factor along x and y axis.
The equivalent console command is
>SCALE 2 0.5 1.1
Each axis can have a different scale factor and you can enter fractional value for the scaling factor. The three available method for pixel interpolation (first parameter in console command) are:
Interpolation by pixel duplication conserves the original sampling of the image, but of course the result has an artificial look. Bilinear interpolation gives to the image a smoother look than simple pixel duplication. Nevertheless, for large enlargement factors, some artificial geometric structures can appear around stars. Spline interpolation is preferable for a natural rendering.- Duplication: for an enlargement, interpolation by pixel duplication; for reduction, interpolation by undersampling
- Bilinear: bilinear interpolation
- Spline: spline interpolation (only for enlargements).
You can invoque resampling from the contextual menu. Select a part of an image. For that drag the desired part of the image with the mouse pointer while clicking the left button:
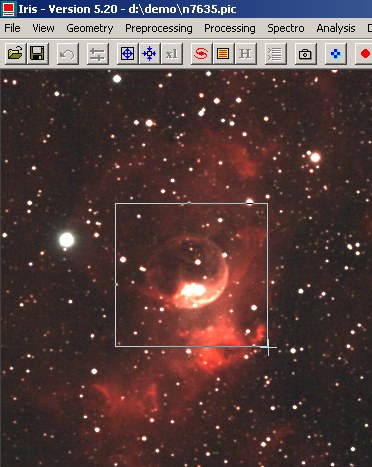
Then, clik the right button of the mouse on the image:
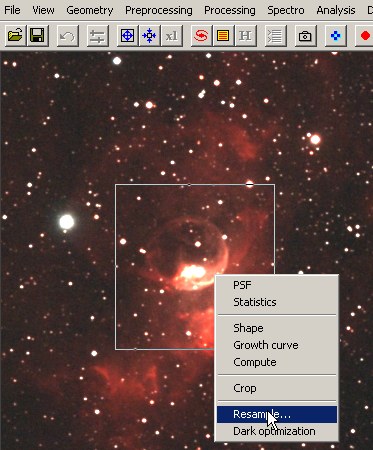
Select the Resample command and enter for example the parameters:
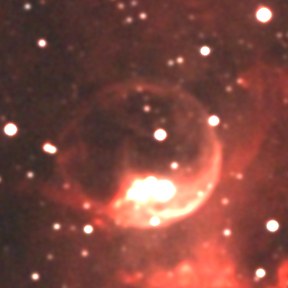
Only the selected part is enlarged:
Binning
The binning operation consist to agglomerate pixels 2x2, 3x3, 4X4, ... for reduce the size. The appreciate effect is an increase of the signal to noise after size reduction by the addition effect of adjacent pixel, but in exchanges, the image is of course less resolved.
The console command is BINXY and the only one parameter is the binning factor. For example:
>BINXY 2
|
|
|
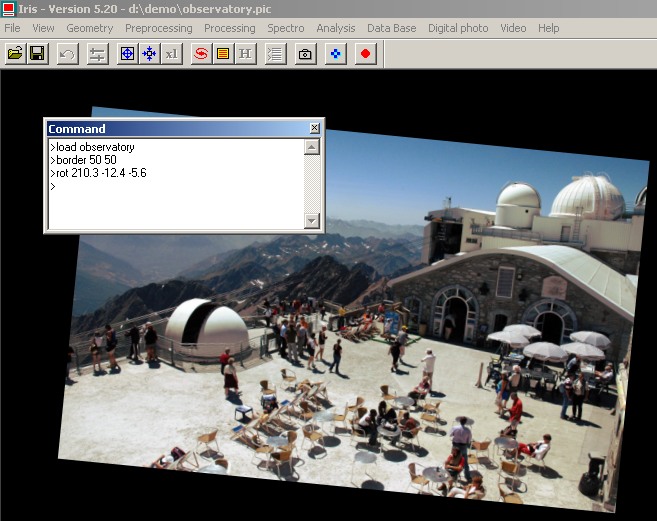
Rotation
The Rotate command (Geometry menu) rotates the current image around a point defined by the X,Y coordinates by a given angle. The center of the rotation can be off the screen. Note that the coordinates of this center and the angle can be noninteger values. For example:
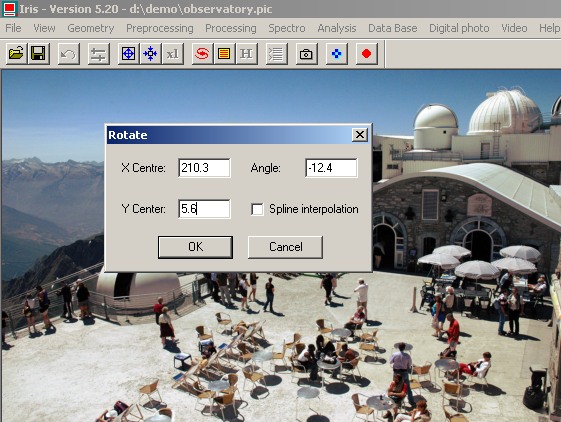
The equivalent console command is:
>ROT 210.3 -12.4 5.6
You can also change the size of the image before rotation (BORDER command):
>BORDER 50 50
>ROT 210.3 -12.4 5.6
Shift
To shift an image of a given quantity of pixels in X and Y you must use the Shift command of menu Geometry. For example
![]()
shift the current image of 12.4 pixels along the horizontal axis and -1.89 pixels along the vertical axis. The equivalent console command is
>TRANS 12.4 -1.84
The Spline interpolation give a more sharp result, but can generate some artifiact on stellar images - not recommanded for deep-sky works.
Flip the axis
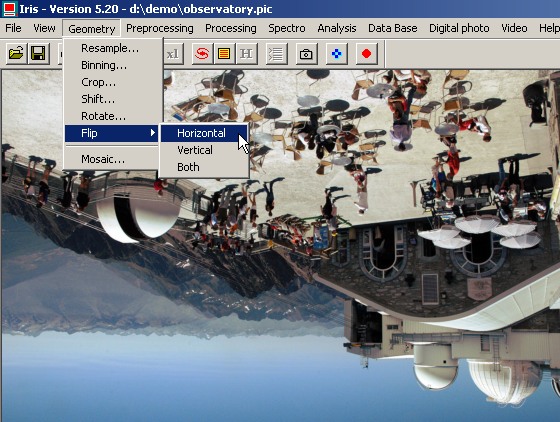
The similar console commands are: MIRRORX, MIRRORY and MIRRORXY.
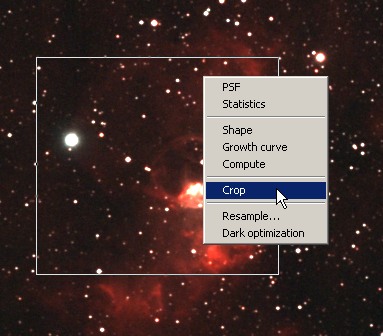
Crop
The basic function for extract a part of an image is Crop command ofthe Geometry menu. The cropped region is defined by two points: (X1; Y1) & (X2, Y2). These points are located at opposed sides of the rectangular crop area.
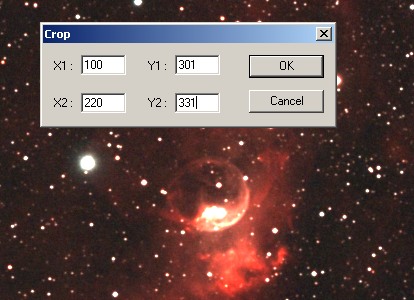
The inline similar commands are
>WINDOW 100 301 220 331
>WINDOW 220 331 100 301
>WINDOW 100 331 220 301
You can define the cropped zone interactively with the mouse pointer and invoque the contextual menu (clik on the right button of the mouse):
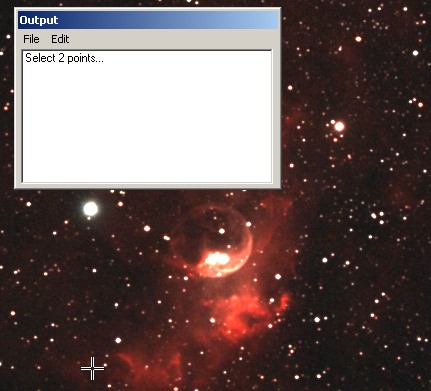
Useful for large images, you can also define the opposite corner of the region to extract by two mouse click. Enter simply the command (no parameter):
>WIN
The mouse pointer is now a cross and the program wait one click for each opposite corners:
PADDING
PADDING function force the support size to a given value (the two paramers are the final size). Example:
>PADDING 930 1207