IRIS TUTORIAL
Preprocessing of grey level images (1/2)
Long exposure CCD/CMOS deep sky images are always
distorted by three types of defects:
(1) During the exposure, a parasitic thermal signal is added to the science signal. This signal is an accumulation of heat generated electrons at the level of each pixel. This thermal signal is also called dark signal because it can be observed even when the sensor is in total darkness. The CCD needs to be cooled to a cryogenic temperature (100K, or -173°C) to reduce this signal to a negligible level. Unfortunately, most CCD or CMOS cameras suffer from effects of this signal when they are only slightly cooled (temperature over -50°C). The principal consequence of the dark current is a noise added on the image, proportional to the square root of the thermal signal. The only simple way to reduce this noise is to acquire several images of the same object and then average them. Moreover, the fact that each pixel in the image reacts differently to the dark current gives a grainy aspect to the raw image - a snow-like appareance. This difference in sensitivity to the dark current is strongly correlated from one image to another, so it is possible to produce a reference map (a master map) of dark signal, to correct the image by a simple subtraction. The dark current map is obtained by the accumulation of many (typically 7 to 10) long exposure images taken in complete darkness. The CCD should be cooled as usual to reduce the difference between master map and science images.
(2) In addition to the useful signal, there is a nearly constant offset signal added to the image, independant of the integration time and somewhat independant of the CCD temperature. This offset, or bias signal, is induced by the characteristics of the CCD output amplifier and video electronics. This signal can easily be eliminated by subtracting an offset master map from the image to be processed. This map is obtained by averaging several images acquired with a minimum integration time in total darkness.
(3) The CCD pixels do not all have the same sensitivity to light. As a consequence, if the detector is illuminated with an uniform source, the resulting image will not be necessary uniform. Just as for the dark current, a spatial noise that degrades the detectability and the photometric quality will be recorded. In addition, the image is never perfectly uniform because of optical vignetting and presence of dust in the optical path. These effects are like a local fluctuation of the gain of the detector. This gain can be corrected for by dividing the science images by the image of an uniform field. This image, called the flat-field, is taken using exactly same optical chain used for the sciences images. The observed scene is a flat background (sky before or after dark, light boxes, white screen located near the entrance pupil of the telescope, etc.).
The preprocessing operation consists to compute the equation
Full automatic preprocessing
Let us suppose that we have the three master images OFFSET, DARK and FLAT (about the methods for obtain master image, click here). We want to preprocess a sequence of six images of the field of the galaxy NGC 4294.
Here the aspect of the master images

Offset
map
Dark
map
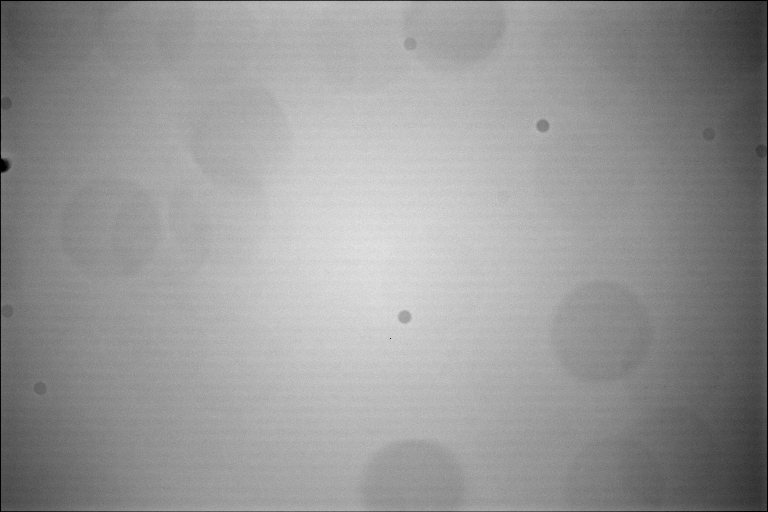
Flat-field
map
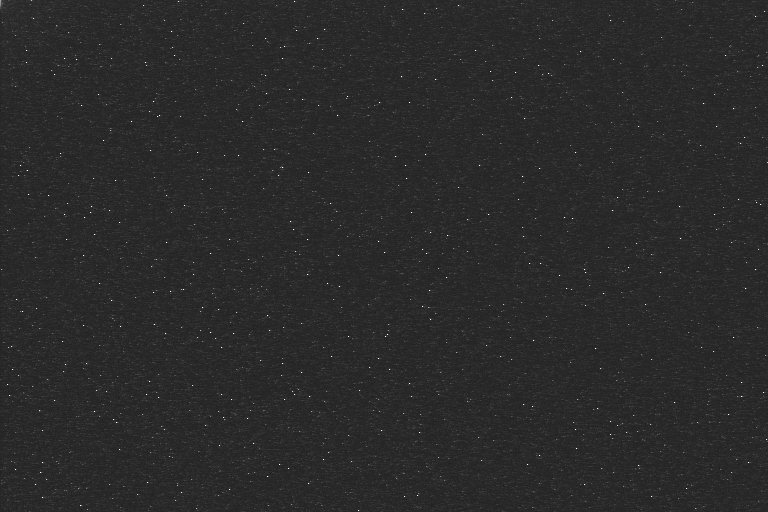
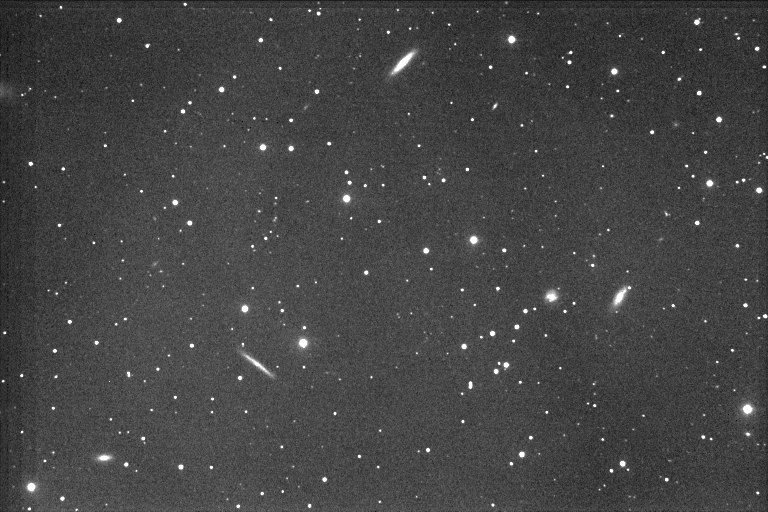
And one of the image to process:

The
first image of the sequence (n4294-1.pic). Note the presence of hot-pixels (local
intense dark signal) and umbra of numerous dusts.
The raw images are named n4294-1, n4294-2, ..., n4294-6.
Tip: How to determine the number of images in a sequence? Answer: Run the NUMBER command from the console
>NUMBER N4294-
The parameter of NUMBER command is the generic name of the sequence (name of the images before the index number).
Iris return the result: 6 images and the mid-date of the sequence acquisition. The first image of the sequence is also loaded automatically.
Run the Automatic preprocessing (2) of Preprocessing menu:
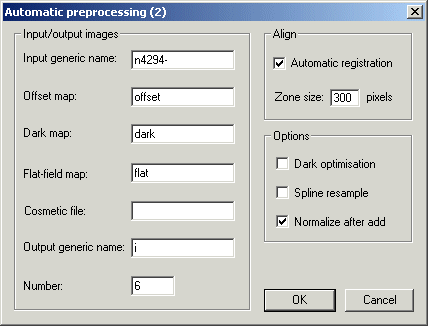
Some items are already filled because NUMBER command was launched as a preliminary.
Click OK. For all images of the sequence, the programm= subtracts the offset, subtracts the dark, divides by the flat-field, aligns all images relative to the first image, and finaly, the 6 images are added and the result is displayed. Also, the preprocessed and aligned sequence i1, ..., i6 is produced on the working directory.
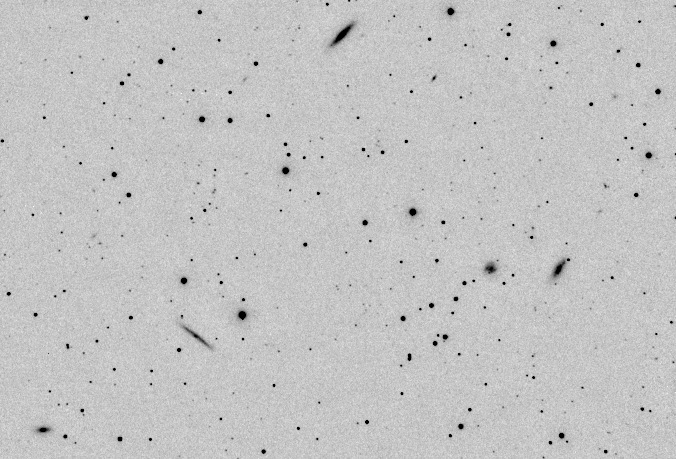
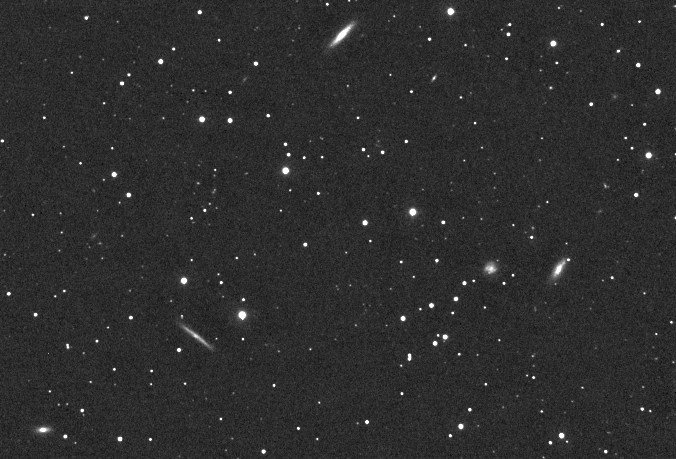
Here is the final combined image displayed (a simple addition of the 6 frames - similar to ADD2 I 6):
The final touch
Crop the common part of the six images. For this, select the desired part of the image with the mouse, click right button for invoque the contextual menu, then, run the Crop command:

The new cropped image

The background sky is not very uniform (images are taken in suburban condition). The problem can be easily corrected.
Run the Remove gradient of Processing menu...
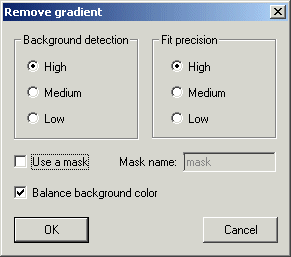
Click OK. Iris selects automatically point in the background and fit a high degree polynom passing by these points. The artificial sky is then automatically subtracted to the processed image.
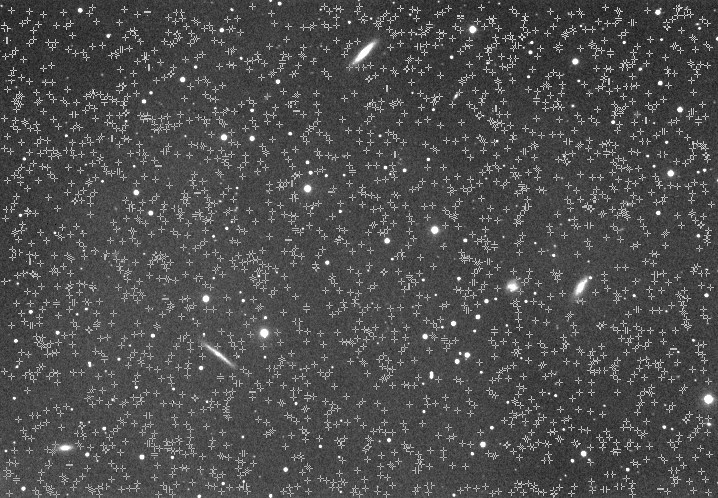
The
program selected points (out of stars and galaxies).
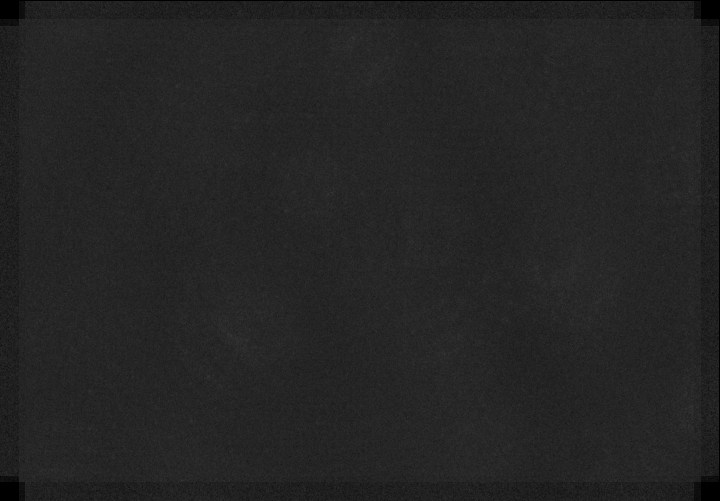
The result

The sky background is now more uniform. But, some high frequencies non-uniformity are still present. Although the image is already very correct you can try to increase the flatness of the sky background by using the technique of the ring median. For example, from the console command, save the image, compute the ring median, save the result in an intermediate file, and subtract the flatness image and the ring median image:
>SAVE TMP
>RING_MEDIAN
25
>SAVE RING
>LOAD
TMP
>SUB RING 150
The second parameter of SUB command is a constant added to all pixels after subtraction of the two files.
Result after cropping:
or a negative view (invert high and low threshold) for a better appreciation of the weakest zones of the image. Also compare with an individual raw image!