 at 10h27m32s GMT, CN212 Takahashi CCD2x2K maya CCD camera, 2 sec exposure, 1/10.000
filter transmission
at 10h27m32s GMT, CN212 Takahashi CCD2x2K maya CCD camera, 2 sec exposure, 1/10.000
filter transmission Click over image to get a larger one
Click here to get the French release, also here to have a report from ESO
Introduction
The idea to achieve CCD imaging of a total solar eclipse is not new, nevertheless,
for three CCD "freaks" who had never seen a total solar eclipse in their whole
life, it was a real challenge ! We have prepared this experiment as best as
possible by reading a lot of publication concerning this topic, by writing modules
which are able to drive automatically CCD cameras by executing scripts (implemented
in the PRiSM software). The use
of this setup was easier for us, since this eclipse was passing over Europe
(and close to our living places).
The goal of this page is to describe thoroughly our method and to share
our unique CCD imaging total solar eclipse. (Best viewed using 1024x768
resolution)
If you want to use our images, please ask the authors,
thanks !
This first paragraph shows all the results recorded with our telescope/lenses coupled to our CCD cameras, for more details concerning the way used to record these images, you are invited to read the text, hereafter the images.
Totality phase
at 10h27m32s GMT, CN212 Takahashi CCD2x2K maya CCD camera, 2 sec exposure, 1/10.000
filter transmission
Click over image to get a larger one
 at 10h27m32s GMT, CN212 Takahashi CCD2x2K Maya CCD camera, 2 sec exposure, 1/10.000th
filter transmission, different kind of processing compared to the previous image.
at 10h27m32s GMT, CN212 Takahashi CCD2x2K Maya CCD camera, 2 sec exposure, 1/10.000th
filter transmission, different kind of processing compared to the previous image.
Click image
 300 mm F16 lens and CCD_Kaf1600 Maya CCD camera, 50 ms exposure time,
polarized filter and 1/8 neutral filter transmission. Color combinaison
of 2 images made of two orientations of polarized filter (90°).
300 mm F16 lens and CCD_Kaf1600 Maya CCD camera, 50 ms exposure time,
polarized filter and 1/8 neutral filter transmission. Color combinaison
of 2 images made of two orientations of polarized filter (90°).


LASCO, C3 |

LASCO, C2 |

195 Å |
171 Å |
Click over images to get better resolution.
Other links to these images :
Partial Phase
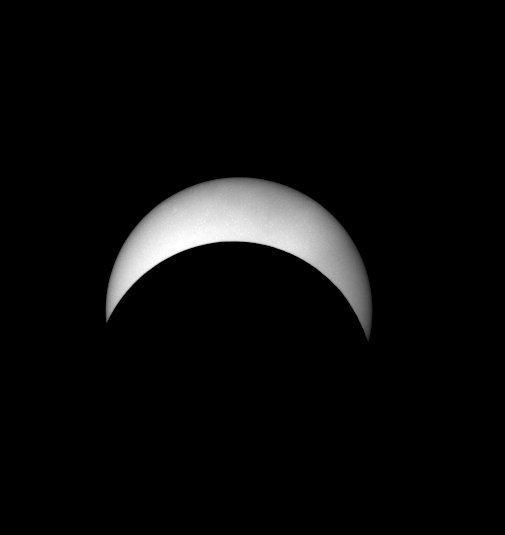 at 10h07m30s - Filter
1/10000 + 1/100000 30msec de pose, 75% dynamic, CN212 CCD2K
at 10h07m30s - Filter
1/10000 + 1/100000 30msec de pose, 75% dynamic, CN212 CCD2K
 at 09h31m46s - Filter
1/10.000 + 1/100.000 exposure 30sec, 75% dynamic, CN212 CCD2K
at 09h31m46s - Filter
1/10.000 + 1/100.000 exposure 30sec, 75% dynamic, CN212 CCD2K
Observing place
Eclipse hunting is a tough task. Everything should be under control, organized, timed in order to avoid risks of failures. Several full moon weekends have been used to prepare this event. Only day after day, angst was increasing whilst getting closer to this event.
One week before the Eclipse, we have to check out all weather forecast
web site to find out the best place in Europe. A T-7 days, Normandy seemed to
be the best place, also Hungary looked fine. Just one day before, Meteo-France
foresaw a possible area between Reims and Metz. Rest of Europe did not seem
to be better than what was predicted in north of France, and was even worst.
All the team met at Chalons/Marne to choice the place of Vouziers (East of Reims).
We arrived there at Vouziers around 19h, the weather was awful : it was
poring, wet and looked really hopeless. We started to seek for a suitable place
to install our telescopes, the main concern was to tied our telescope/CCD cameras
to power supply (220V). We were lucky, we found very quickly a very nice family
willing to offer us their garden as an observing place and power supply ! It
was really a wonderful way to welcome us !!!
Click images to get higher resolution one.
 |
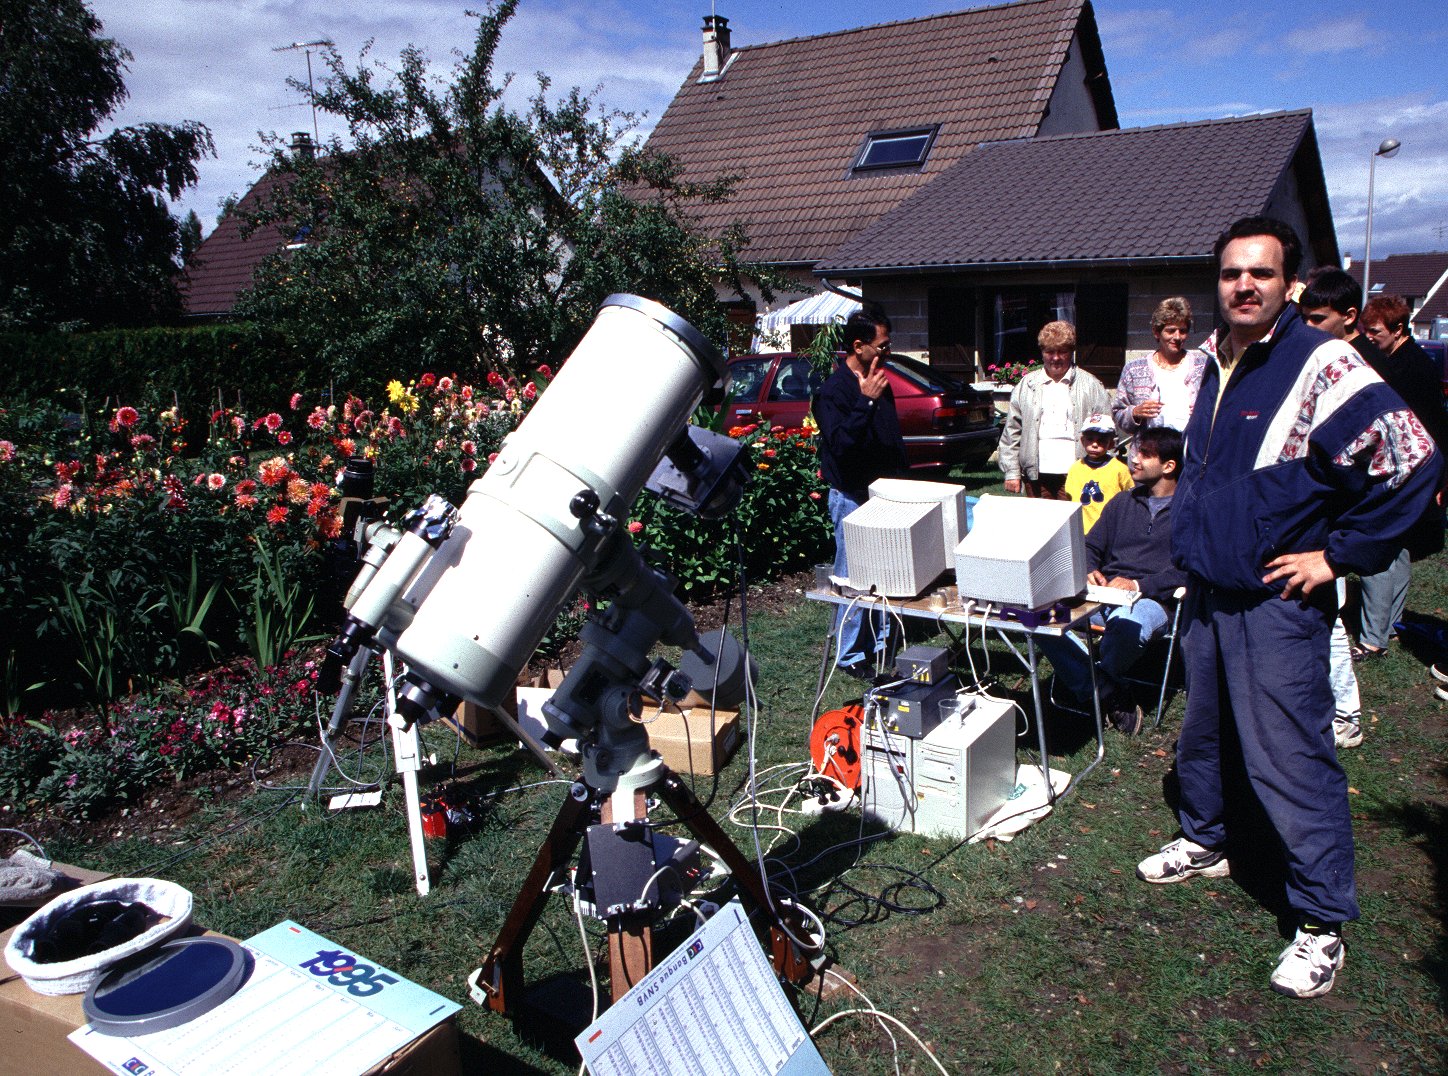
Everything is ready, before partial phase, focusing of the
Cameras needs to be carried out.
One could notice the two PCs (and two displays) lying on weak camping tables. The sky lets appear some blue areas,nevertheless our mood is not as high as the sky wants to turn to. We were doubting about the forecast of MétéoFrance : this place was said to be the highest portability to watch the Eclipse ! Anyway, we cannot move anymore : a lot of stuff has been unpacked, it's too late. |
 |
Few seconds after 1st contact !
Background of this image, the whole team of Pises Observatory (Montpellier) is visible. The two telescope are pointing toward the same point. Pressure is increasing also !! |
 |
Some minutes after totality phase, the blue sky hole which
had let us to watch the Eclipse, starts already to close .
Despite our excitation, one should not forget to carry out flats-fields using the remainder of the blue sky which closes quickly ! |
 |
The main investigators :
From left to right : Boris Gaillard, Cyril Cavadore and Laurent Bernasconi. At that time our mood was good since our experiment was successful. The sky was (this picture) overcast and we didn't see a lot from the decreasing partial phase. Anyway, the most impressive part had taken place in front of our eyes !! |
Seeing the satellite image of 12h00 UT, one could wonder how we were able to watch it , eclipse shadow is still visible over Iran !

The instruments
Two experiments have been settled. The overall weight was close to 150kg... it was difficult to move all the telescopes/cameras once it was unpacked !
Experiment #1 : solar corona imaging
- CCD Camera Maya 2k*2k : CCD Thomson TH7899 (14µm pixels
size)...home made camera.
- CN-212 takahasi telescope, focale length : 840 mm, 212mm diameter.
- Field corrector.
- Full aperture filter 1/100 000 + 1/10 000 transmission to allow us
to focus using partial phase.
- Full aperture filter 1/10 000 just for corona pictures.
- NJP160 takahasi mount with MCMT.
- Old desktop PC (we don't have laptops).
Experiment #2 : solar corona polarization
- CCD camera Maya Kodak-Kaf1600... (here again an homemade CCD camera).
- Russian 300mm Photo lens.
- Polarized filter.
- Green filter and KG3 to block IR light.
- Super-polaris mount.
- Desktop PC
Each PC controls his own camera/telescope using Prism V4 beta
15 software.
We decided that all these experiment should be done automatically.
No way to be front of our screens during totality phase !!!
Thus, programming script were written to ensure automated image recording,
full moon was necessary to debug and test these scripts (see next section).
Nevertheless, the list above miss to provide you a good overview of
all the hardware we used...
these picture will give you
a better idea.
Image acquisition method (CCD 2x2K + CN212)
The basic idea (and according to Francois Colas advice) was to avoid to enter
any commands to the PC's keyboard whilst the short totality phase, and thus
to use an automatic acquisition system through the Prism
Software. The CCD La camera was based on a 2x2K Thomson TH7899M CCD, and
read out by a controller sending datas thru the parallel port in EPP mode. The
conversion gain was 8e-/ADU. This system, though nice for deep sky application,
showed its weaknesses for this application because of the readout time of 71sec
(binning1x1) and 22sec using binning 2x2. Considering that the eclipse duration
was 2m17sec, it was out of the scope of this project to use the 1x1 binning
for the whole acquisition process, but to keep this setting for the last imago
before the end of the totality phase. The sampling was, with binning 2x2, using
the TAKAHASHI CN212, 6.9" per 2 pixels of 14µm and the field of view of
1°49'x1°49'degrees.
I think it worth to say that processionals are using a 1Kx1K CCD camera, digitization
performed with 12 bits, which allows almost a video frame rate of many images
per seconds. These cameras are not performing well in term of noise, and one
will notice that it could be a limiting factor to reach the faint external extensions.
 |
This image shows the CCD 2x2K front side view, shutter opened.
A 60mm PRONTOR shutter hd to be installed to avoid any voignetting problems
and make this experiment automated. The small box contains the coil to command
the shutter. The ring to attach any optical devices is a CANON EOS EF type.
The CCD is visible (28x28mm sensitive surface) |
 |
Overview of the whole system is shown in this image :
|
To find out the exposure time and which kind of filter to use was a tough problem
to solve. We, have given up the idea to use radial filter [Ref.3],
which is beyond our reach. In that context, we had to use a full aperture filter
to overcome the high brightness of this event. After reading papers [Ref.1
,4 et .2], we realized that the best
test was to be done with the full moon with the same setup. The goal was to
get a signal reaching 95% of the CCD dynamic, in the area close to the sun/moon's
edge, otherwise all the useful information could be lost either around the saturated
parts or by the spread of a CCD blooming tail. Tests have been done with a close
full moon (June 99), using exactly the same setup we intend to use for the solar
eclipse.
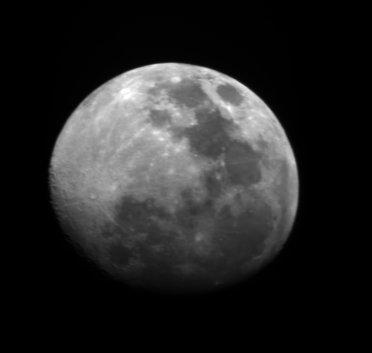 |
Nearly full moon, 5sec exposure time sampled at 6.9"/pixel (bin2x2) and 1/100.000 full aperture filter, the signal swing is 11000 downto 4500 ADUs. A 1/10.000 transmission aluminum filter should be better, because 5 seconds of exposure time is too long. 1 sec exposure will be a good starting exposure time. Literature states that full moon brightness match to the one from a solar eclipse border. Tests had been also carried out with a off axis hole and neutral wratten filter : it was not successful. |
This preparation allowed us to know which exposure time to apply as a starting
point, to refine it, an automated setup has to be found to get the optimal exposure
time : to reach this point a special set of scripts has
been written. An arbitrary window is set to compute the optimal exposure
time, the maximum value is computed out, and the exposure time too. If the exposure
time is greater than 2sec, it will be thresholded. Afterwards, 4 images are
acquired using binning 1x1, all the images are saved to the disk automatically.
We have hesitated to vary the exposure time between the 2nd ,3rd and 4th frames
and the 1st one, but safety reasons prevented us to do that ... (I think now
20/04/2000, that is was a great mistake....)
Those scripts have been tested with full moon and they fulfilled completely
our requirements, this is how they look like Prism (v4):
test de recherche de temps de Pose
Next iter. -> tempsDePose=50
Max= 10630
Next iter. -> tempsDePose=73
Max= 13084
Next iter. -> tempsDePose=86
Max= 14443
temps de pose trouve !!
tempsDePose FINAL=86ms , iter= 3
Lecture image 1
Lecture image 2
Lecture image 3
Lecture image 4
Lecture image 5 -> 2 minutes 11 sec
Termine
The timing is also Ok....
The test has been done also with the PC we intend to use for the event : old
Pentium 133, RAM 32Mb, nothing outstanding at that level...
Once arrived into the observing place at Vouzier, just during totality phase, the sun/moon needed to be properly centered into the frame and to launch the script.
We were lucky, the sky was clear, a nice blue sky appeared washed by a full
night of rain !
During these 2minutes and 17sec, we have fully gotten advantage of the
show : OUTSTANDING !
I did not have a look to the PC's screen, if something fails, I would have not
done anything during the totality phase.
Once the event was over, this is what I could read from the log file :
test de recherche de temps de Pose
Next iter. -> tempsDePose=50ms
Max= 972
Next iter. -> tempsDePose=1150ms
Max= 6017
temps de pose trunque au max!!
tempsDePose FINAL=2000ms , iter= 2
Lecture image 1 -> 11/08/1999 - 10h25m54s
Lecture image 2 -> 11/08/1999 - 10h26m27s
Lecture image 3 -> 11/08/1999 - 10h27m00s
Lecture image 4 -> 11/08/1999 - 10h27m32s
Lecture image 5 -> 11/08/1999 - 10h28m05s
Termine
The image rate was one image every 32secondes, CCD readout time is 22secondes,
10 secondes have been lost :
to display the image, save the file, launch the next exposure, wipe the CCD,
apply an exposure time of 2sec.
Under excitement, I save the output log and we cheers each others for this
success, the images looks nice.
Once after I came back home, I've noticed the following points:
 Last image at 10h28m05s,
the 3rd contact has taken place at 10h27m46s, this image had been recorded 20
too late, see the result !
Last image at 10h28m05s,
the 3rd contact has taken place at 10h27m46s, this image had been recorded 20
too late, see the result !
 Sum of the 1st and last image , the moon's edge had moved during 1m40s of 5
pixels, yielding to 35 arcsec.
Sum of the 1st and last image , the moon's edge had moved during 1m40s of 5
pixels, yielding to 35 arcsec.
Raw images analyzis
 Raw image of the totality phase, at 10h27m32s TU
 The SAME raw image with different display cuts ! This shows are large is the
CCD dynamic
The SAME raw image with different display cuts ! This shows are large is the
CCD dynamic
 Again the same image, jets are visible, due to the CCD large resolution
!!
Again the same image, jets are visible, due to the CCD large resolution
!!
 Again the same raw image, a display log scale has been applied .
Comments about exposure time and corona photometry
A close inspection of the images shows that the jets are almost all saturated
(14 bits CCD camera= 16383 ADUs).
The following plots shows various radial profiles (ADUs) : Profile #1 includes
a jet, profile #2 is a mean profile and profile #3 is taken accordingly to the
Sun's magnetic poles
 |
|
This LOG scale plots show the wide dynamic of intensity throughout all profiles. One can notice a jet saturation (protuberance) and the full moon's sees intensity matches to the corona intensity nearby the Sun The useful signal for processing is extending up to 1.5 Solar radius, intrinsic CCD camera dynamic is about 12.6 bits. This is strange because literature foreseen that a 13 bits dynamic should be able to reach the corona up to 3 Solar radius ! One solar radii yield 138 pixels, and the largest corona feature is visible up to 300 pixels (SNR =3) which is 2.2 Solar radii. Sky background brightness is about 57 ADUs, which means we are more limited by CCD readout noise than intrinsic sky background photon noise. To gain more fainter features inside the corona, a fast 16 bits low noise (5e-) CCD camera would have been great, may be next time ! |
 |
| Above, same plots as previous, but linear scale, the three plots intensity variations are emphasized. |
What about the faint inner moon light ? :
Unfortunately, any image shows the faint inner moon light, event by tightening
the display cuts, a weak gradient light is also contaminating the inner part
of the eclipse. Sky background is 15ADUs in this area. All the optical parts
were cleaned before and the sky was pretty pure. Radial filter would have helped.
However digital image processing can make fun of
it....
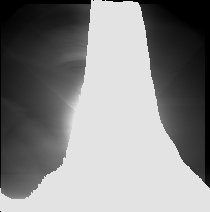
 Eclipse CCD image, cuts (brightness/contrast) has been set in such a way to
check whether moon light was visible in the center (note, instead, diffusion
toward the center) !
Eclipse CCD image, cuts (brightness/contrast) has been set in such a way to
check whether moon light was visible in the center (note, instead, diffusion
toward the center) !
Click over image
 "Faking" made of a full moon combined with eclipse image ! easy, no ?
Click over image
Have
a look here to an image made of overexposed films
Some polarimetry
Using a 300mm photo-lens and a CCD camera, we wanted to measure has far the corona was polarized.The experiment consisted in recording automatically solar images thru a polarized filter. The only manual action to be done was to rotate the filter manually. This sounds easy in a normal situation, it was not the case : due to the high excitation atmosphere during totality phase, we, at some point, missed to forget to rotate it.

Dual image composition, for each image the filter has been rotated
of 90°
These results shows that the corona is highly polarized, which indicates that most of the light is emitted by dust specular reflection. This is a well known phenomena that can be demonstrated with inexpensive amateur means.
Image Processing method

Raw Image
- "Log scale", or histogram equalization, .... which allows to see at the same time bright and faint areas. The main problem using these method is related to the fact that it kills the image contrast, increase the noise, the fine structures will also disappear.

Image after "log" processing
- Rotational gradient, it consists in performing the difference between the original image and the same rotated of a given amount. This method is not really suitable in the sense that it filters/cancel out all details/features which the frequency is related to rotation angle. To improve things, one can combine images that had been processed with rotational gradient having different angles, but in any case interesting features are lost, such as jets and the outcoming image does not look really realistic.

Image after rotational gradient
- A most interesting method is to remove the radial component by doing the
median or the mean of many images. We aim at subtracting the continuous corona
light decrease outward the center. For each pixel having a given distance form
Sun's center, its value is set according to a median coming from all the same
pixels at the same radial distance. The initial image is divided by this model
gotten from the previous algorithm.
This method provides good results, but "stairs like" features (or quantification)
problems appears. If one applies a low pass filter; thinks goes better.
It looks attractive, but another means need to be found.
- Computed model of the Corona : this method consist of performing a
computed model of the corona by mathematical functions. The functions parameters
has been fitted to the real image according to a less-square method. We
tried many set of functions such as exponential, exponential multiplied
by a polynom, etc....
The resulting curve is smooth and continuous and furthermore, this set of functions
fits properly the corona. This is finally the method we used to remove the
radial gradient, making easy the unsharp masking process.
 |
 |
|
|
|

Corona model cross section
Finally, it looks clear that a set of image processing features must
be coded/written to take the best advantage of the specific shape/signal
from a Total Solar Eclipse image and had consisted hereafter as :
- Corona model coding
- Radial unsharp masking coding, according to the radial corona
intensity.
A large combinaison of factor helped to get a successful experiment :
Finally, it is clear that things can be improved, like making this experiment more portable over the world. The use of radial filter coupled with a CCD could be extremely efficient. In any case, this is a very exiting experiment and that's really a shame that total solar eclipse are so short and so rare...
References :
1 : C.Buil email available in the AUDE-mailing list archive
about CCD experiment on Solar Total Eclipse in Guadeloupe.
2 : F.Clette paper issued in "Ciel et Terre"
vol 115 p 92-100
3 : S.Koutchmy paper issued in "Ciel et Terre"
vol 115 p 82-91
4: Radial
filter use in photography
