A
flat field is ideally an image containing information on the relative
sensitivity of each pixel respect to others. When using color sensors
with Bayer matrix (such as a DSLR or a color CCD) a simple
elaboration procedure for flat field will yield to unsatisfactionary
results. Here below we'll focus on software calibration with a flat
field, while the data gathering topic is discussed here.
The simple procedure is to take flats and put them in the image calibration software. But a simple software will assume that the image is absolutely white and so it will produce a proper color balance basing on this. But unfortunately the flat field sources (flat field box, twilight sky, etc) rarely are truly white and so a color tint will result in the calibrated images.
To avoid this problem you need to remove the color information of flats. Many methods are available, here are two:
A note about the "boxcar" filter: you can manually obtain the same result this way: Filter>Kernel Filters..., then select User Filter and click on Set. Select the 3x3 kernel size and write 1, 1, 0; 1, 1, 0; 0, 0, 0. An example is in the two images here below, before and after the application of the filter. This filter "smooths" out the bayer matrix, thus removes the color information, but also removes the sensivity information of each single pixel.
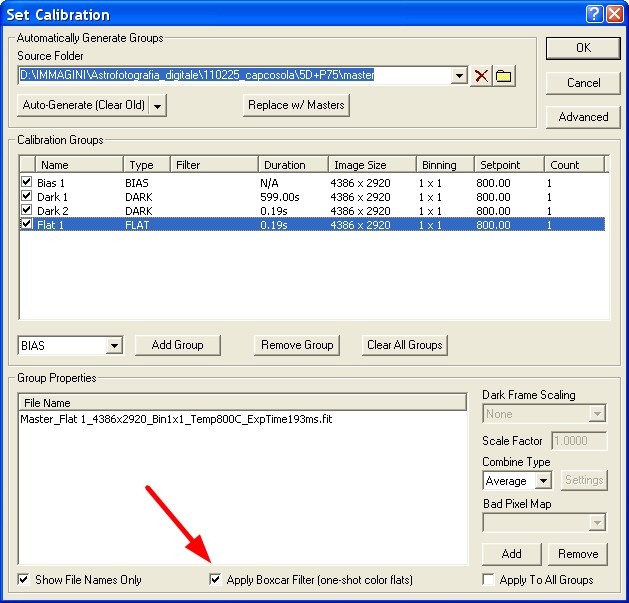
The "Set Calibration" with the "Apply Boxcar Filter (one shot color flats)" to be checked
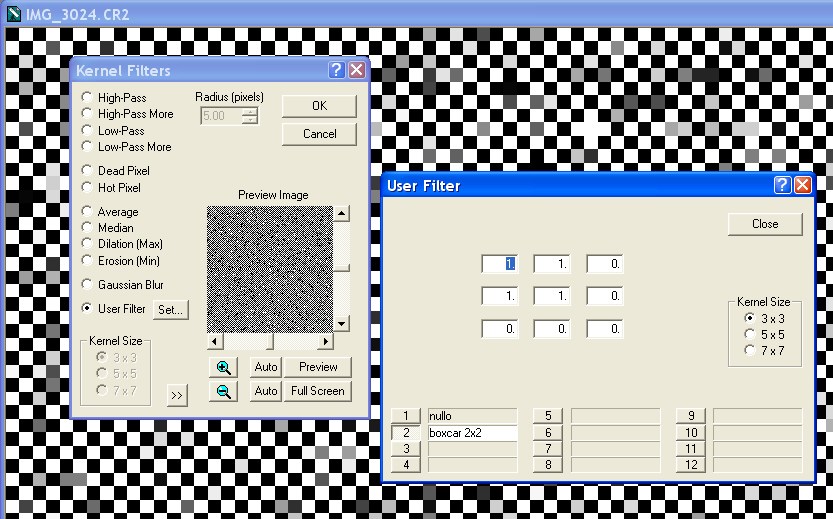
To reproduce the "boxcar" processing automatically made by the automatic function, use this settings.
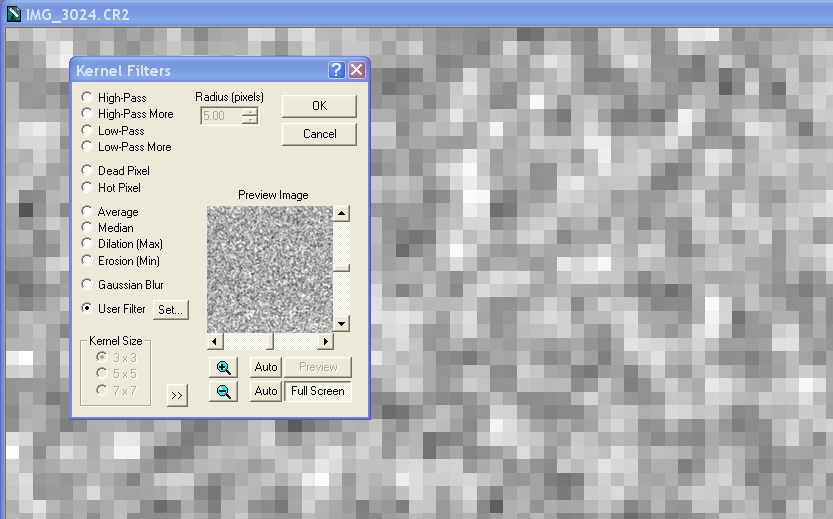
The output of the "boxcar" filter is a smoothed image, whitout the Bayer matrix.
The simple procedure is to take flats and put them in the image calibration software. But a simple software will assume that the image is absolutely white and so it will produce a proper color balance basing on this. But unfortunately the flat field sources (flat field box, twilight sky, etc) rarely are truly white and so a color tint will result in the calibrated images.
To avoid this problem you need to remove the color information of flats. Many methods are available, here are two:
- METHOD 1:
multiply with a different factor the R, G and B pixels in the raw image
(with the Bayer matrix). Only a few softwares are able to do this.
Please note that this is the only correct solution that preserve the
sensitivity information of each single pixel.
- METHOD 2:
prepare a modified flat field frame, with only black and white data.
While this method is not strictly correct, the error is small, so small
that you should never notice the difference except in very deep images.
This method will still perfectly correct the dust and vignetting
problems, and most of banding defects. This method can be appliable
when the more preferable method #1 is not available, being the
functions readily available in many software packages.
Procedure A (automatic)
FIRST AND ONLY
STEP: set the software with the proper dark, bias, flat, and
dark of flats. To do this, select Process
> Set Calibration... Be careful to select "Apply Boxcar Filter (one shot color flats)"
for the flats. The software will calibrate all automatically. Refer to the image below.A note about the "boxcar" filter: you can manually obtain the same result this way: Filter>Kernel Filters..., then select User Filter and click on Set. Select the 3x3 kernel size and write 1, 1, 0; 1, 1, 0; 0, 0, 0. An example is in the two images here below, before and after the application of the filter. This filter "smooths" out the bayer matrix, thus removes the color information, but also removes the sensivity information of each single pixel.
The "Set Calibration" with the "Apply Boxcar Filter (one shot color flats)" to be checked
To reproduce the "boxcar" processing automatically made by the automatic function, use this settings.
The output of the "boxcar" filter is a smoothed image, whitout the Bayer matrix.
Procedure B (manual)
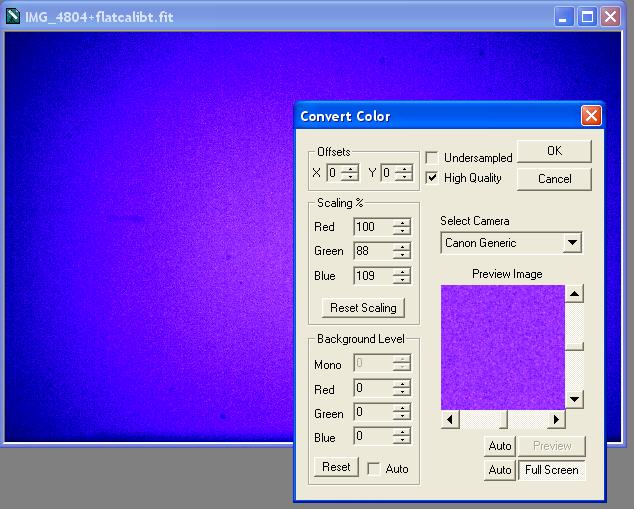
SECOND: set the software to do a proper color conversion with your camera parameters (found using this procedure). Open one of the flats and execute only one time the command Color > Convert Color... , uncheck Auto Background Level and reset the levels to zero, confirm with OK button and close the image without saving. The image will have a bad color tint that is due to the wrong white balance of the flat source. Here below is an example with a homemade flat box.
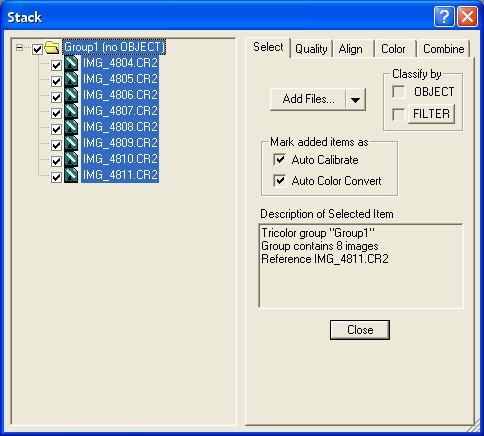
THIRD: then you can apply the calibration and combine the flats with a single command: Process > Stack... First check the Auto Calibrate and Auto Color Convert options. Then click on Add Files... and select the flat field frames. A list such as the one here below will appear. The Auto Calibrate option will use the proper dark to calibrate each image and the Auto Color Convert option will color convert the images with the last used settings.
Then
go though the next tabs: in the Quality
tab uncheck all the options, in Align
set the Mode to None (and select a file from the
list to apply the setting, a color converted image will be displayed),
and in Combine set the Combine Method to Average (or Median if
sky flats). The click on the Combine button and wait until the result
is computed. Close the Stack window. You'll have obtained a coloured
flat.
FOURTH: convert to black and whilte the flat with Color > Convert to Mono. Save the result as your Master Flat Field, in FIT format for later use.

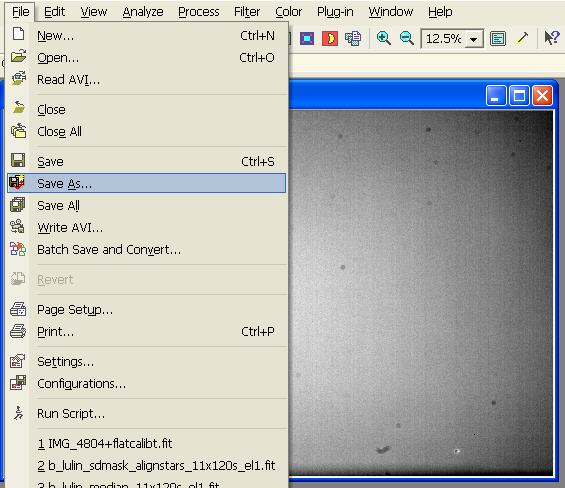
FIFTH: set
the calibration with the new flat field: Process
> Set Calibration... and add a new flat group with only the
above result. Use this setting for you deepsky frames. Remember to set
back the Convert Color command
options to Auto Background Level
so that the light frames will be correctly converted.
FOURTH: convert to black and whilte the flat with Color > Convert to Mono. Save the result as your Master Flat Field, in FIT format for later use.