IMPORTANT
NOTICE: all the operations here described has been tested and never
damaged my cameras. However be aware that the author does not assume
any responsability for eventual damages to the reader cameras using the
procedure here described.
It's necessary to obtain the
following items:
- ethyl alcohol 90% (the normal
one, pink coloured), absolutely avoid the perfumed or diluted kind.
- a piece of absorbent paper (the
kind found in kitchen), turned two times
- some sticks with cotton wool at
the extremities
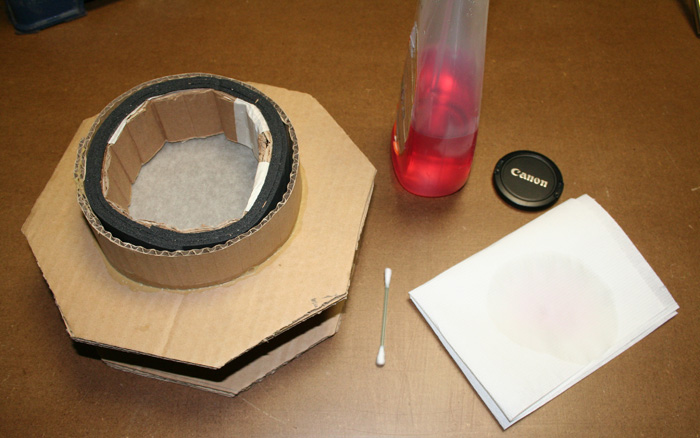
The necessary stuff for
the cleaning, including my flat-field-ometer for capturing an uniform
background.
- Open
the shutter of DSLR camera with the sensor cleaning function, be
aware to use a fully charged battery. If the battery is discharged
you'll risk that the shutter closes when the cotton stick is inside....
- Observe
visually if there are big particle of dust, be aware that almost
all the one visible in the test shots will not be visible with unaided
eye. I recommend to work under a strong light source and to avoid
speaking, and possibly breathe, to avoid spraying even more particles
on the sensor.
- Put
a little alcool on the absorbent paper, not very much.
- Roll over the paper an
extremity of the cotton stick, so that the cotton wool will be dampened. Be
aware that the cotton must not be very much wet.
- Now clean the sensor with the wet
cotton, with left-right and up-down movements, so as to clean uniformly
all the surface.
- Immediately after the cleaning,
and *before* that the alcool
evaporates, turn the stick and
repeat the movements with the dry cotton wool, so as to dry up the sensor without leaving
halos. Be aware not to touch with the hands the dry cotton in the
preceding operation, so as not to leave the greasy of the skin.
- Visually
verify that no big dust particle is on the sensor, and if so,
remove them gently with the dry cotton stick. If the sensor is still
dirty, please repeat the cleaning with alcool and a new cotton stick.
- Turn
the camera with the sensor toward the bottom, switch off to close the shutter and
finally... restart to breathe... ;-)
All those operations have to be made very
quickly, I usually need a minute or so. I recommend to try before the
procedure on a less critical glass, like the front lens of an objective.
In the end you'll have to remount the objective on the DSLR and now
verify the sensor cleanness. If the sensor was really dirty, maybe
you'll need to repeat the procedure.
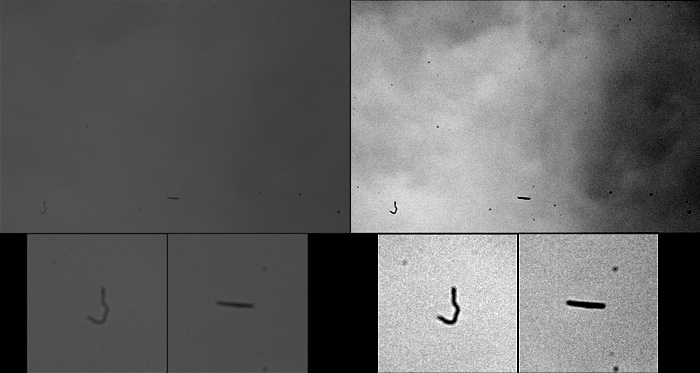
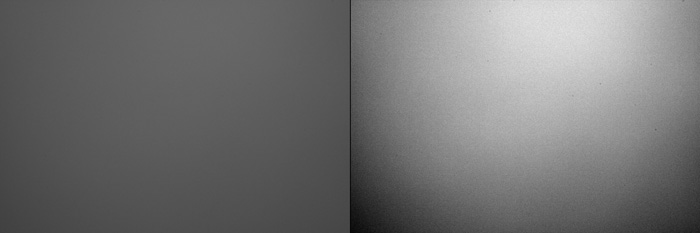
Here is the result of
the cleaning (at left a raw image, at right a very enhanched one).
Conclusion
This page explain how to clean the
DSLR cameras sensors with a very modest cost, and without so much
effort. On the market there are many special liquids and specific kits,
some of with very expensive and hard to import. My personal opinion, at
the light of the results here shown, is that they are not necessary.