|
by Lorenzo Comolli - Written in December 2012 |
Introduction
Dew is a big problem for residents of many humid regions on Earth, like me living in Northern Italy. Dew can settle down on front lenses of telescope or of photographic lenses, such as during long imaging efforts like timelapses. To prevent the dew from ruining observations or imaging, a simple solution is to keep warm the front lens.
Why dew? Understand the phenomena to understand how to solve.
Dew settle down on any object that has a temperature below the dew point. When the relative humidity (RH) is high, the difference between the air temperature and the dew point temperature is small, and dewing is more frequent. But how it is possible that our lenses has a temperature lower than the air? The reason is radiation exchange! Any lens imaging the night sky is looking at the universe, at a temperature of only 3 K (three kelvin! That is -270°C). So your lens is radiating infrared light to the deep space, cooling down. The more the sky is transparent and clear, and the more your front glass is cooling down.
As an example, and looking at the graph below, with air temperature of 20°C, and RH=80%, the dew point temperature is about 16°C, that is 4°C below. If the front lens cools down to this temperature, or below, dew start settling on the lens.
Solution. The solution to the problem is to prevent dew fogging by:
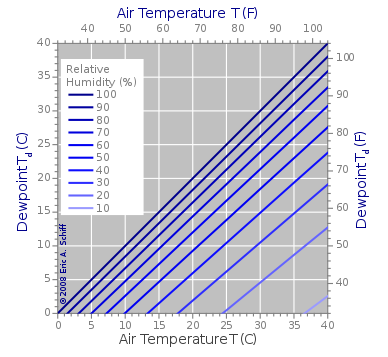
Dew point graph (source Wikipedia/Easchiff).
My heating strip solution
My preferred solution is a heating strip, because of better reliability in RH=100% situations over a lens hood and blowing air. Many commercial and DIY solutions are available, and here I'll describe the one that I adopted because of the simplicity of the building and availability of required parts. The main parts are:
I've built many strips for my telescopes and photographic lenses. Here is one of them applied on a lens.
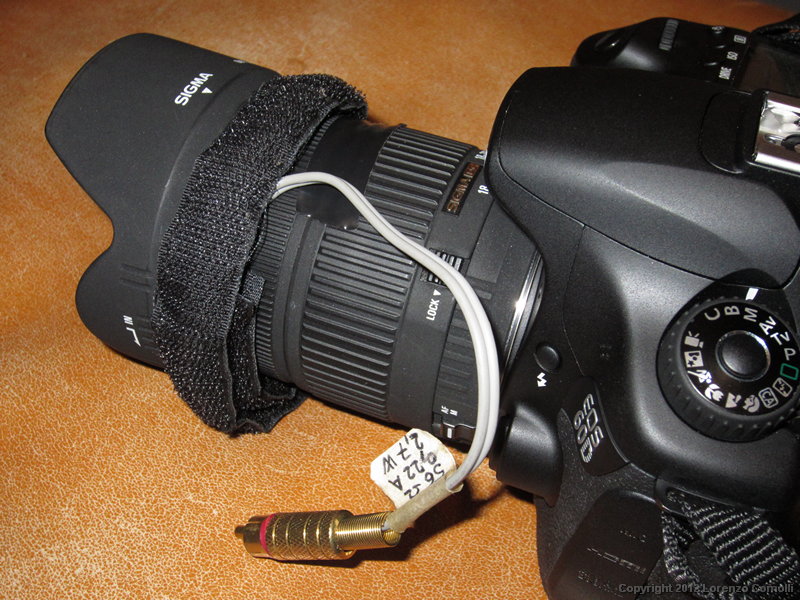
One of my heating strips applied on a photo lens. Note also the black tape to prevent the focus ring rotating.
Designing the electrical part
Each application require a suitable dissipated power. Here is the method to design the electrical quantities.
Designing the mechanical parts
I suggest to incorporate the resistances inside a heat-shrink tubing. This will confer high mechanical strength and it will prevent breaking. When shrinking, I suggest to give the required curved shape.
Then I suggest to incorporate the obtained tube inside a velcro strip, double sided with male/female velcro, and with a hole in the middle. For standard lenses I suggest a width of 2 cm, to be needled on the major sides, and closed only on one extremity. The resistance tube will be inserted in the velcro strip, and thanks to the curvature it will remain there without coming out.
The electrical connection cable should be chosen carefully so that in cold weather it will remain soft. I suggest using an audio "1 wire + shield" cable, with rubber tubing.
As a connector I used RCA golden connectors, that are very reliable and able to carry also currents up to 1 or 2 A.
Images of some strips
Here are some images of a strip for my lenses and my telescopes.
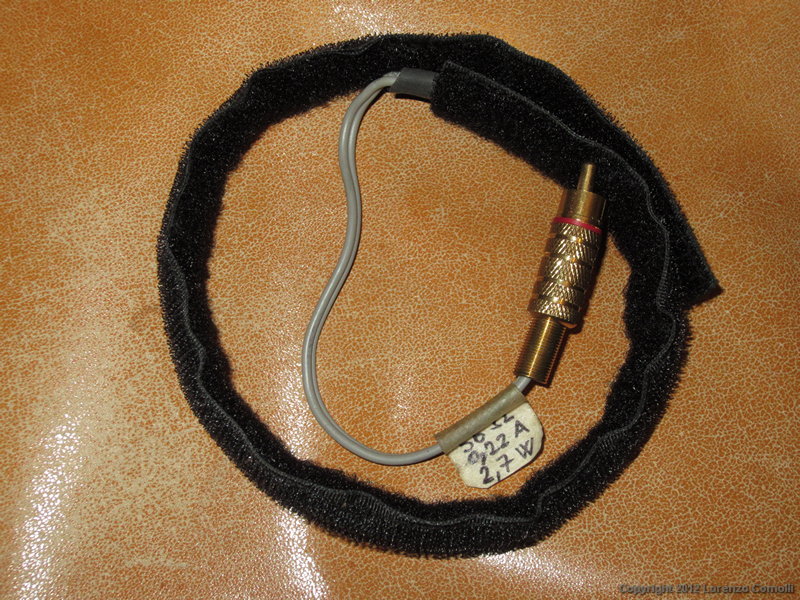
Heating strip for standard photo lenses.
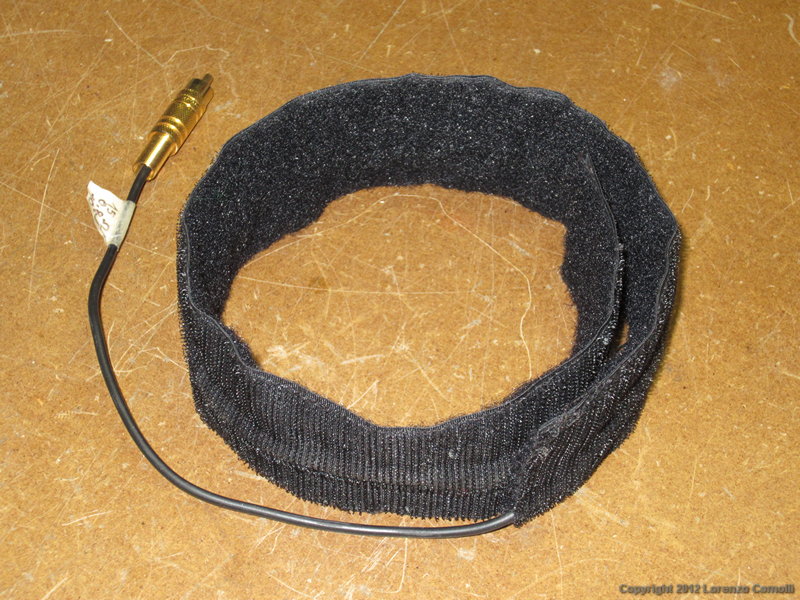
The velcro strip with the resistance tube to be inserted.
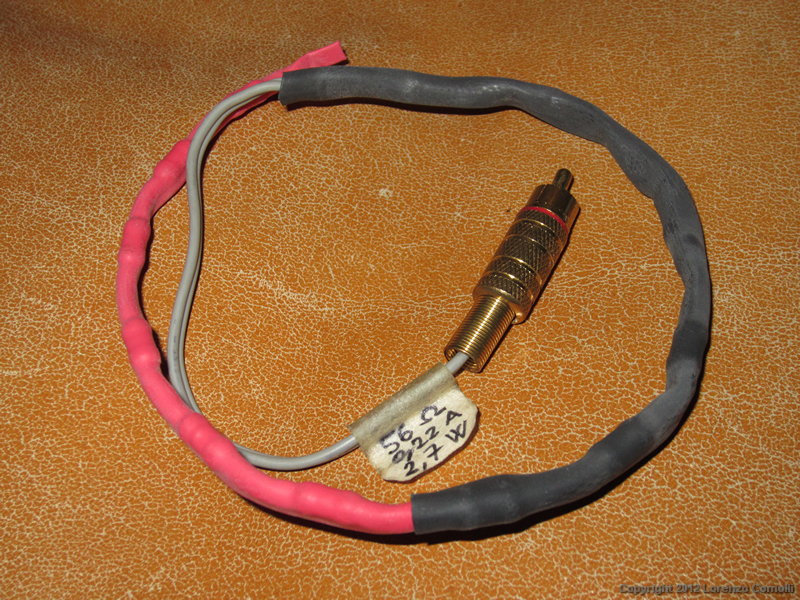
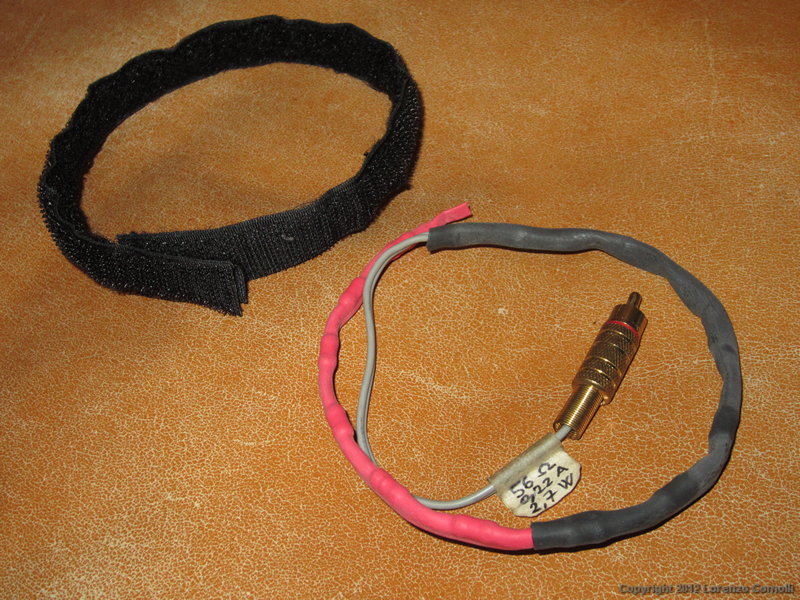
The resistances incorporated in heat-shrink tube.
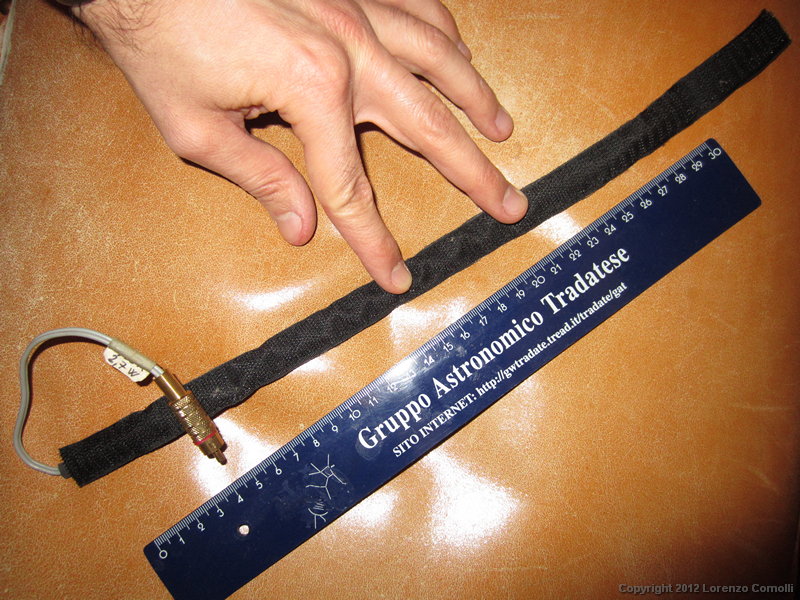
Length of the strip for a standard photo lens.
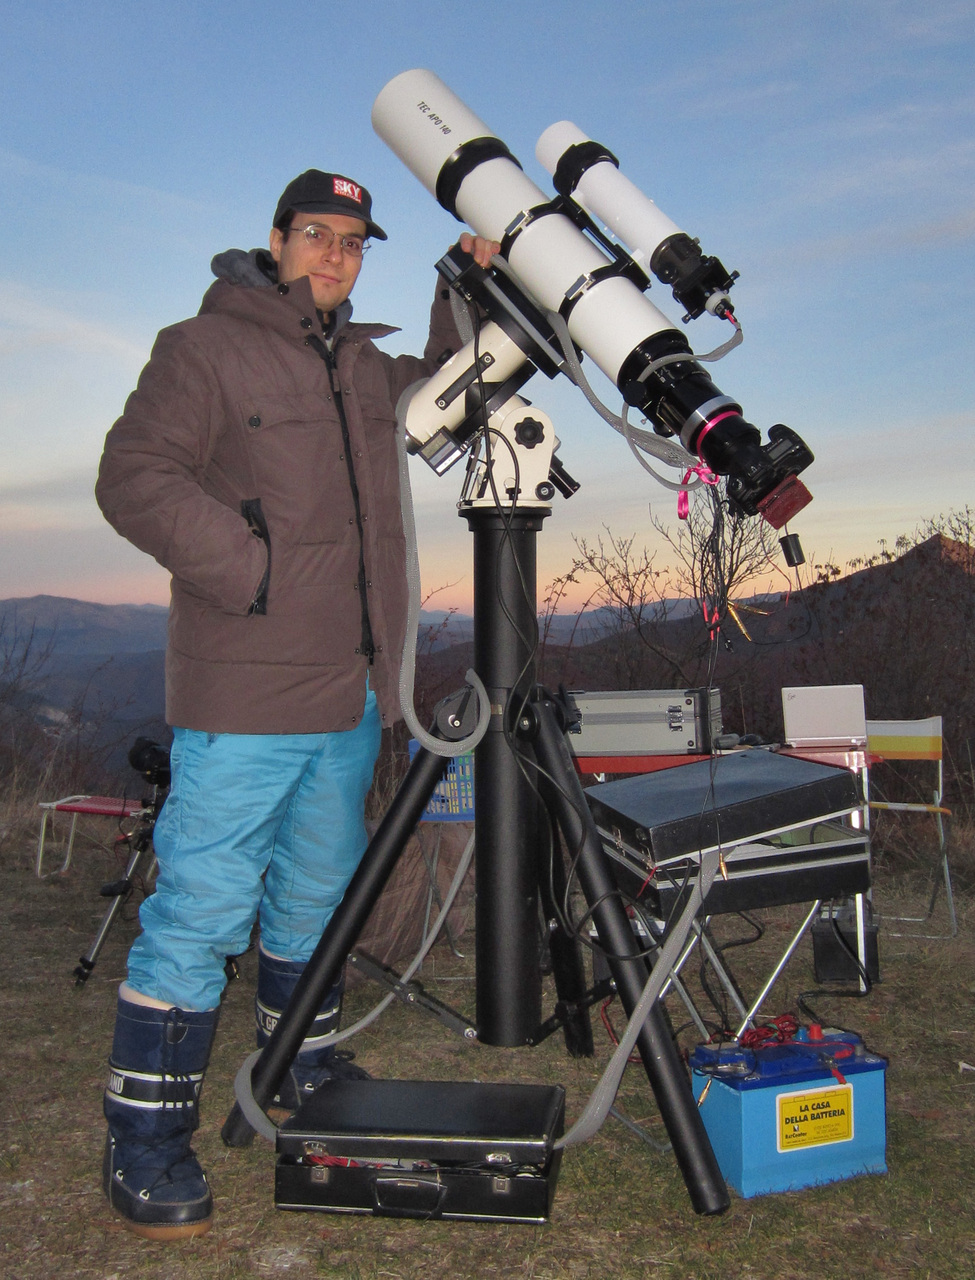
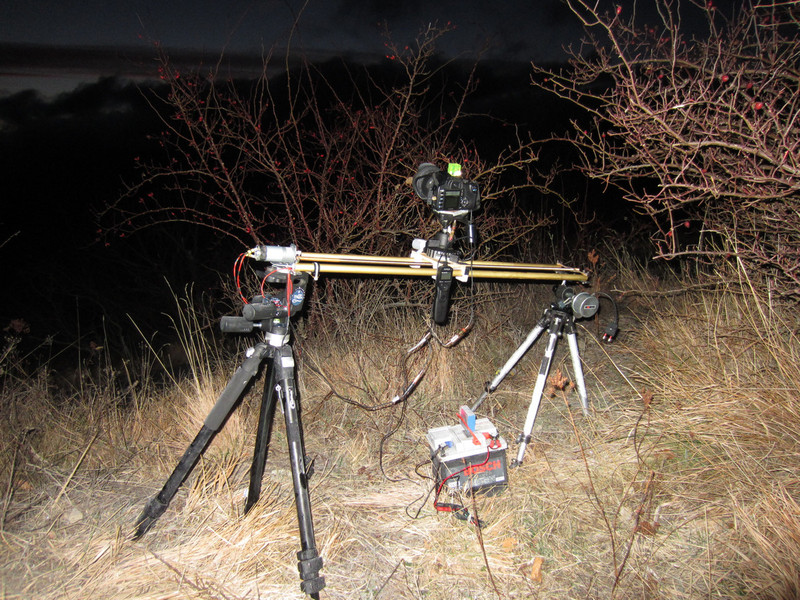
My telescope on the field. Note two velcro strips on each of the telescopes. Big battery is needed to power all the setup.
A strip for my 10-15 cm telescopes, with a 5 cm wide velcro strip.
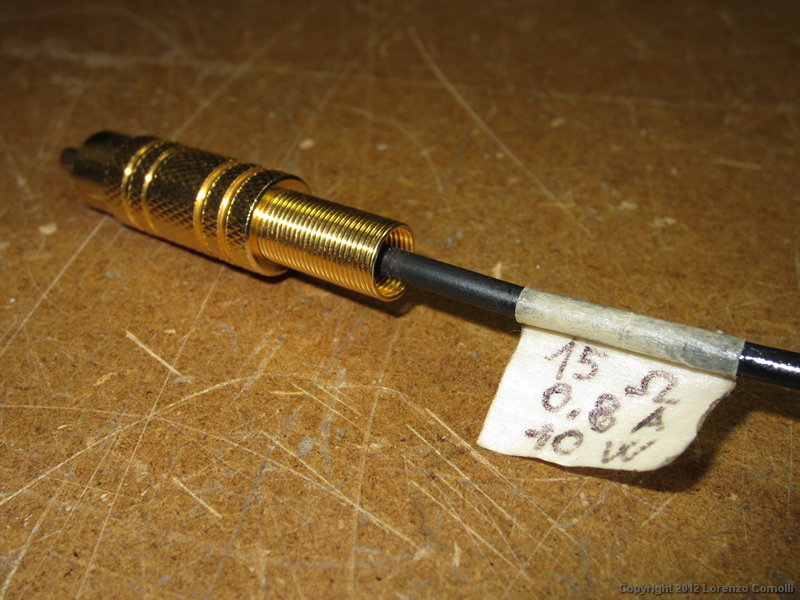
Detail of the strip for my 10-15 cm telescopes.
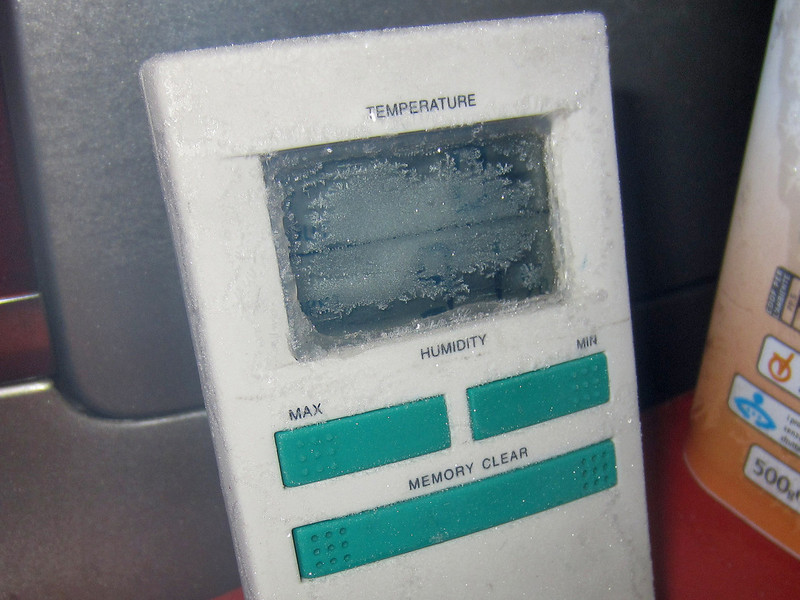
Should you read to understand that heating strips are necessary?
A typical situation where heating strips are essential: note the ice all over the tripods.
Dew is a big problem for residents of many humid regions on Earth, like me living in Northern Italy. Dew can settle down on front lenses of telescope or of photographic lenses, such as during long imaging efforts like timelapses. To prevent the dew from ruining observations or imaging, a simple solution is to keep warm the front lens.
Why dew? Understand the phenomena to understand how to solve.
Dew settle down on any object that has a temperature below the dew point. When the relative humidity (RH) is high, the difference between the air temperature and the dew point temperature is small, and dewing is more frequent. But how it is possible that our lenses has a temperature lower than the air? The reason is radiation exchange! Any lens imaging the night sky is looking at the universe, at a temperature of only 3 K (three kelvin! That is -270°C). So your lens is radiating infrared light to the deep space, cooling down. The more the sky is transparent and clear, and the more your front glass is cooling down.
As an example, and looking at the graph below, with air temperature of 20°C, and RH=80%, the dew point temperature is about 16°C, that is 4°C below. If the front lens cools down to this temperature, or below, dew start settling on the lens.
Solution. The solution to the problem is to prevent dew fogging by:
- inhibiting the lens to cool down by using a lens hood. This reduces the radiation exchange and so reduces the cooling of the lens.
- heating the lens with a heating strip to maintain a temperature higher respect to the dew point. Please note that this temperature may be also equal to air temperature, no need to really have a hot lens! Moreover, hot or warm lenses can ruin the local seeing. So the heat must be small.
- keeping the lens at the air temperature by blowing air on the lens, thus increasing the convective exchange.
Dew point graph (source Wikipedia/Easchiff).
My heating strip solution
My preferred solution is a heating strip, because of better reliability in RH=100% situations over a lens hood and blowing air. Many commercial and DIY solutions are available, and here I'll describe the one that I adopted because of the simplicity of the building and availability of required parts. The main parts are:
- velcro strip for easy placement and adaptation to several diameters (male on one side and female on the other)
- chain of electrical resistances to dissipate heat power all around the lens; other solutions include heating pads or constantan wire, but they are more expensive or difficult to find.
- 12 V power supply, constant
I've built many strips for my telescopes and photographic lenses. Here is one of them applied on a lens.
One of my heating strips applied on a photo lens. Note also the black tape to prevent the focus ring rotating.
Designing the electrical part
Each application require a suitable dissipated power. Here is the method to design the electrical quantities.
- Total power P(tot). Not too much and not too small. Here are some example:
- photographic lenses: 2.5-5 W
- telescopes nearly the same power in watt as the diameter in centimeters. E.g. for a 10 cm telescope use a power of 10 W, for 20 cm scope use 20 W, ...
- Power supply voltage V. I suggest using 12 V CC because of the availability of batteries.
- Number of resistances N. To distribute equally the heat all around the lens, I suggest using N=10 or more.
- Type of connection, series or parallel.
- Series is simpler to built and this is what I've used most.
- Parallel is more reliable, since the break of a wire will not compromise the array, with only a little bit increase of the dissipated power.
- Resistance values.
- Total resistance of the array use: R(tot)=V^2/P(tot).
- Single resistance value:
- for series: R(res)=R(tot)/N
- for parallel: R(res)=R(tot)*N
- Power of single resistances P(res). An electrical resistance is rated for a maximum power, above that value it may break. So be careful in the choice, according to: P(res)>P(tot)/N. I usually prefer resistances with 2 or 4 times the required minimum value.
- Effective current consumption I. Current I=P(tot)/V
- P(tot)=2.5 W
- V=12 V
- N=10
- Connection: series
- R(tot)=57.6 ohm, R(res)=5.8 ohm (a similar value must be selected considering what is available in the market).
- P(res)>0.25 W, so a good choice is 0.5 W or 1 W. For larger values, the ceramic type should be used.
- I=0.2 A, that is a small current.
Designing the mechanical parts
I suggest to incorporate the resistances inside a heat-shrink tubing. This will confer high mechanical strength and it will prevent breaking. When shrinking, I suggest to give the required curved shape.
Then I suggest to incorporate the obtained tube inside a velcro strip, double sided with male/female velcro, and with a hole in the middle. For standard lenses I suggest a width of 2 cm, to be needled on the major sides, and closed only on one extremity. The resistance tube will be inserted in the velcro strip, and thanks to the curvature it will remain there without coming out.
The electrical connection cable should be chosen carefully so that in cold weather it will remain soft. I suggest using an audio "1 wire + shield" cable, with rubber tubing.
As a connector I used RCA golden connectors, that are very reliable and able to carry also currents up to 1 or 2 A.
Images of some strips
Here are some images of a strip for my lenses and my telescopes.
Heating strip for standard photo lenses.
The velcro strip with the resistance tube to be inserted.
The resistances incorporated in heat-shrink tube.
Length of the strip for a standard photo lens.
My telescope on the field. Note two velcro strips on each of the telescopes. Big battery is needed to power all the setup.
A strip for my 10-15 cm telescopes, with a 5 cm wide velcro strip.
Detail of the strip for my 10-15 cm telescopes.
Should you read to understand that heating strips are necessary?
A typical situation where heating strips are essential: note the ice all over the tripods.