I came to the idea of building un ultra-light telescope when I finished
to build my equatorial telescope. It weighted nearly 50 kg and it was difficult
to transport. Moreover I wanted to go observing in a site where I couldn't
go by car (One hour of walking in the mountain with the telescope in the
backpack). But I had not a lot of time and money to involve in this project.
So I decided to keep both the primary and secondary mirrors and build a
new telescope with these existing parts (I also kept the spider). Now I
can use the telescope the way I want : a very stable equatorial mount for
photography or an ultra-light telescope for visual observing. I have to
take the mirrors out of one scope to put them ion the other if I want to
change the configuration.
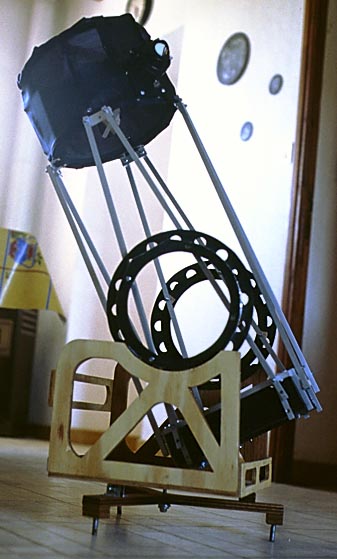
I chosed to build an open tube telescope to minimize weight and to
allow it to be collapsed and to take as little place as possible.
The result is visible here. The whole telescope weights about 7 kg
and can be transported in a backpack (the rocker box is attached on top
of the backpack. Unfortunately, to build such a light telescope I had to
make some compromises with the stability. Nevertheless, the telescope can
comfortably be used with magnifications up to 200x.
How is it done ?
In order to build a dobsonian telescope it is best to start at the
top. If the secondary cage is too heavy, the center of gravity of the OTA
will be high, so the rocker box will be high also, and the weight will
increase. If one want to build a very light telescope, he must start to
build a very light secondary cage. Unfortunately for an 8 incher, the weight
of the primary mirror won't compensate for the weight of the eyepieces
and focuser (they weight the same if they are on a 8" or on a 20"). The
primary mirror is 28mm thick and weights 2kg. The secondary mirror is larger
than needed for visual use (it was chosen to allow prime focus astrophotography)
so it is heavier tha necessary. So to keep the declination axis low, I
had to add some weight (800g) to the primary cage.
The secondary cage
The spider was commercially bought from a French manufacturer. The secondary
mirror has a 60mm minor axis. The focuser is made of plastic (very light)
with a 2" diameter.
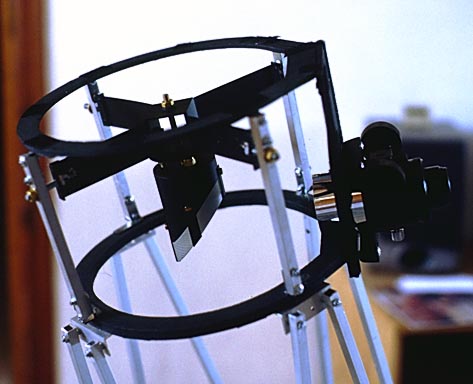
I built the secondary cage around the spider. I could have done a thinner (and lighter) cage if I had made another spider. The 2 black circles are made of plywood (5mm thick for the upper disc, 10mm for the lower one). Their internal diameter is 230mm (just what is necessary to prevent vignetting). In order to protect the secondary mirror, a shroud is attached with velcro around the cage. When the telescope is not in use, 2 discs are attached under and on top of the cage to close it.
I used 10mm square aluminium tubing. I think this size is really a minimum. The telescope would have been stiffer and not much more heavy with 15mm ones. They are attached with 4mm nuts and bolts.
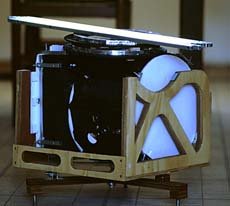
The primary mirror box
The mirror is 28mm thick and 205mm in diameter. It is nearly a full
thickness mirror. When I started to build the mirror box, I wanted to make
it as light as possible but it was not necessary because I had to add counterweights
(800g) at the bottom in order to keep the center of gravity low enough.
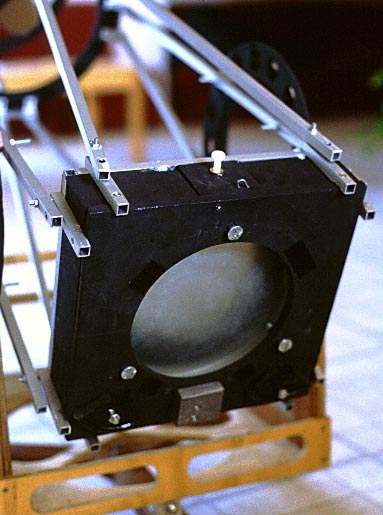
It would have been easier (and with no weight increase) to build a box
with 10 mm plywood. That's why I won't give more details on the building
of this part. The mirror rests on three points at the edge. A large hole
(160mm diameter) at the back allows fast cooling of the mirror. For transport,
I add a dust cap at the back to cover the hole.
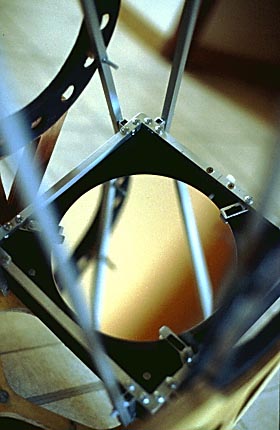
Seen from the top, we can see the 3 clips which prevent the mirror
from falling. On top of the clips there is some velcro. It is used to attach
either a mask to prevent the turned down edege of the mirror or a dust
cap. This cap must always be there while assembling the telescope in case
a nut or tool fall on the mirror.
The altitude axis
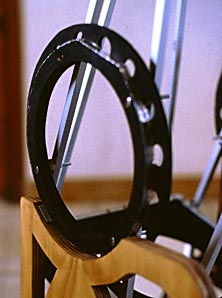
The circles are made of plywood and covered with self-adhesive aluminium. They ride on teflon pads. The contact area between the aluminium and the teflon is really small but it is enough given the low weight of the OTA. The circles are attached directly to the trusses with 4mm bolts. That trick allows a very low primary box. The circles are large enough (230mm) to provide a smooth movement.
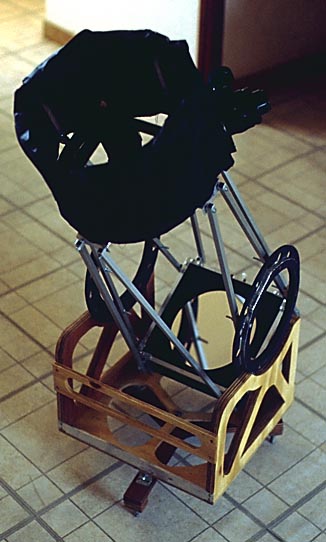
The rocker box
As soon as the OTA is built, it is possible to build the rocker box.
It must be light and compact.
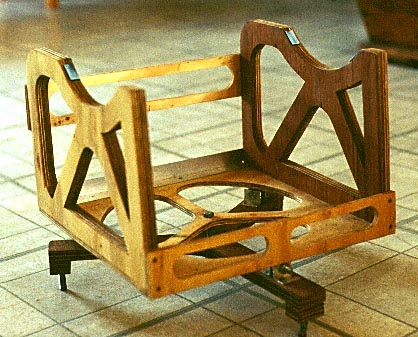
The fork must be really rigid and not deform when pushed on the side.
So the sides need to be strong enough. I have chosen to use 2 layers of
10mm plywood for the sides. There are large holes to gain some weight.
There are also additional parts on the front and rear part to add more
strength to the rocker box. The bottom of the box need not be very strong.
I have cut large holes in it to reduce weight. All the weight is supported
at the edge, so the only important part in the center is the pivot bolt.
The feet and the ground board
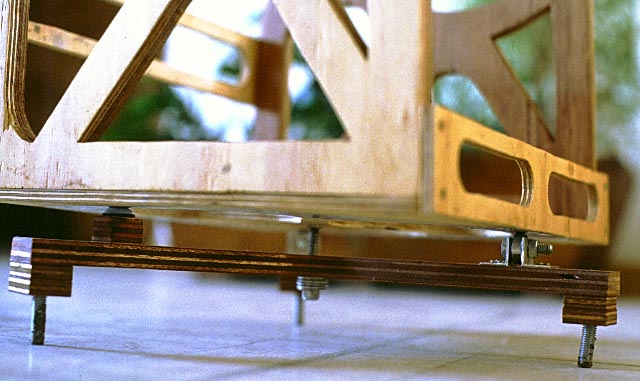
The fork rides on two ball bearings and a teflon pad. Since I could
not find a good formica to put under the rocker box I used aluminium. When
using 3 teflon pads with aluminium, tracking at high power was difficult.
Replacing 2 of the teflon pads with roller bearings helped a lot.
The feet are made of 10mm threaded rod. I tried several feet : long,
short, metal, wood. But these ones are the best I tried. If the ground
is hard (concrete for example) the feet rest on the groud as in the photo
above. If the ground is soft (grass for example), the user pushes on the
telescope's feet so that they go into the ground (they are a few cm long).
Then the telescope is really stable.
Conclusion
This telescope works well even if I had to make some compromises between
weight and stability. I have been able to carry it for a trip in the French
Alps where the sky is great. Of course it is possible to go to wonderful
places by car, but being alone in the mountains for a few days and watching
the sky each night is really great. Why don't you try it ?