
Astrophotography through a diffusion filter
Since the middle 80's, as soon as I started astrophotography, I've been intrigued by the beauty of many wide-field shots taken by Akira Fuji, one of the greatest masters of astrophotography. Many of his constellation portraits shown the brightest stars emphasized in size and color saturation keeping as well the finest details of the fainter objects. The technique that permits this result is either to slightly defocus or to use a diffusion (fog) filter in front of the lens during only a part of the total exposure. Both defocusing and filtering produce the same effect: the stars bloat, spread their light on a larger area increasing size and color saturation. This is visible only on the brightest stars because when diffused the dimmer ones have not enough force to be recorded on the film. The faintest stars and objects anyway are recorded during the focused/unfiltered exposure. Since a repetitive and precise control of defocus amount is not very easy it is simpler to use a diffusion filter instead. Unfortunately mount a filter in total darkness while an exposure is running could cause some camera movements or flexions but nowadays digital age gives a great help. |
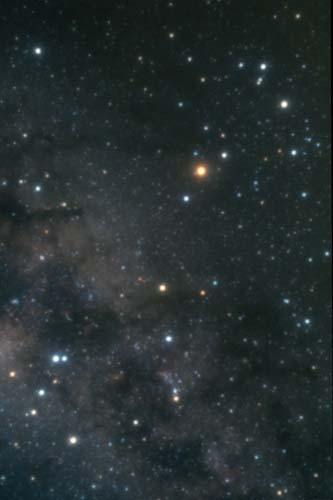
Pic.
1: the raw scan of a 45 minutes shot of the constellation of Scorpius.
Nikkor 50mm f/2 used @ f/4 to increase sharpness. |
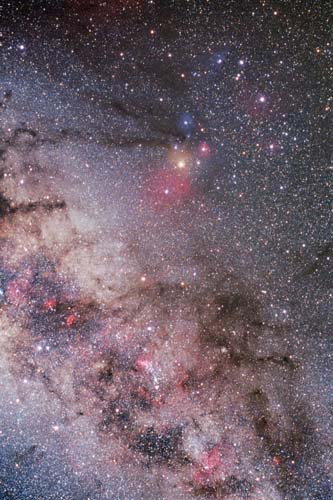
Pic.
2: Same object and setup as picture
1 but using a diffusion filter in front of the objective (10 minutes
@ f/2.8) |

Pic.
3: the processed result of picture 1 (curves applied) |
Pic.
4: the result of "lighten"
blend of pic. 2 over pic. 3. |
I usually take two sequential shots: a long one unfiltered exposure (pic. 1) and a short one filtered (pic. 2). The longer one (I will call it the background image) is taken according to the amount of faint details sought (I often push it to the sky's limit) and with reduced f/ stop to increase sharpness and reduce vignetting. The short filtered exposure (I will call it the foreground image) is taken with a Cokin 840P diffusion filter mounted in front of the objective. This filter turned out to give great results and thanks to its modular design can be adapted to all my telephoto lens set. The foreground image is usually taken at full aperture (possibly lens flaws are not evident since are lost in the bloated star's disks) and long just enough to show the fog effect on the brightest star. Sometime I use also different films for the two exposures, i.e. a red sensitive one to record the fainter nebulas in the field and a better color balanced one to evidence the different star's dyes. Then I scan both images and I process the background one with Photoshop and other graphical software (pic. 3). When I am pleased with the result I take the foreground image and I register and paste it on the background one as new layer. I select "lighten" as blending option, so only the pixels of the foreground shot that are brighter are actually merged on the background image. If I don't like the result I either reduced the "weight" of blending or, once selected the upper layer, I play with curves, brightness and saturation until I am satisfied (pic. 4). Sometime I apply also a little gaussian blur to further softer the bloated stars before flatten the sandwich. |