Losmandy Titan mount
Monture Losmandy Titan
Olivier Thizy (January 10, 2004)
The first day |
|||||||||||
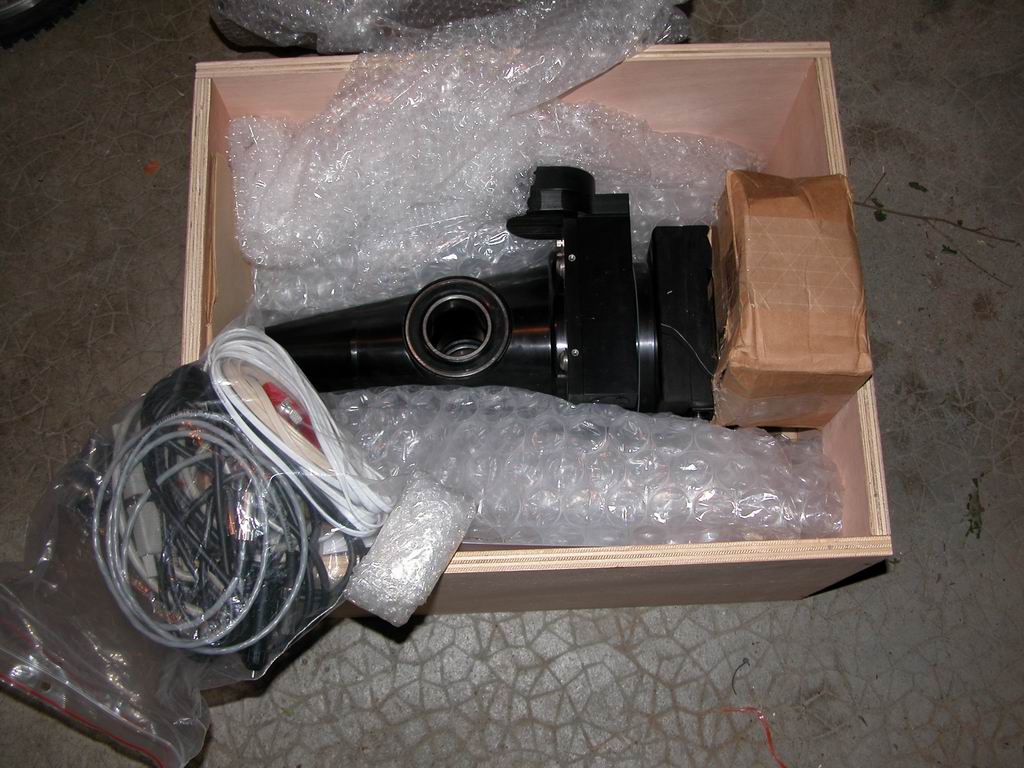 Shipment Box |
Saturday morning... the ring bell & my heart boomed... the transporter was here with my "dream equipment". My dealer in France (Optique & Vision) prepared shipment & provided two wood box for the Losmandy Titan mount - very convenient to transport. Still need to cut some foam to have an almost perfect transportation system. | Samedi matin, ça sonne ŕ la porte et mon coeur bat fort: le transporteur est lŕ avec mon équipement des mes "ręves". Le distributeur en France, (Optique & Vision) avait préparé l'expédition avec soin et la monture Losmandy Titan était emballée dans deux boîte en bois trčs pratiques ŕ réutiliser - juste quelques blocs de mousse ŕ trouver et ajouter ŕ ce systčme. | |||||||||
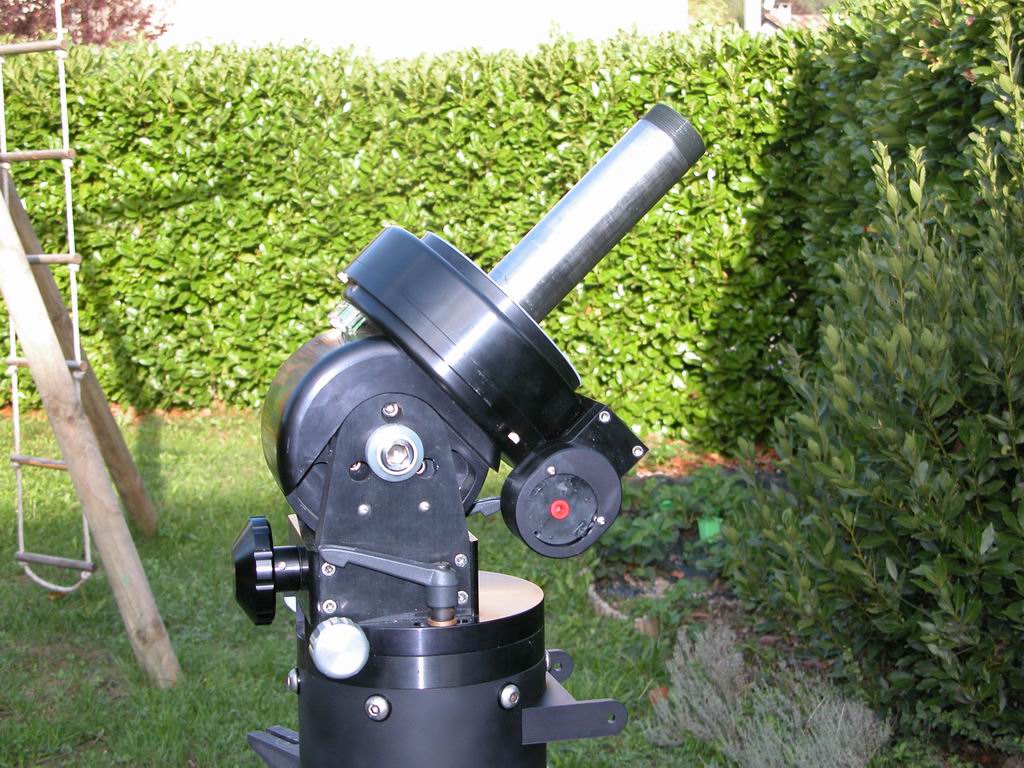 One axis only |
As soon as I received my mount, I did install it on an old Meade tripod (too expensive for what it is... and difficult to adjust). In 2 hours only, the mount and my new Celestron 11 were assembled in my garden. Check out Donovan's or Florent's web sites for more pictures & details on the Losmandy Titan setup. | A peine la monture arrivée, je l'installe sur un ancien trépied Meade (trop cher pour ce que c'est et surtout pas pratique ŕ ajuster). En 2 heures seulement, la monture et mon nouveau Celestron 11 sont assemblés dans mon jardin. Voir les sites de Florent et Donovan (en anglais) pour plus de photos et détails sur la monture Titan. | |||||||||
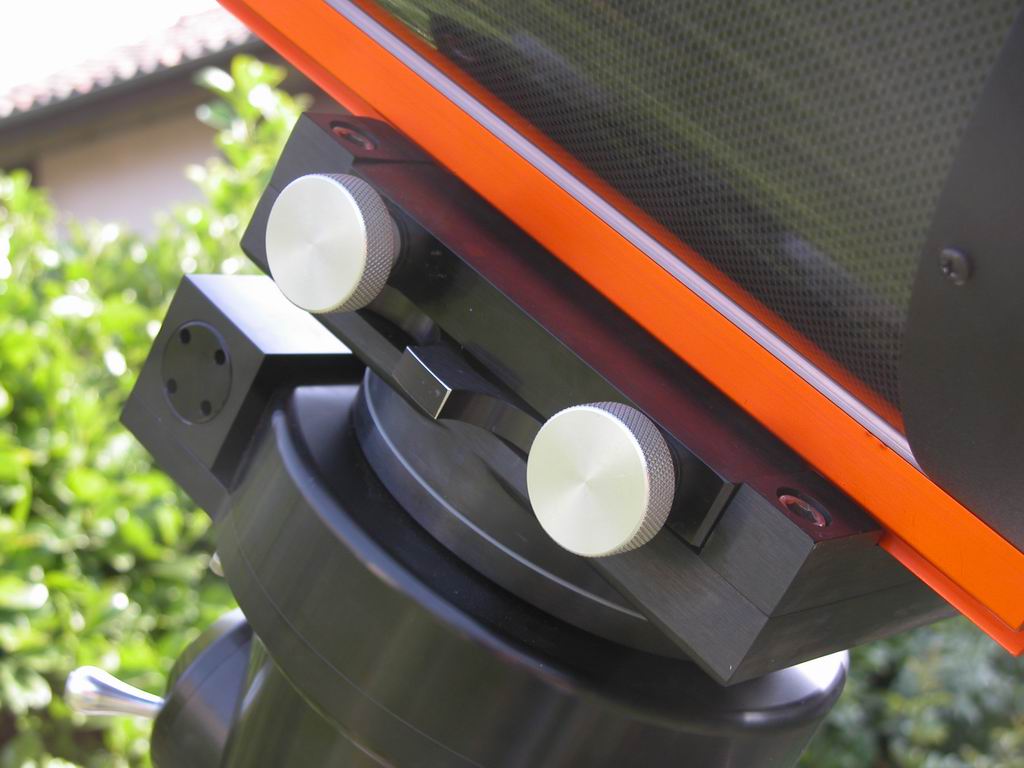 Mounting Plate |
The mounting plate is very well crafted. Still, if the mount is easy (but heavy) to assemble, I found very difficult to put the Optical Tube Assembly (OTA) on the mounting plate... After some practice, I can setup the OTA alone! | La plaque de montage pour la queue d'aronde est trčs bien faite et de qualité. C'est toutefois difficile, avec le poids et la hauteur du tube optique, de monter le tout. Au début, j'ai eu besoin d'aide. Avec un peu plus d'expérience, j'ai trouvé comment installer le tube sur la monture seul. | |||||||||
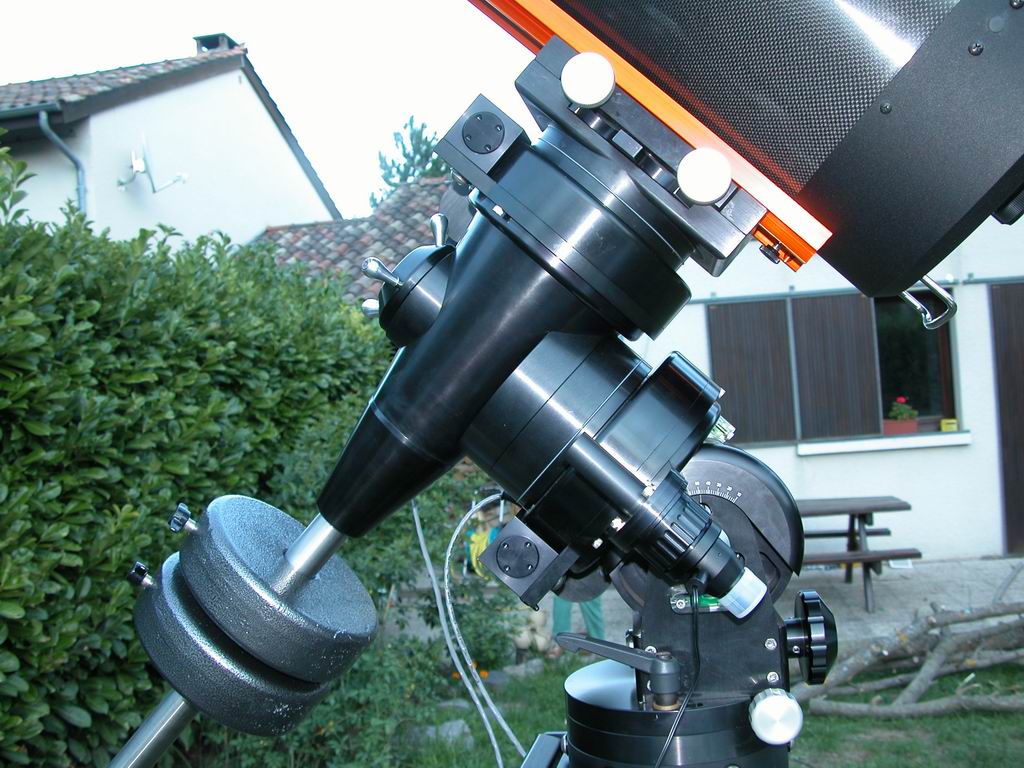
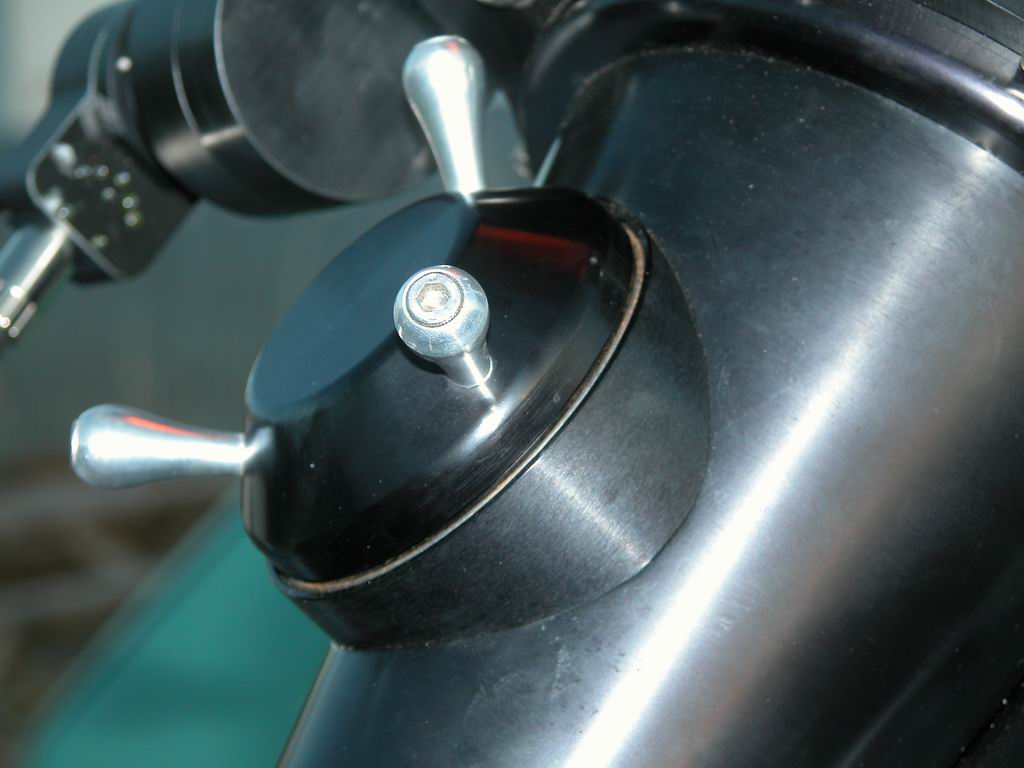
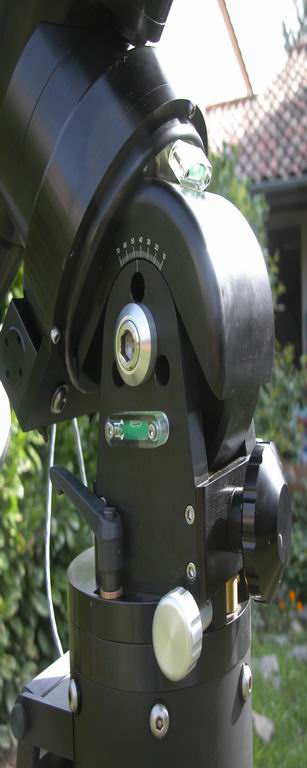 RA Axis |
The Losmandy Titan mount can easily be adjusted with a large knob for the latitude and a nice system for the longitude. | La monture Losmandy Titan peut facilement ętre ajustée avec un large levier pour la latitude (trčs fin) et un systčme pratique (mais un peu de jeu) en longitude. | |||||||||
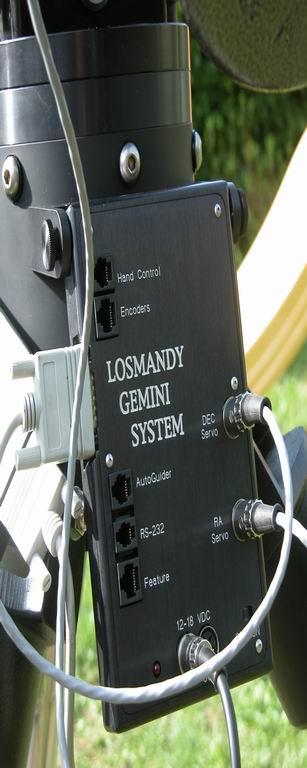 Gemini Control Box |
The Gemini Level 3 system is very easy to install and I found it very easy to use. Associated with a laptop, the system is incredibly powerful. I recommend the use of the GCL (Gemini Control Lite) software & Project Pluto Guide 8. | Le systčme de contrôle "Gemini Level 3" est trčs facile ŕ installer et assez pratique ŕ utiliser. Connecté ŕ un ordinateur, c'est hyper puissant. Je recommende l'utilisation du logiciel GCL (Gemini Control Lite) & de Guide 8.0 de Project Pluto. | |||||||||
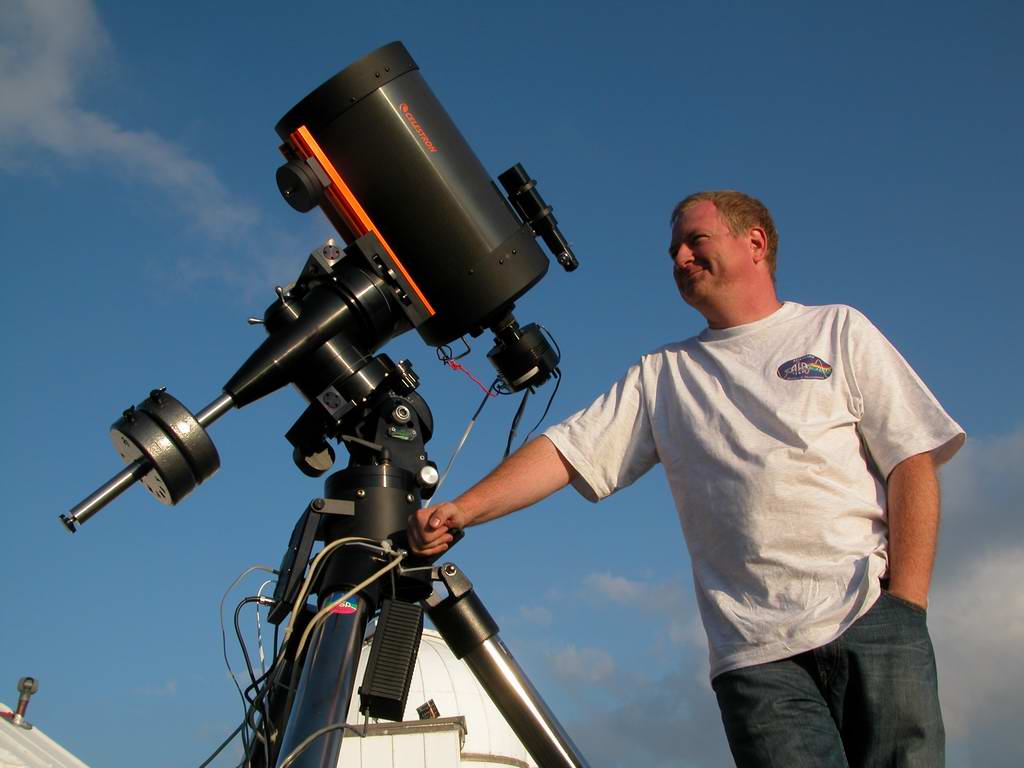
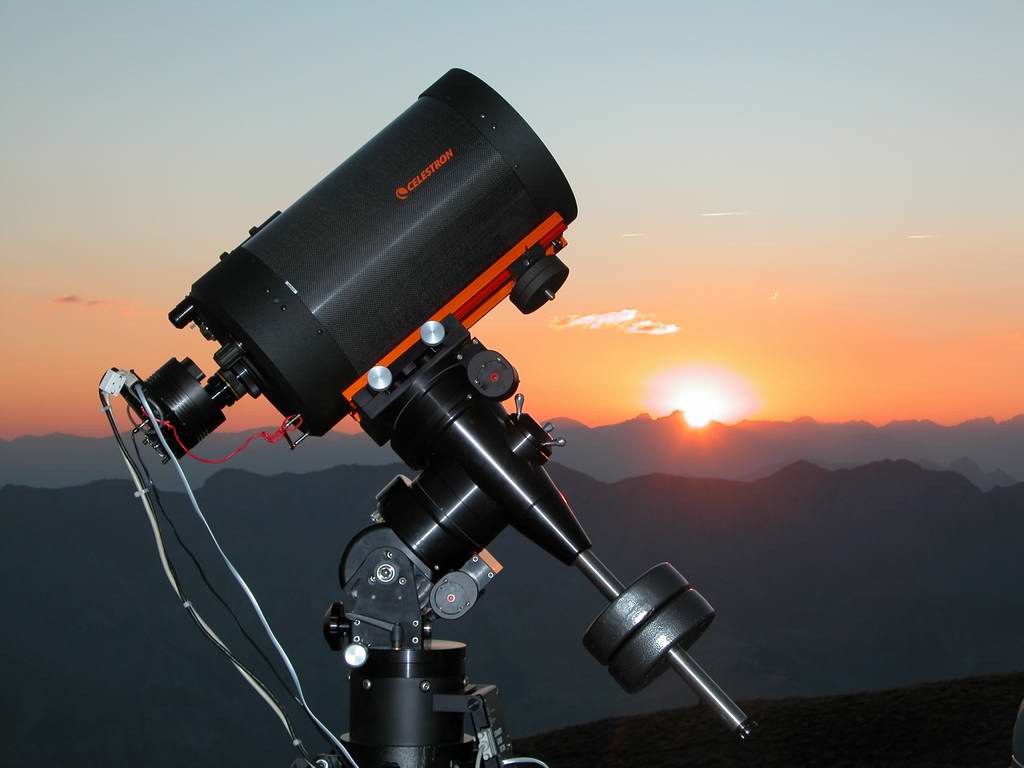
 Celestron 11 |
The Celestron 11 sits proudly on top of the mount!!! | Le Celestron 11 se tient fičrement sur la monture!!! | |||||||||
 Axis |
The titan mount is very very well crafted. Even with the two axis locked, you can turn the mount without risk for the mechanic. | La monture Titan est bien construite. Męme avec les deux axes bloqué, on peut tourner la monture sans risquer d'abîmer la mécanique. | |||||||||
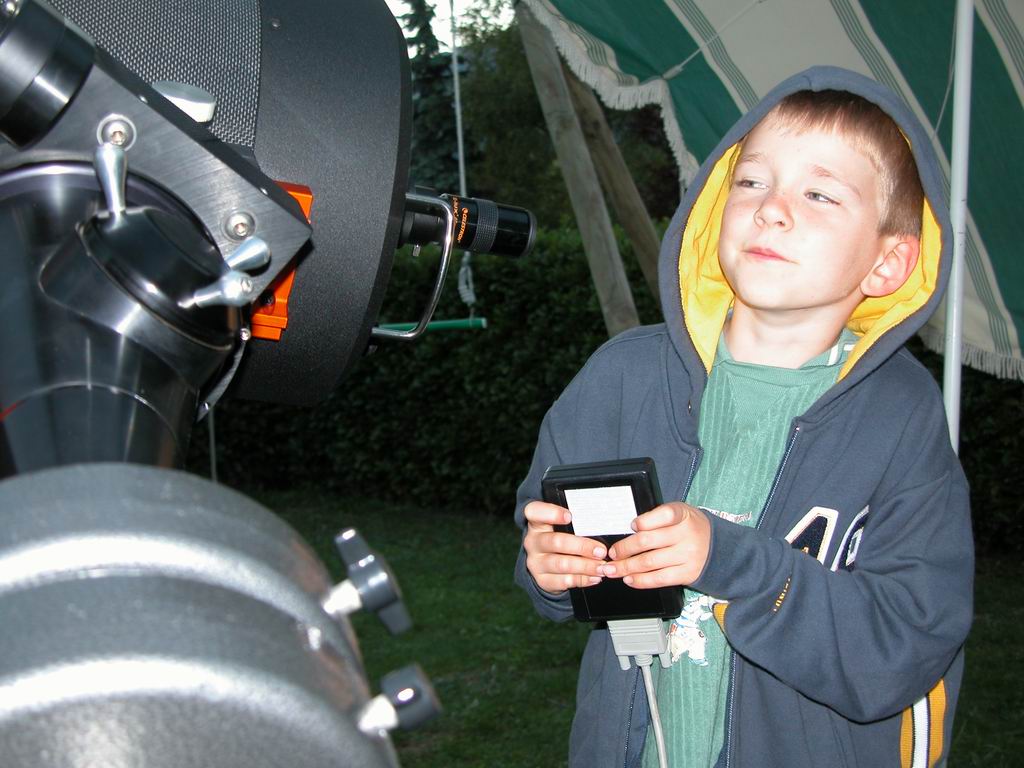 my oldest son |
My oldest son (7 years when I received the mount) during the first observing evening. I invited my neibourgh for a very nice observing session, thanks to the Gemini L3 system. My son liked moving the scope with the hand control. | Mon aîné (7 ans ŕ la réception de la monture) lors de notre premičre soirée d'observation. J'ai également invité un voisin et ses enfants pour une super soirée d'observation. Avec le systčme "Gemini" et un PC, c'est vraiment simple. De plus, ce soir lŕ, le ciel était assez joli en dépit de la pollution lumineuse trčs forte dans ma région. Mon fils a adoré déplacer le télescope avec la raquette de contrôle! | |||||||||
Pro's & Con's |
|||||||||||
Pro's |
Qualités |
||||||||||
Con's |
Défauts |
||||||||||
Mechanical Adjustments |
|||||||||||
| This part is describing some mechanical adjustments I had to do after I received the mount, and specially when I went at high altitude and lower temperature (20°C delta). After burning several motors (I did burn 4 in total!!!), I looked into more details into the mount with a friend. It was very instructive - this why I am sharing those pictures. But on your own mount, you may not at all need to do those adjustments/changes. | Cette partie décrit quelques ajustements mécaniques que j'ai du faire sur ma nouvelle monture, surtout aprčs un séjour ŕ 3000m d'altitude et une température 0°C. Aprčs avoir grillé 4 (!) moteurs, j'ai décidé avec l'aide d'un ami plus mecanicien que moi de démonter la mécanique. Nous avons pu ainsi faire quelques modifications et ajustements. Sur une autre monture, ces ajustements ne sont pas nécessairement utiles! | ||||||||||
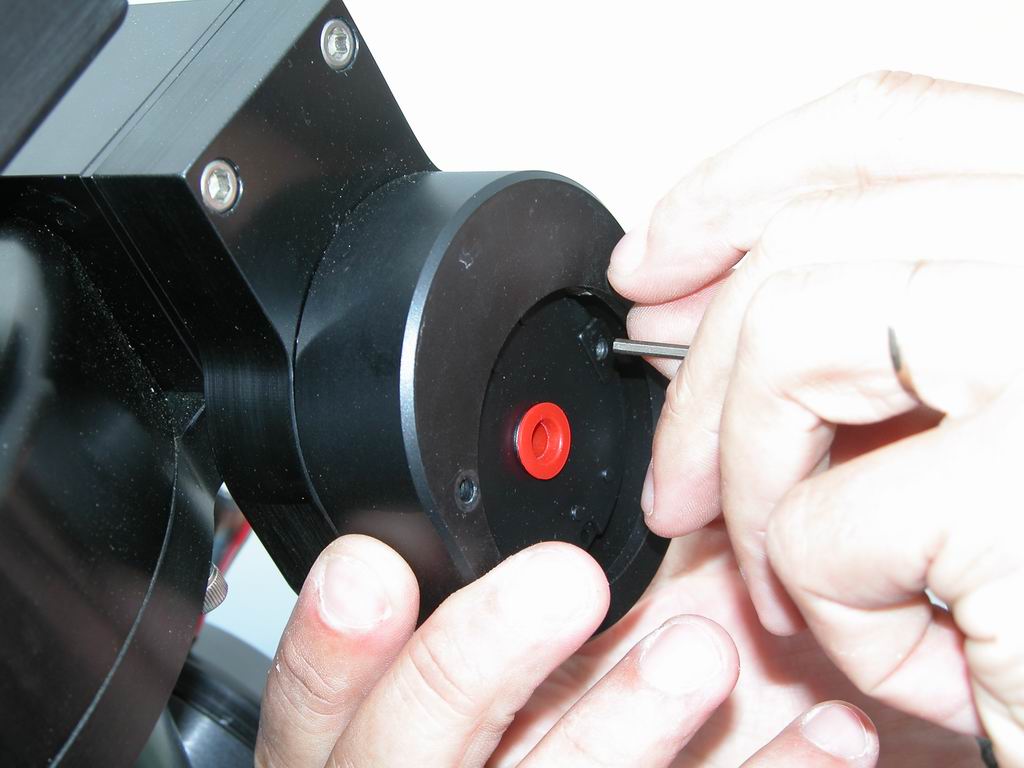
 DEC Gear Box |
Motor being removed (and gear protected with a small red cap), you can see the Gear Box. | Le moteur étant enlevé (et l'engrenage protégé par un petit bouchon en plastique rouge), on apperçoit la boîte ŕ engrenage (bloc réducteur). | |||||||||
 Removing gear box cover |
Remove the two small allen screws to remove the gear box cover plate; then remove the four larger allen screws to remove the gear box. | Dévisser les deux vis allen pour enlever la plaque protectrice; enlever ensuite les quattre larges vis pour enlever le bloc de réduction. | |||||||||
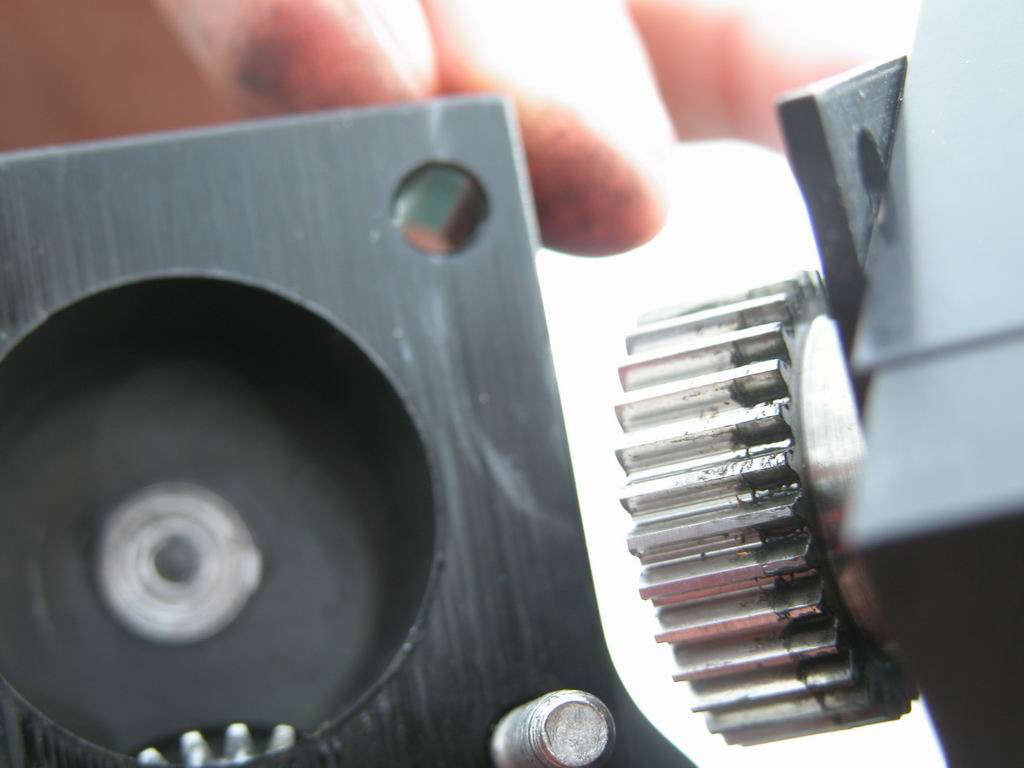
 Worm Gear |
The worm gear is now visible and you can turn it by hand to see if the system is smooth. If there is any backlash or hard point, you will need to adjust the worm gear. | L'engrenage de la vis sans fin est maintenant visible et peut ętre tourné manuellement afin de s'assurer que le mouvement est doux. S'il y a du jeu ou si le mouvement est trop dur, il faut alors régler la position de la vis sans fin. | |||||||||
 Gear Box |
The gear box show an used bottom due to the worm gear touching it - I suspect that my first motor, which burned after two observing nights!, died because of this problem - and I continued to have "motor stalled" errors even after switching to 18V power supply. | Le bloc réducteur était usé au fond, indiquant le frottement entre l'engrenage de la vis sans fin et du bloc réducteur. Il est possible que cela soit une des raisons de moteur grillé (mais pas tous!), męme aprčs ętre passé ŕ une alimentation 18V. | |||||||||
 Worm Gear & Gear Box |
To avoid the gear to touch the gear box/cover, I added a carton on the square plate (carton is not shown, plate is visible between the gear & the worm case/cover. The worm gear and the motor reducer gar did not overlap completely as seen on this picture. |
Pour éviter ce frottement, j'ai ajouté un carton entre la caisse de la vis sans fin et la plaque métallique carrée (pas assez épaisse dans mon cas!). | |||||||||
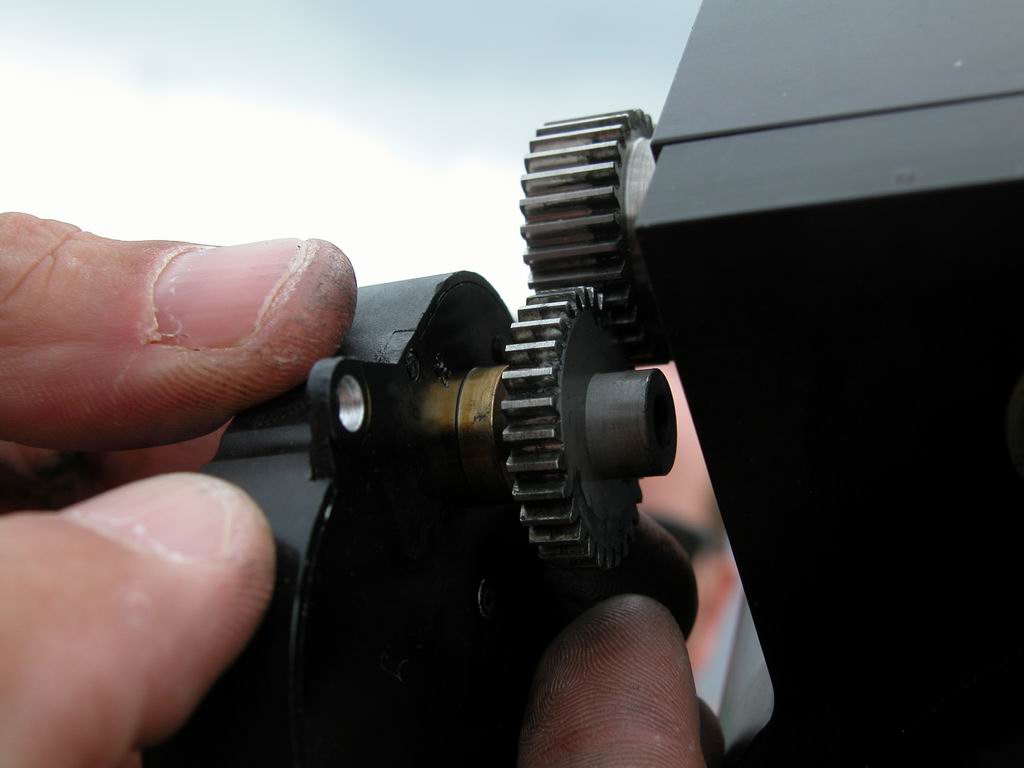 Gears re-adjusted |
The gear on the reducer was reverted to allow better overlap between the two gears. | L'engrenage du réducteur semblait inversé et ne recouvrait pas complčtement l'engrenage de la vis sans fin. J'ai donc inversé l'engranage. | |||||||||
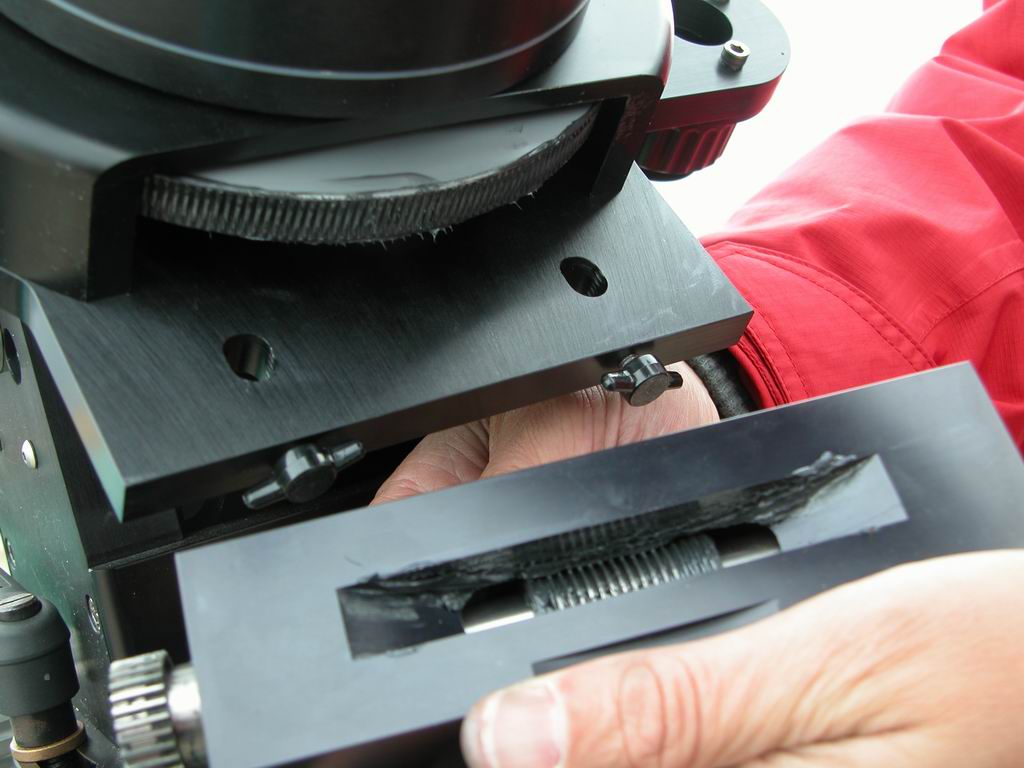 Worm Cage |
I removed completely the worm case. You can see the large 7" gear, the worm, and the gear on the left side. | Le bloc de la vis sans fin enlevé, on apperçoit la grande (7 inchs) roue dentée, la vis sans fin, et l'engranage de la vis sans fin. | |||||||||
 RA axis top cover plate |
Removing the worm case top cover plate (special tool needed). | Le cache supérieur de la vis sans fin est enlevé (outil spécial). | |||||||||
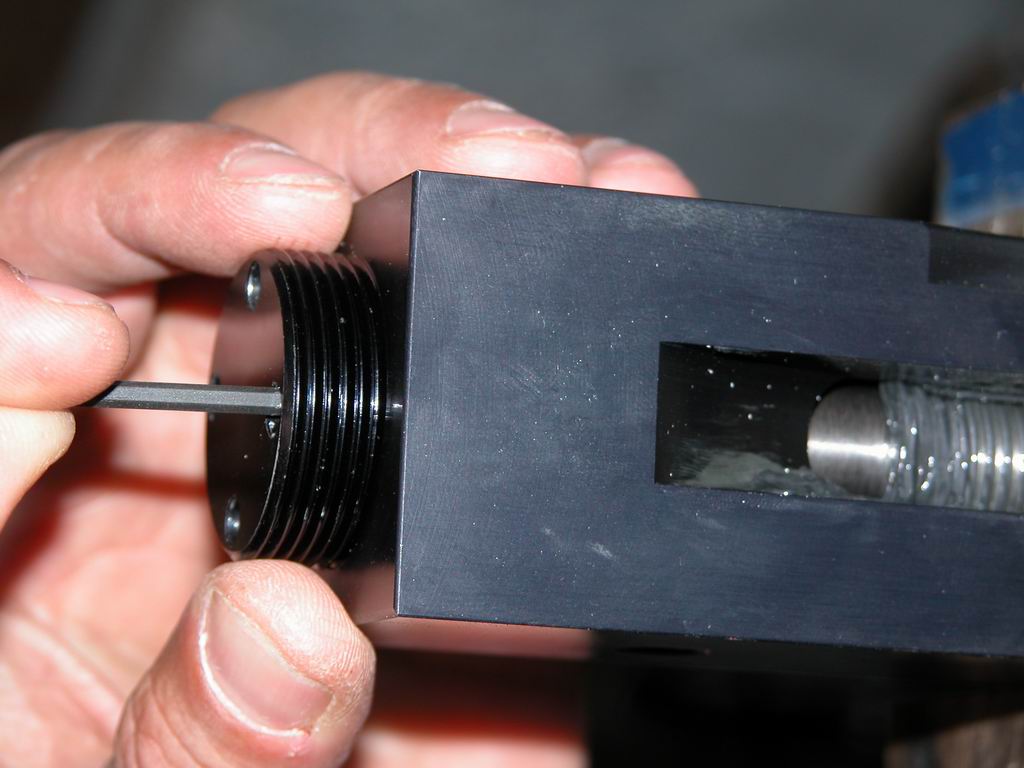 RA axis bottom cover plate |
Removing worm case bottom cover plate (special tool needed). | Le cache inférieur de la vis sans fin est enlevé (outil spécial). | |||||||||
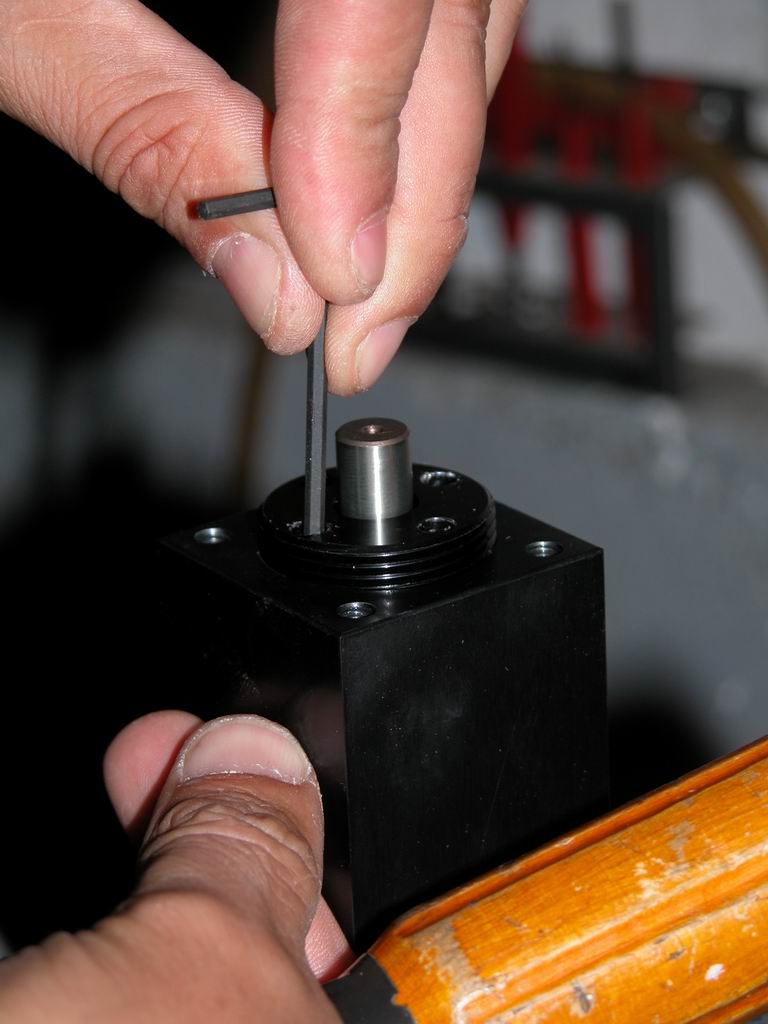
 Adjusting the worm |
With a light touch of a hammer, I adjusted the worm in the case. The worm was hard to turn before and turn very smoothly now. Not sure if this is sensitive to temperature and if this change overtime (during transportation for example)... but I'll keep an eye on this! | D'un faible coup de marteau sur l'axe de la vis sans fin, j'ai permis ŕ l'axe de tourner beaucoup plus facilement (il était dur ŕ tourner avant). Je ne sais pas si c'est sensible ŕ la température ou au transport... je vais donc gardé un oeil sur cette partie de la monture! | |||||||||
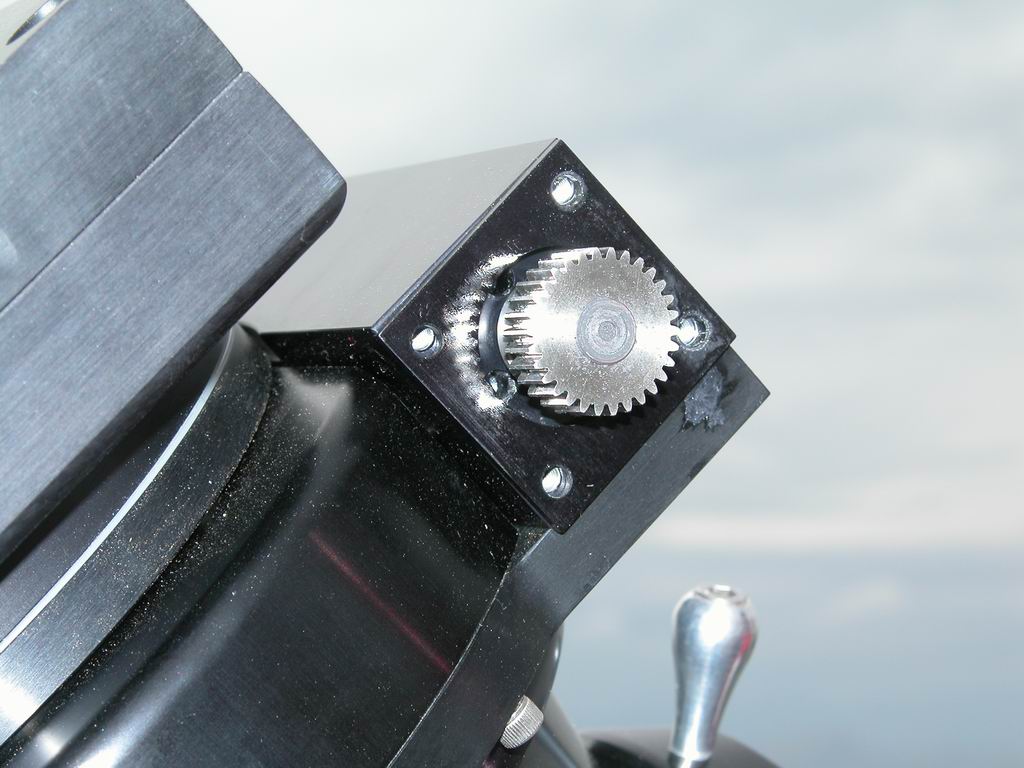
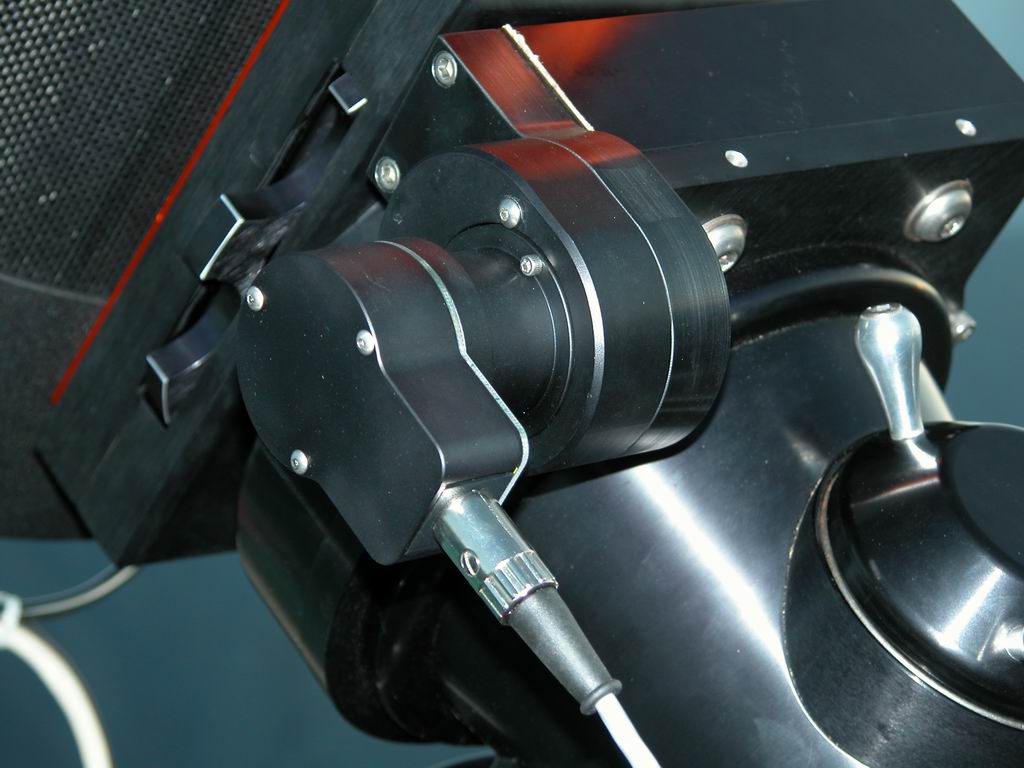 DEC motor |
The DEC motor mounted on the Titan... I feel the motors are the weak point of this great mount. Anyway... I burned 4 motors already!!! The good thing is that I had great service from my french dealer and I got replacement motors the following day... even at 3000m altitude! | Le moteur de déclinaison sur la Titan. Les moteurs sont le point faible de cette superbe monture - j'en ai grillé 4!!! Par contre, ils ont été remplacé le lendemain par Optique & Vision; super service, męme ŕ 3000m d'altitude! | |||||||||
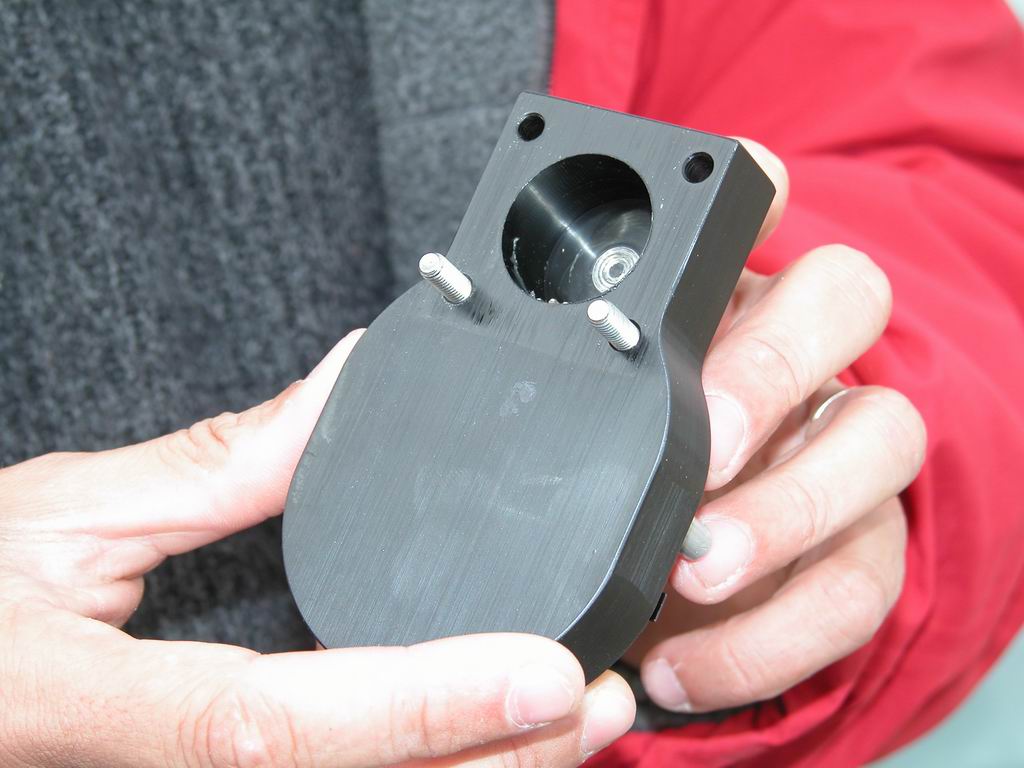
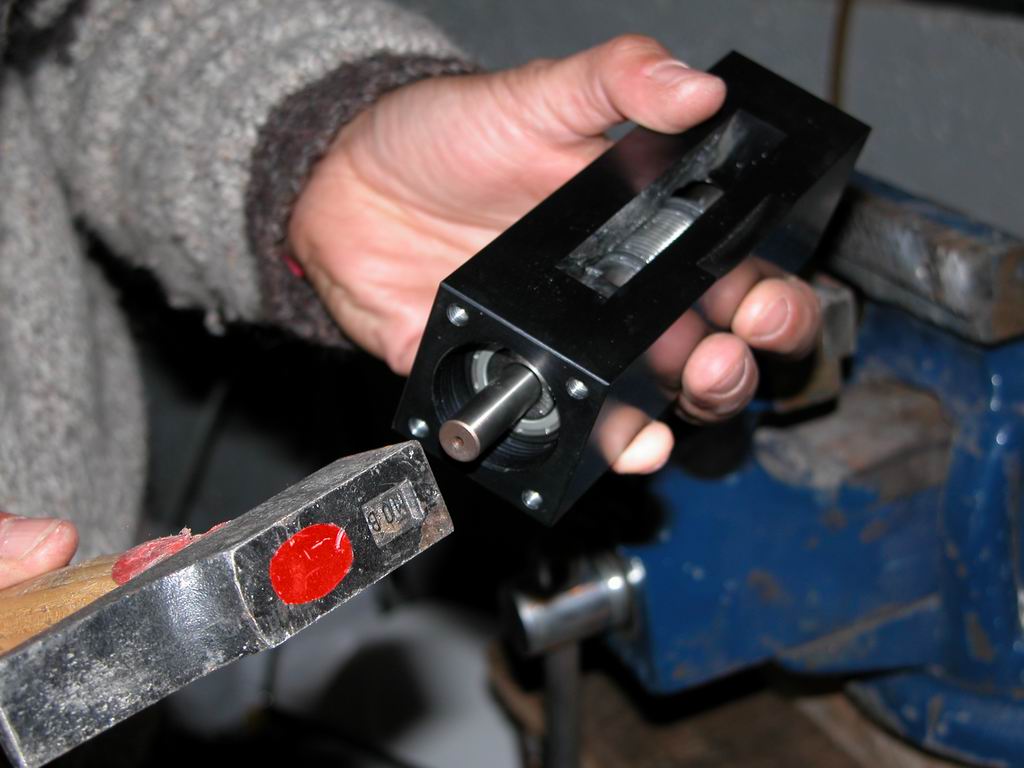
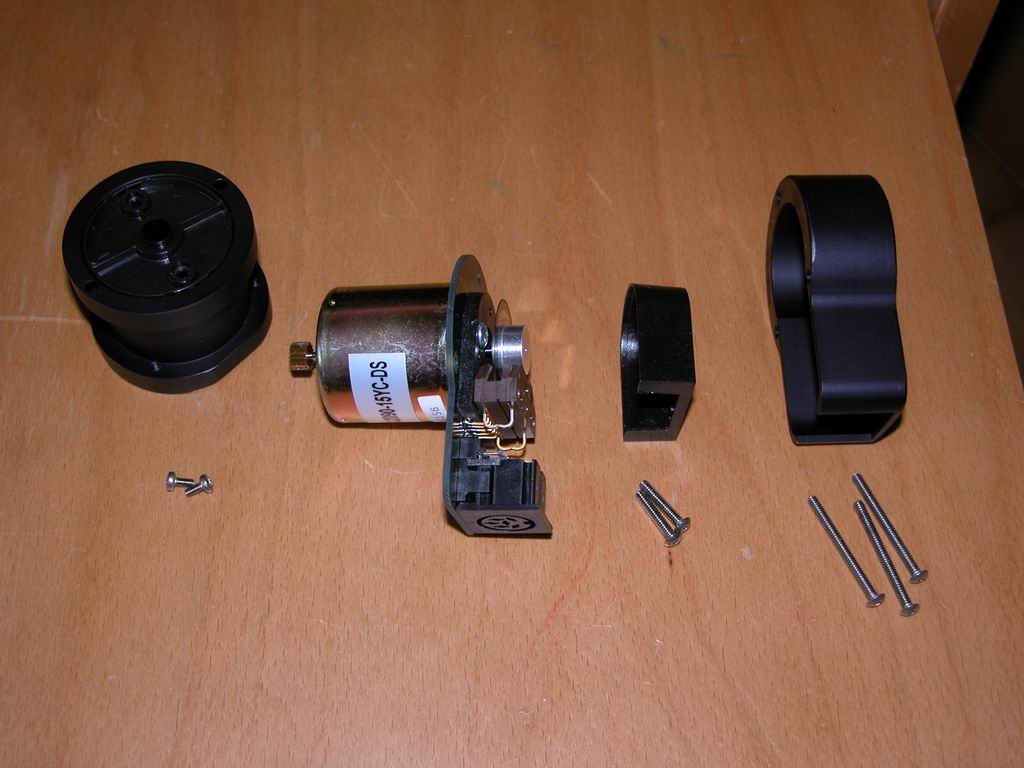 Motor assy |
OK, as I did burn several motors, I obviously wanted to look inside!!! Here is the motor dismantled. Attached to the motor is the coder. | Aprčs avoir grillé 4 moteurs... j'ai bien entendu vouloir ce qu'il y avait dedans. Voici le bloc moteur démonté. On apperçoit l'encodeur attaché au moteur. | |||||||||
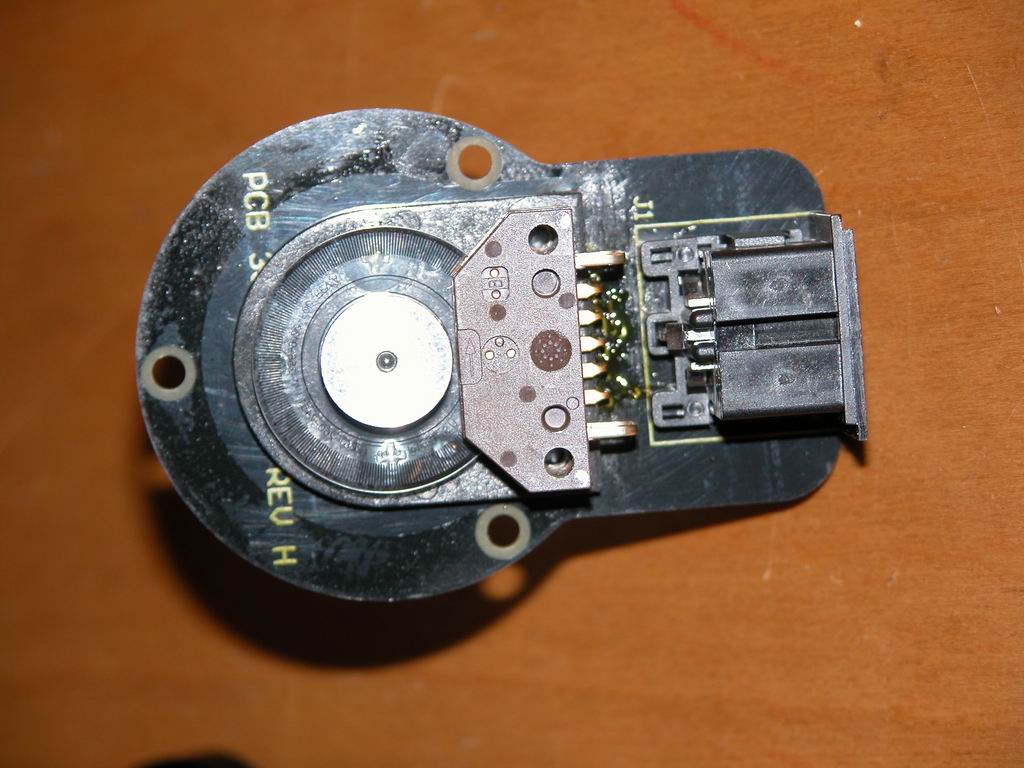 Coder |
View of the motor coder. | Vue de l'encodeur. | |||||||||
User's guide |
|||||||||||
| The objective of this part is to describe some of normal user operations. The intend is not to go in lot of details but to highlight "visually" the key operations. Any feedback to me would be welcome to improve this part of the web page... | L'objectif de cette partie est décrire quelques opérations simples sur la monture. Le but n'est pas d'entrer dans le détails mais de donner une vue générale des ces opérations de maintenance. Les commentaires seront les bienvenus! | ||||||||||
 RA lock |
RA axis lock. Even when turned completelly, the axis can still be turned manually. But if you do it after Gemini is calibrated, you need to resynchronize on a star. | Vis de serrage de l'axe Alpha. Męme serré ŕ fond, la monture peut quand męme ętre tournée ŕ la main, c'est normal et bien pratique. Par contre, une fois le systčme Gemini réglé, ne pas le faire ou alors refaire une synchronisation sur une étoile. | |||||||||
 DEC lock |
DEC axis lock. Be carefull with cutting edges! | Vis de serrage de l'axe de déclinaison. Attention aux bords coupants! | |||||||||
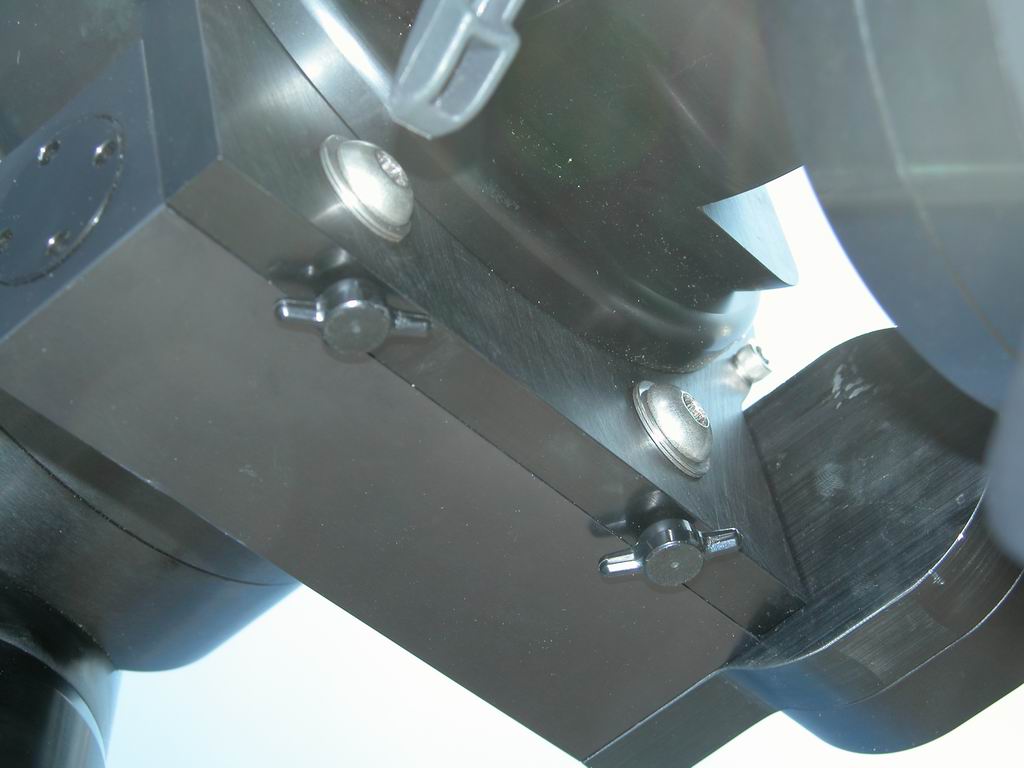 RA Adjustment screws & Wingnuts |
RA blocking allen screws are visible as well as adjustement's wingnuts. | Vis de serrage du bloc d'ascension droite & vis papillon de rčglage. | |||||||||
 Adjustment Screws |
The two large screws below the worm case are used to adjust the worm/7" gear spacing. First, unscrew those large screws; then adjust the spacing using the two "wingnuts" (slightly visible on this picture above the hand); then lock the large screws. Once the adjustment is done, you can unscrew the small "wingnuts" if you want (not needed thus). | Pour ajuster la position du bloc de la vis sans fin par rapport ŕ la roue dentée de 7 inchs, il faut en premier lieu déserrer les deux grosses vis allen. A l'aide des vis papillon, on ajuste la position jusqu'ŕ ce qu'il n'y ai pas de jeu et que la vis sans fin tourne facilement. Bien serrer les deux grosses vis sans fin aprčs le rčglage et vérifier qu'il est toujours correct. | |||||||||
 DSCN5253 Titan - Mount Adjustment.JPG |
Polar adjustment large black knob & small dual knobs. | L'alignement polaire se fait avec un large boutton noir (latitude) et la vis horizontale (longitude). | |||||||||
Some pictures |
|||||||||||
 9000ft high trip |
Here I am... proud owner of the C11 & the Titan. | Me voici... fier proprio du C11 et de la Titan. | |||||||||
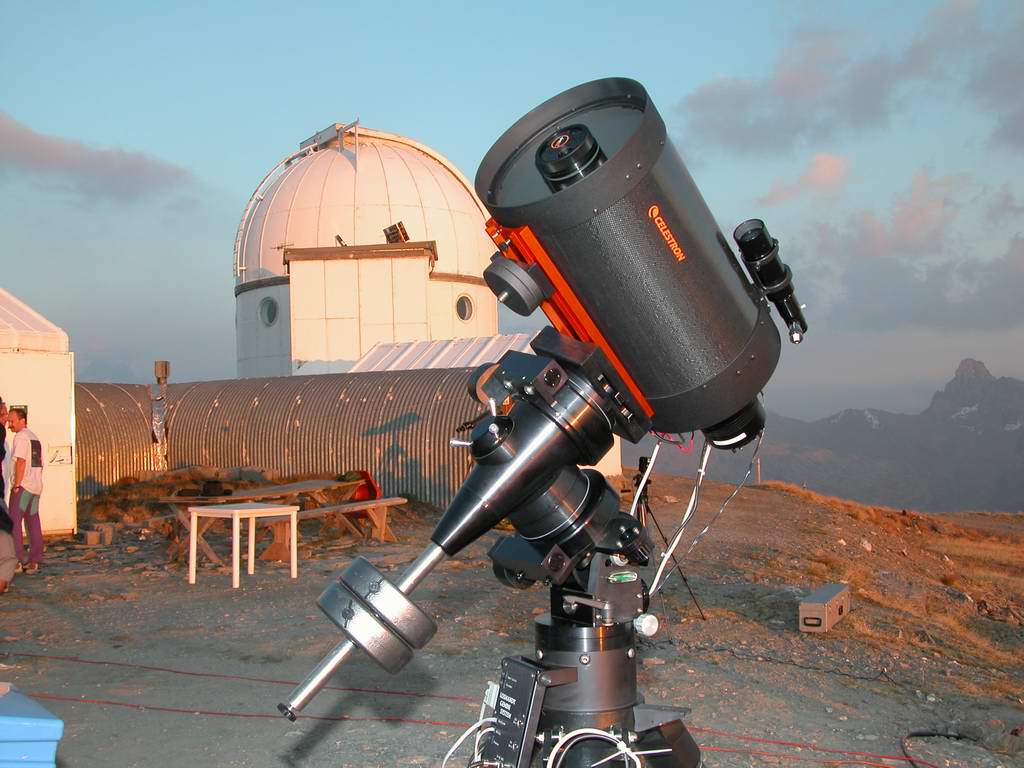 in front of observatory |
In September 2003, one week after having received my mount & scope, I went at top of "Pic de Château-Renard", 9000ft elevation for a mission. The dome protect a 24" telescope that we used with a new Echelle Musicos spectrograph that was provided by professional astronomers to allow us to continue deeper our study of Be-Stars. | En Septembre 2003, une semaine aprčs avoir reçu la monture et le tube optique, je faisais une mission au Pic de Château-Renard ŕ 3000m d'altitude. L'observatoire contient un télescope de 0.62m et un nouveau spectrographe ŕ Echelle de type Musicos que nous avons installé. Cela nous permet de continuer nos études d'étoiles Be. | |||||||||
 Sunset |
Sunset behind the telescope. My SBIG ST7E CCD camera with LRVB filter wheel is mounted on. | Coucher de Soleil derričre la monture. La caméra CCD SBIG ST7E avec la roue ŕ filtre LRVB est fixée sur le télescope. | |||||||||
 Titan & C11 |
C11 mounted on the Titan. | Le C11 sur la Titan. | |||||||||
 Movie (1.5MB) |
Movie of the mount... | Vidéo sur la monture... | |||||||||
Results |
|||||||||||
 image002.gif |
Periodic Error measurement (7 cycles) using a webcam during a very poor seeing night. Check out C.Demeautis french web site on Periodic Error for several mounts, very instructive! | Mesure (webcam) de l'Erreur Périodique; nuit trčs turbulente. Voir le site de C. Demeautis sur les Erreurs Périodiques, c'est trčs instructif! |
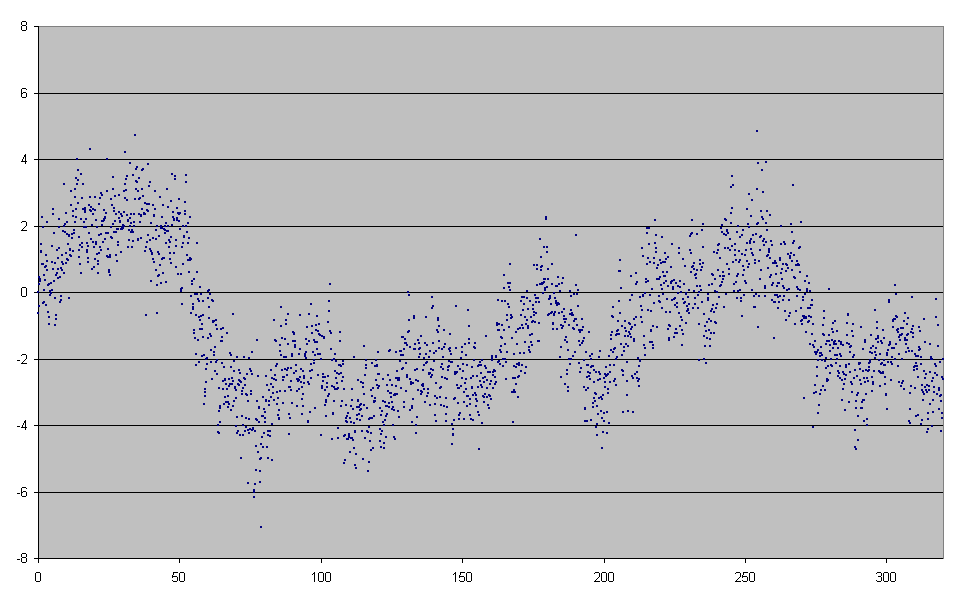 image003.gif |
One cycle (320sec) periodic error. | Erreur périodique sur un cycle (320sec). |
 (575) Renate: field |
One of my first result obtained with my new setup: light curve of (575) Renate asteroid. This picture shows a star field with the moving asteroid. | Un de mes premiers résultats obtenu avec cet équipement est la courbe de lumičre de l'astéroďde (575) Renate. Sur cette image, on voit l'astéroďde se déplacer sur la voűte céleste. |
 (575) Renate: lightcurve |
This graph available on R. Behrend's web site on lightcurves show the rotational period of this asteroid. | Ce graphique disponible sur le site web de R.Behrend sur les courbe de lumičre montre bien la période de rotation de cet astéroďde. |