After a few years with my 6" binocular telescope, I wanted to use a bigger instrument. I wanted to see spiral arms of galaxies and small details in planetary nebulas. I also wanted to observe with both eyes. Over the years I got used to this comfort, and it is more and more difficult to go back to single eye observing. So I started to think about a larger binocular telescope. Other ATMs had already built such instruments above 16" diameter, so ther ws no reason I couldn't do the same. In order to help with the design of the instrument, I wrote a piece of software to simplify the choice of the various parameters (size of the secondary and tertiary mirrors, position of the mirrors, ...)
Deciding of the instrument's diameter was pretty straightforward: the largest possible while still being able to transport it in a small car. I also wanted to observe with both feet on the ground (I don't like to climb on a ladder in the dark). So I settled on 14" for several reasons:
- the telescope fits in the trunk of a small car
- a pair a thin 14" mirrors weight 15kg, so even with the weight of the primary cage, I can lift it alone.
- with an f/D of 4,65 (in order to keep parabolization simple), the focal length is short enough to allow observing without a ladder most of the time (two steps are needed near zenith).
That's a frequently asked question. It's true that a 14" binocular telescope has the same light gathering power than a 20" monocular telescope. So why choose the more complicated configuration of the binocular telescope ?
In my opinion, a binocular telescope is mor complicated from a mechanical point of view, but the optics are easier to make. In my case, I had to make two 14 inch mirrors. It takes more time than making a single one, but it is no more difficult. I can't say it was easy, but it's doable with some previous experience with an 8" mirror for exemple. If I had to make a 20" mirror, maybe I would still chasing the parabola. Moreover, if I wanted to get the same 1673mm focal length to keep the eyepiece low, I would have had to do a 20" f/3.3 with 33mm edge thickness (to keep the same mirror weight). This is something for very experienced opticians !
Of course the mechanical part of the telescope is more complicated, because it is necessary to provide additional adjustments for the parallelism of the OTAs, for the adjustment of inter-ocular separation, ... but I am convinced that these difficulties exist mostly because it is difficult to find information on the building of binocular telescopes (there are no books on this topic for example). It is possible to build this kind of telescopes with simple tools. I used only simple and inexpensive tools (the fanciest being a cheap drill press and a router) and easy to find materials (mostly plywood and aluminium).
I don't have a 20" telescope to compare the views, but a few years ago, I compared the sight through my 6" binocular and a 8" telescope with a binoviewer (both instruments have roughly the same light gathering power). In order to understand what happens, we need to study three cases.
At low power, the diameter of the primary mirror determines the smallest usable magnification. Let's say that the pupil size of the observer is 7 mm in the dark (this value can vary from one person to another, but that's not the point, we'll make the reasoning with a fixed observer). With 360mm, we can use a 50x magnification, whereas with the 500mm, the minimum magnification is about 70x (under that, light is wasted). So it is possible to get a wider field of view with the binocular telescope. Moreover, using a binoviewer can yeld vignetting (especially with inexpensive units and a fast focal ratio telescope). In addition, for a fixed magnification, the exit pupil is smaller with the binocular telescope, which reduces the eye imperfections. In practice, I can observe pinpoint star without my glasses at 130x (I have astigmatism). I couldn't do that with a 20" telescope and a binoviewer.
At medium powers, there are not a lot of differences. That's what I have found when comparingthe 6" binocular and an 8" SCT. Maybe there are some subtle differences, but nothing really important.
At high magnification, the 20" telescope has an advantage because its resolving power is 1.4 times higher. That means it is possible to see smaller details on the moon or on planets. However, there is a particularity of the binocular telescope when the seeing is not perfect (most of the time unfortunately). In a monocular telescope with a binoviewer, both eyes receive exactly the same image : the light reaching the eye has traversed the same air layer in the atmosphere. That's not the case with a binocular telescope: each eye has its own image which has not been affected in the same way by the turbulent air. It's possible (but it's difficult to verify this) that at some times, an image is less affected by seeing efects than the other. In this case the brain can choose the details from one image or from the other. I tried this experiment several times. I watch the moon with only one eye for a few seconds. When I open the other eye, seeing seems suddenly a bit better. Is it reality or just an illusion ? hard to say for sure.
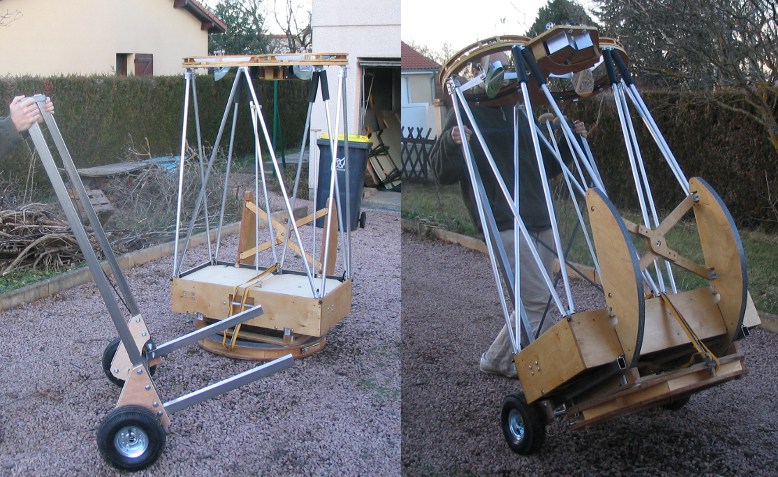
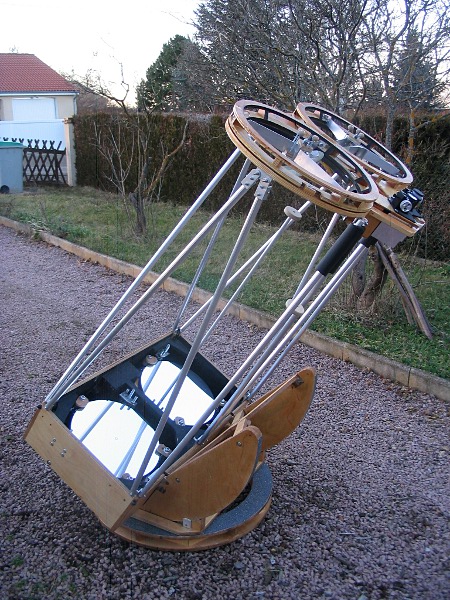
The primary mirrors ahev a diameter of 360mm (14") and 1673mm focal length, f/D=4.65. The focal length is long enough so that coma is not a problem, and short enough so that it's possible to have a wide field of view wih 1"1/4 eyepieces. I thought of transporting the telescope since the beginning of the design phase. It can be separated in three parts: secondary cage, primary cage ans mount. Each part has a low height when disassembled. When they are put one on top of the other they occupy a small space. The mount itself can be folded to lay flat. Finally, the 14" bino takes less space than my 6" bino ! The complete instrument weights about 60kg. The heaviest part is the primary cage at about 30kg (mirrors included). The mount uses a flex-rocker and is independant of the OTA. This will allow to replace it with a motorized one later.
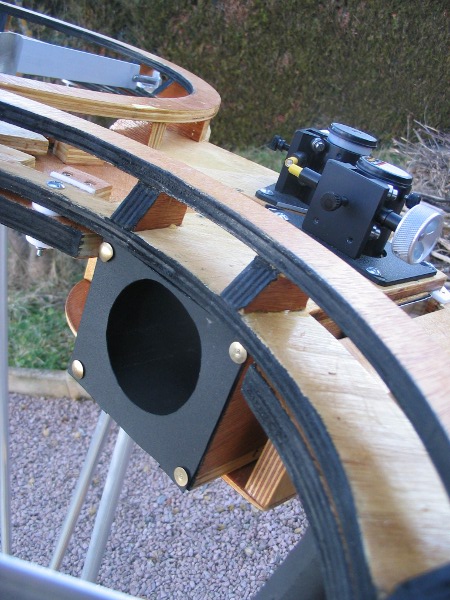
The inter-ocular distance adjustment and focusing is done nearly in the same way as with regular binoculars. One has to turn the secondary cages. The movement has just a bit of friction. After that focusing is done with the crayford focusers.
In order to obtain a well working instrument, it is essential to design some points with care: - the inter-ocular separation must be independant of focusing - it must be possible to adjust the parallelism of the right and left telescopes while observing: this is done with extensions of the collimation screws which can be reached while looking through the eyepieces. - the instrument must have all the necessary qualities of an usual telescope: stability, ease of movement, rapid setup and so on.
The primary mirrors are made of thin blanks (33mm or about 1"1/4 thick at the edge). They are mounted in 18 point cells. They are made od BVC (Black Vitrified Ceramic). It is a black, non transparent glass manufactured by the small company AJ's Telescope Workshop in Canada. I had no bad surprises with this material. During all the fine grinding, I made one wet with mirror number 1, then one wet with mirror number 2 on the same tool. Then I polished and parabolized each mirror separately. With this method it is easy to get two mirrors with the same focal length.
The secondary mirrors have a minor axis of 102mm (4"), which results in 28% of obstruction. That's more than what we find on an ordinary newtonian, but it's still less than the obstruction of C14 SCT for example. In fact I could have used samller secondaries (90mm or 3.5") but I choosed a wide fully illuminated field.
Finallt=y, the tertiary mirrors (34mm or 1"3/8 minor axis ) are placed just under the focusers to fold the light path in a direction parallel to the optical axis of the primaries.
Clic here to download the optical configuration that can be viewed with Binewt designer.The biggest difficulty when making a binocular telescope is making sure that both optical assemblies (left and right) are at the same time well collimated (to give sharp images) and point in the same direction (so that the observer sees a single image). There are several ways of achieving that.
The first idea is to make two optical tube assemblies which are collimated independantly. Then these tubes are mounted in a rigid structure which allows to make them parallel. That's the principle I used on my 6". It works but the structure which supports the 2 OTAs must be really stiff. If it's not the case, the vibrations can be different in the right and left side which is annoying when observing. That's what I had at high power on the 6" because the structure was not stiff enough. Finally I think that this approach leads to something quite bulky.
For the 14" bino, I decided to build a single truss which holds all the mirrors for both optical systems. It is then necessary to adjust all the mirrors simultaneously. At first, it seems realy complicated, but there's a method to achieve that. Moreover, this adjustment is necessary just once after building the instrument. The biggest advantage is that we obtain a rigid and compact instrument.
The co-collimation is the operation which consists in adjusting all the 6 mirrors so that the observer has sharp images in the left and right oculars and can merge the images.
To understand how it works, and design the necessary adjustments in the instrument, it is necessary to understand how it is possible to collimate and make parallel two newtonian optical systems. To do this, we need to make some brain experiments:
1. We consider a newtonian telescope (monocular) with a spherical mirror. To simplify things, we assume that the focal length is long enough so that prabolization is not required. Let's imagine that this telescope is perfectly collimated and Polaris is in the center of the field. If the primary mirror is rotated around its center of curvature, then the telescope is still well collimated and it is still aimed at polaris. In fact, its surface is always on the same sphere. The only problem is that the fully illuminated field is moved a bit, but that's not important for this explanation.
2. Now we consider a newtoninan telescope with a parabolic mirror still aimed at polaris. If we do the same movement as previously, the scope keeps polaris at the center of the field. But, since the mirror is not spherical, this movement introduces a decollimation of the telescope. The result is that polaris is kept at the center of the field, but the star is going to show some coma.
3. The previous experiment is even more interesting if we reverse things. Let's suppose we start with a miscollimated telescope aimed at polaris. If we move the mirror with a rotation around the center of curvature, we can remove off-axis aberrations while keeping polaris centered in the field. With this operation, we have a way to collimate the telescope without changing the direction it is aimed at. This method will be used for the collimation of the binocular telescope.
4. Suppose now that we have a binocular telescope. The right optical system is perfectly collimated and polaris is centered in the right eyepiece. We can manage easily to center polaris in the left eyepiece, even if this destroys collimation of the left optical system. From that point, we just need to use the method described at point 3 to collimate the left optical system while keeping polaris at the center of the left eyepiece.
It is pretty simple finally. The trick is to be able to rotate the primaries around their center of curvature. In practice, the mirror cell must be designed to allow this movement. This may seem difficult at first but it is not. We just need to move the primary laterally in its cell (translation in the plane of the mirror). To do this, the lateral support points of the mirror must be adjustable to accurately position the mirror in its cell. For mirrors which are not too thin, two support points at 90° are enough and this lateral support does not introduce deformations of the mirror. It's really easy to make this points adjustable. The mirror needs to be moved of a few millimeters at most. Then to do this special movement (rotation around the center of curvature), we just need to adjust the tilt of the primary (like in a traditional mirror cell) and after that, to move the mirror laterally in its cell to keep polaris centered in the eyepiece. Finally collimating the left optical system is very similar to ordinary collimation using a star at high magnification. The primary tilt is adjusted, then the star is centered again in the eyepiece. For a monocular newtonian, recentering of the star is done with the movement of the telescope (alt-az or equatorial). In the case of a binocular, centering the star is done by moving the primary in its cell. There's one thing left to correct: afer all these operations, the secodary mirror of the left side must be adjusted (that can be made with a laser collimator by chacjing that the laser hits the center of the primary). Then we go back to primary adjustment. By repeating this procedure 2 or 3 times it is possible to co-collimate both optical systems.
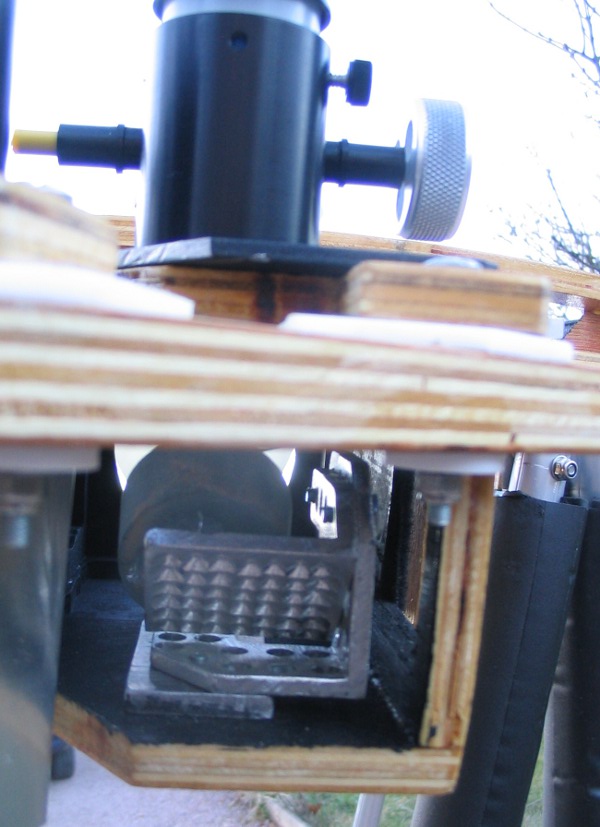
At the top of the telescope, the secondary mirror folds the light path like in a classical newtonian telescope. Then the tertiary mirror folds the light path so that it becomes parallel to the axis of the primary mirrors. It's mandatory to be able to merge the images. Of course the spacing of the eyepieces must be adapted to the interpupillary distance (IPD) of the observer. Adults have an average IPD of 63 mm and 95% of adults have an IPD comprised between 55 and 70 mm. In order that everybody can look comfortably (adults and children), we can plan a possible adjustment between 40mm and 75mm). In order to have an easy adjustment even for newbies, I used the rotating upper cage principle. This allows to modify the eyepiece separation without modifying the focus. Moreover, this system reminds the one on classical binoculars. Keeping collimation when the cages are rotated is not as difficult as it may seem. The rotation movement needed is very small (usually less than one degree). It's not the same problem as in an equatorial telescope when we want to adjust the position of the focuser for example. For this movement, the plywood cage slides on teflon pads. The movement is easy but with enough friction so that there is no need for a locking mechanism when the adjustment has been done.

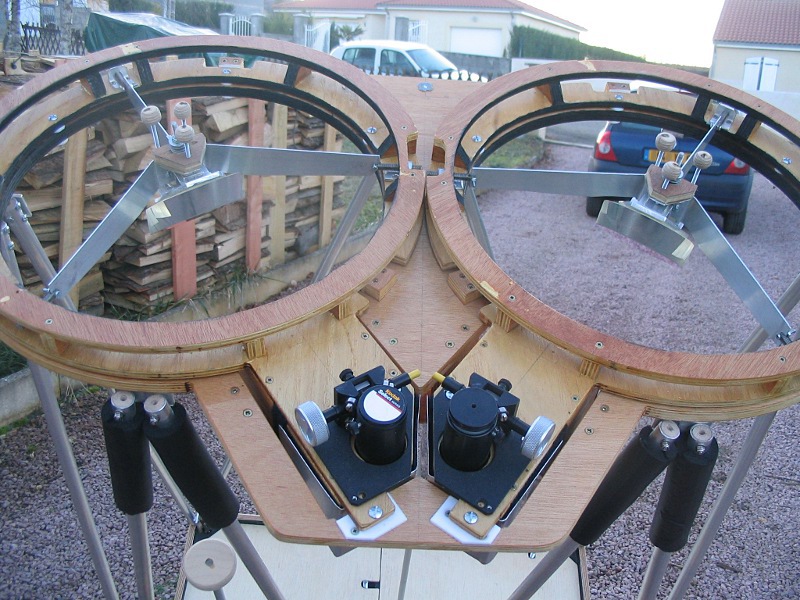
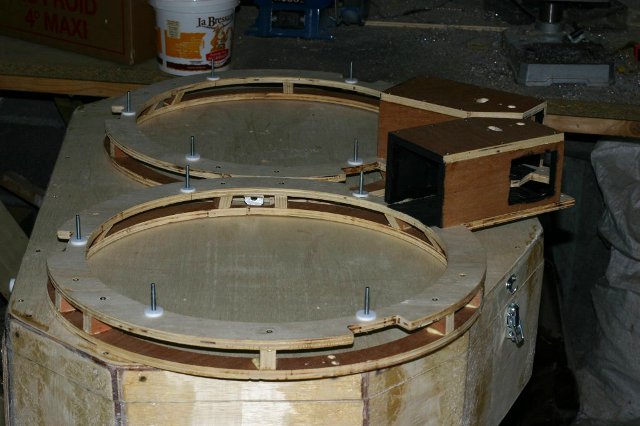
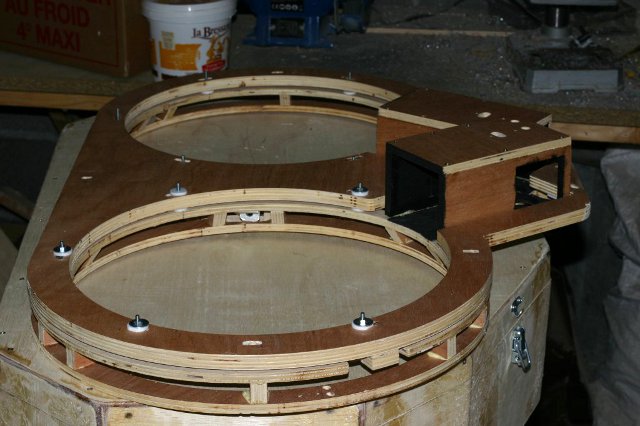
The focuser is placed after the tertiary mirror. This allows an independanta djustment fo focusing and inter-pupillary distance. The only drawback is that a short and compact fcuser is required so that the eyepieces can be close enough. I choosed the JMI RCF-mini1 which are perfect for this use. Those are 1"1/4 focusers, which reduces a bit the choice of long focal length and wide field eyepieces. I could have choosen 2" focusers, but there is a chance that some people (especially children) couldn't adjust the eyepiece separation to fit their IPD. Therefore, the maximum field is obtained with 24mm focal length eyepieces with 68° apparent field. The magnification is 70x, with nearly 1° true field and 5mm exit pupil.
The position of the focusers on the secondary cage is choosen so that the head of the observer doesn't interfere with the light path. To do that, the distance between the secondary and tertiary mirror is important. The distance from the tertiary to the focus point must be added to that. The main drawback is the need for a large secondary mirror (102mm or 4" in my case). But there are also some advantages. First, this reduces the height of the telescope. Moreover, it's possible to place a very efficient baffle between the tertiary and secondary. It is also possible to include a filter slide (this is not done yet).
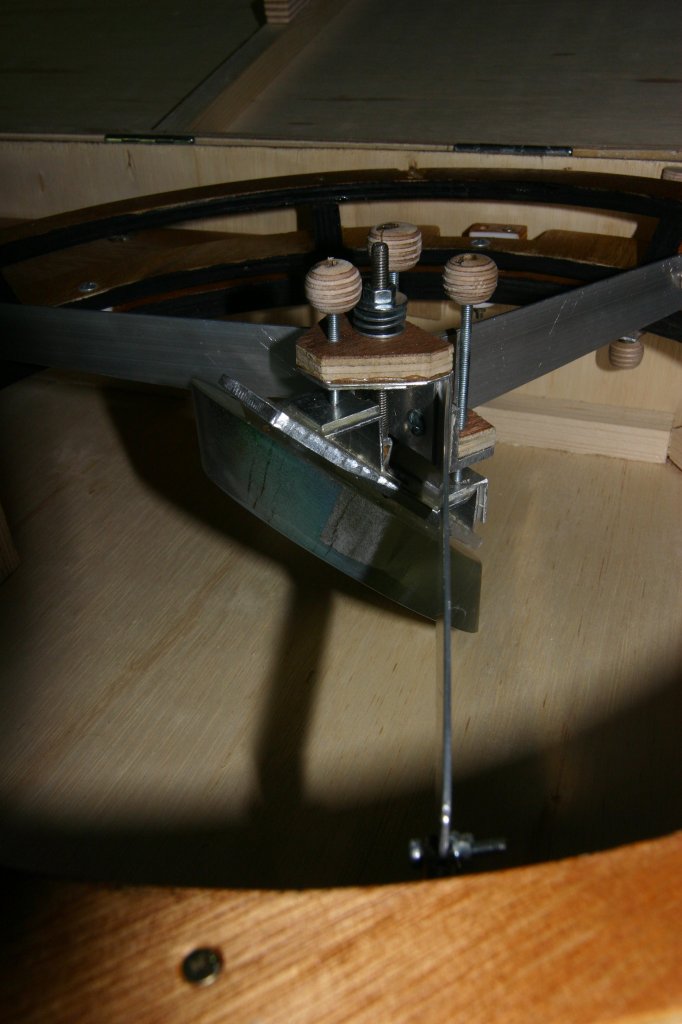
The spiders are inspired from th one from the Strock-250 travelscope in order to reduce the heigth of the secondary cage to the minimum. The spider legs are made of 1.5mm aluminium. Stainless would have been better, but aluminium is easier to find and to work with. First I tried to use a tension spring to hold the secondary but I could find a spring strong enough and small enough. So I made a spring with spring washers around a piece of all-thread. Finally, the position is adjusted first with a nut, which put the washers under compression. Then small adjustments can be made without the need to adjuts the compression.
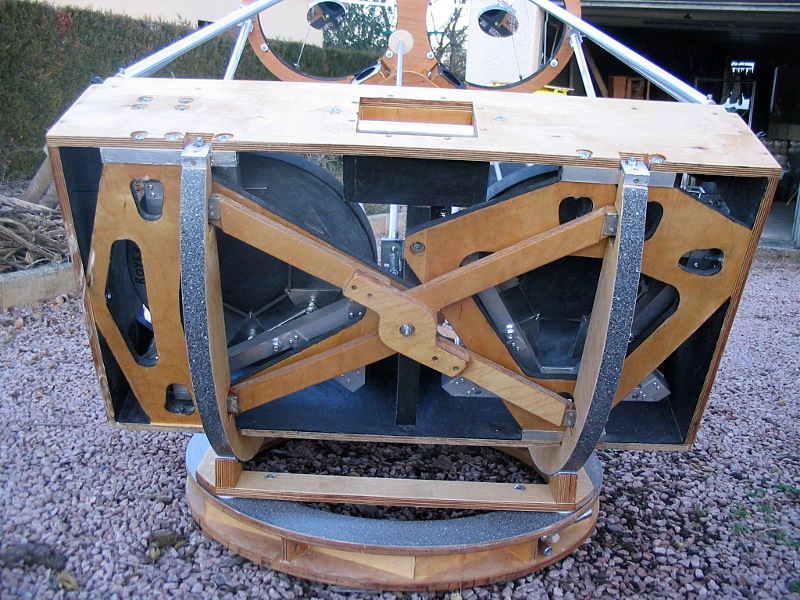
The cells have 18 floating points. The structure is made of 25mm aluminium tubing. The whole cell moves when collimation is adjusted. So the lateral supports stay at the center of gravity of the mirror. The cell is held by 6 strong springs (6kg of tension for each spring). The 3 collimation rods can be reached from the front and push against the cell (one against a hole, one against a slot and the last against a plane) so that a lateral movement of the cell is impossible.
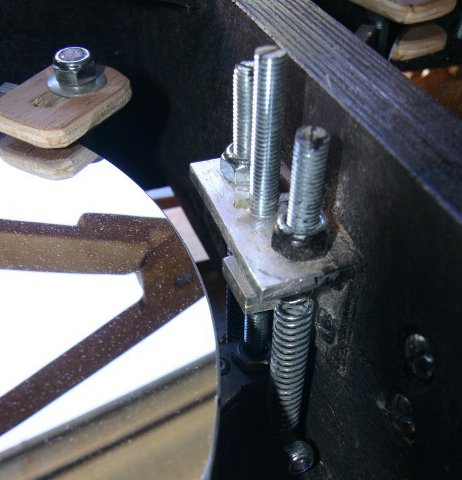
The cells have 3 particularities needed for a binocular telescope:
- There is some room for adjustment of the heigth of the mirrors. It allows to finely adjust the heigth of the eyepieces if there is a bt of difference in the focal length of the mirrors.
- The lateral supports of the mirrors are adjustable. This allows the special movement of the primary mirror around its center of curvature explained in the co-collimation part. This adjustment needs to be done only once at first light.
- Collimation adjustments can be done while looking in the eyepieces. This is needed to make small adjustments if one can't fuse the images in the left and right side. The left mirror can be adjusted along the vertical axis, and the right mirror can be adjusted on the horizontal axis. In practice most adjustments are made along the vertical direction when the telescope is moved in altitude. One could think that this kind of adjustment could spoil collimation, but in reality, if the images doesn't merge, that means that there has been some flexion in at least one of the optical assemblies and certainly already some loss of collimation. But most of the time, the adjustements are really small (the size of one Jupiter diameter), which has a negligble impact on collimation.
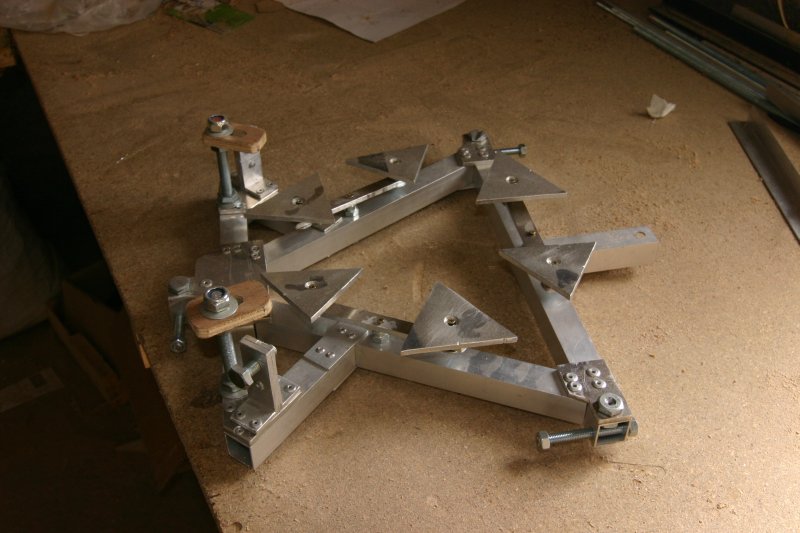
This is an altaz mount with a flex rocker. The rectangular primary cage (and not square as on monocular telescope) and the need for an easy transportation have driven the design of the mount. Unlike most dobsonian telescopes, the mount can be completely separated from the optical tube assembly. So the altitude trunions pass completely under the primary cage. The whole mount can be dissassembled and folds flat. During the assembly the cross pieces hold the trunions and it is easy to put the primary cage on top of that. There is a big handle at the rear of the primary cage to do that. The movement is done with the friction of teflon and ebony star. With large trunions like these ones, balancing the telescope is very easy.
