|
|
|
Infrared and ultraviolet photography
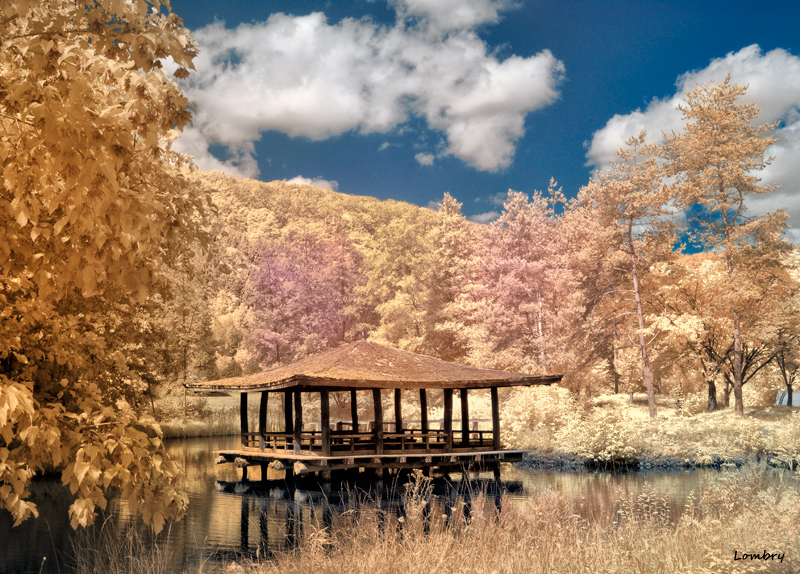
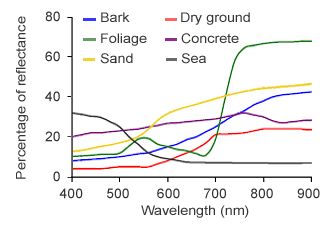
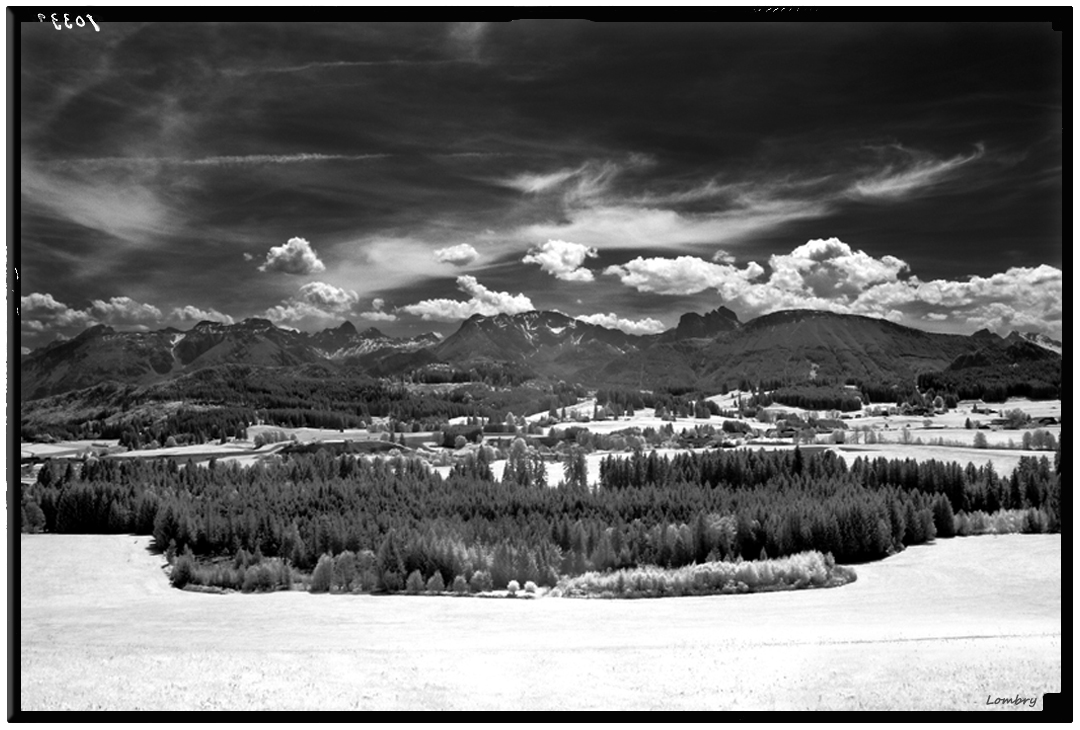
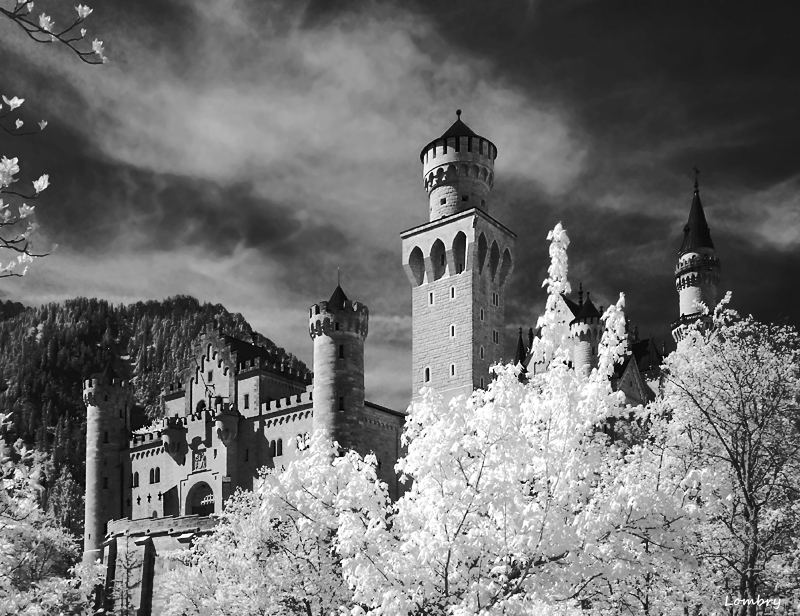
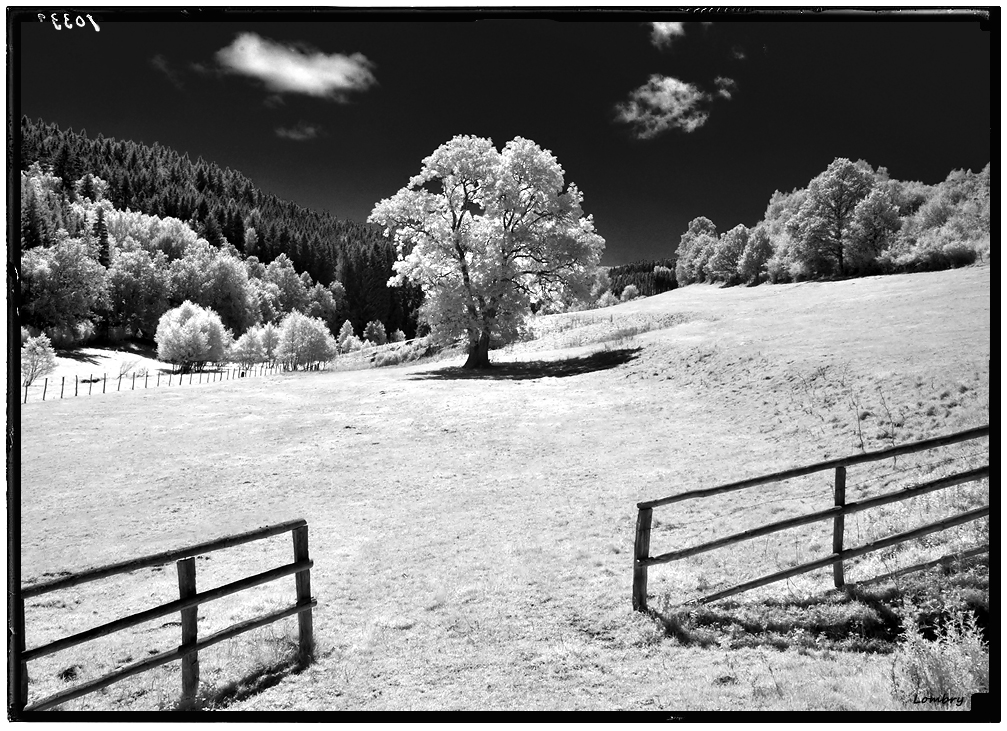
Infrared photography (II) What usage can we have of near-infrared photography ? The near-IR radiation as many scientific applications. It permits to penetrate into the haze, to increase details at the horizon, to detect the chlorophyl emission, IR bioluminenscence, etc. Its spectroscopic counterpart also permits medical diagnosis. In B/W photography, this radiation gives the feeling to enlarge the landscape depth and increases the image contrast (and conversely in UV). One mainly uses this technique in planetary astrophotography : the observation of Mars and Titan, and to record bright nebulae emitting in Hydrogen alpha. On his side, the amateur mainly uses infrared at pure aesthetic purposes : to bring to the fore a particulary nice landscape, a wild nature or an attracting site (building, ruin, etc) to which he will give false colors to increase the emotion. But before feeling that pleasure, we will see that a processing on computer is essential, at least to desature the image, to correct the contrast or to modify the saturation of colors. Power reflectance of objects in IR Beforing taking pictures, it is useful to familiarize with the power reflectance (albedo) of the different materials in the near IR because it is their response in that radiation that we will record. With the last generation of DSLR and compacts, it is easy to visualize the aspect of an object in infrared. Indeed, in using a compact digicam dislaying the image on the monitor before shooting or a DSLR equipped or not with a "Live View" mode, you need only a few seconds to see and understand what are brights objects and those giving a dark image. The graph displayed below shows response curves of various materials in visible and near IR radiation. As we see, foliage and sand are very bright in IR (up to 70% of refection) and thus will take a light color in colors and will be almost white in B/W. Conversely, the sky and wood (trunk) will be dark while the water will be black. To see : "Infrared World" Images Gallery
Focusing Lenses of cameras are designed to focus the white light at focal plane. The autofocus is also calibrated for a wavelenght of 500 nm taking into account the thickness and refraction index of the IR blocking or the clear glass that replaces it. Consequently, the IR radiation does not focus at the same focal plane. The autofocus for example is very difficult to use in macro and must be desactivated. In revanche, you can keep using the autofocus if you work with a large field depth. Most DSLR's show the IR focusing at infinity with a point or a red mark close to the infinity symbol. By lack of reference (as on most compact digicams), picture the most as possible in autofocus mode in checking that it operates well between a few meters and infinity. That said, on last generation of DSLR's, you can always see the image on the monitor before shooting and even perform a manual focusing on some compacts. Exposure compensation and duration Usually, in the same working conditions (light, hardware and subject) the exposure time depends on the sensor size. But even inside a same brand, two DSLR's models using the same sensor will not necessary give the same exposure time. So, according to calibrated tests made by MaxMax, the exposure time can be of 1/60th s on a Canon 300D to 1/30th s on a Canon 400D. In addition, larger is the sensor, less is the thermal noise, higher is the signal/noise ratio and more it is sensitive to IR radiation. The light loss induced by an IR filter requires an exposure compensation. This correction is transparent for the photographer as the measure is generally performed through the lens but it is good to know that the exposure time will vary according to the filter used. So, compared to a picture taken without filter, the exposure compensation is ranging between +2 EV (RG665, R-72), +5 EV (RG830) and +12 EV (W87 and W87C). Note that +10 EV represent 210 or to multiply the exposure time by 1024. Without reaching that extreme, even using a filter transmitting some light (under filters like X-Nite 630, Schott RG665, Hoya R-72, etc) if weather conditions changes and light inensity decreases, you have chance to end up with exposure times two to four times longer than in full sun.
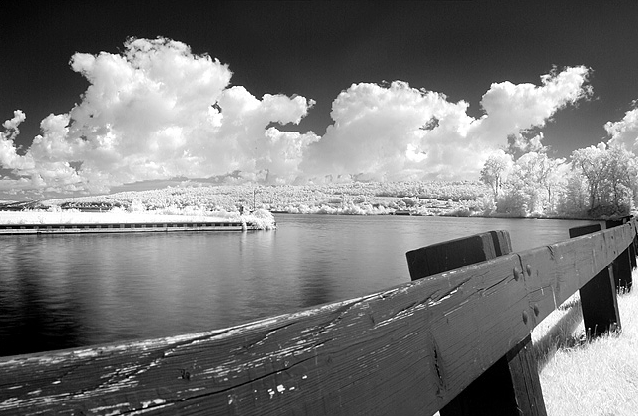
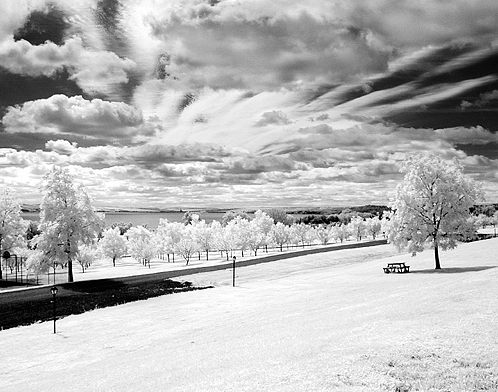
If you use an IR filter cutting all visible light (RG830, W87C, etc), even in full sun the exposure time will be at least 16 times slower (+4 EV) compared to a picture recorded without filter. If you use a polarizing filter, you will have to compensate of at least +1 EV additional, and if the sky is cloudy, till add +1 to +2 EV... A tripod can thus be useful. On new DSLR's or lenses, the alternate is using the vibration reducer (VR) that allows to win 3 obturation speeds according to Nikon. In the field, one can indeed record freehand still subjects up to 1/6th s. Generally speaking, due to the light loss, it is not excluded to have to increase the sensitivity to 400 ISO and have exposure times from 1/100th to 1/10th of a second or even to a few seconds if the filter is totally opaque to light. If your camera has a noise reduction function (NR), use it, it will be useful although it could generate a loss of definition. Also, note that in increasing the exposure time, colors saturation will change, going for example from a brownish sky on a snapshot with a CWB on grass to a pinky sky on an image exposed some tens of seconds. At the end, this has no much importance if you can correct colors on computer or work in RAW where all corrections can be done after shooting, by image processing. Exposure modes In infrared, two exposure modes can be used : in colors or in B/W. Say immediately that it is better to work in colors and then to process images on computer because in this way you have more flexibilities. Depending on the bandpass of the filter placed on the lens, you have the possibility to record the full spectrum visible+IR (and on modified camera all the spectrum between 330-1200 nm) or only the IR radiation. It is only isolating the IR radition that you will get the more contrasted images (without speaking about the image processing on which we will come back). Black and white photography Infrared B/W photography allows to get the same result as pictures recorded on silver-based Agfa IR or Ektachrome IR Aero emulsions where we had the feeling that snow shrouded all vegetation, clouds coming out from a sky becoming as black as ink and where the landscape becaming unreal took some depth. For lack of colors, it is an opportunity to play with "light" and shadows in searching for contrasted subjects, refecting much and very few IR. Aesthetic effect assured.
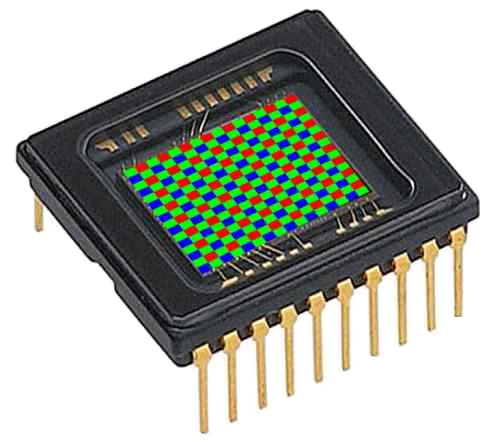
You will get a B/W image either in working in monochrom mode at shooting or in working as usual in color then in desaturating the image on computer. Both methods are equivalent as in B/W mode the built-in camera software will also perform a desaturation but we will see below that both methods do not necessary give images of the same quality. You will also get a B/W image in using an IR filter blocking all visible light (Schott RG830, X-Nite 830, Kodak W87C, etc) and in performing a CWB (see below) on any colored objet of the scene (vegetation, blue sky, etc). Why in this case, do we get a B/W image ? Because outside the visible spectrum, the Bayer matrix becomes transparent; in other words the three RGB channels record the same level of luminance. The image processor perceiving only variations of brightness, it can only build a B/W image. Note that if you use an IR filter transmitting some light (e.g. X-Nite 630, RG665 or Hoya R-72), with a CWB on a colored object the red channel will influence the image that will not be fully desaturated. Some objects as well as the sky will show a light brownish tint while vegetation will be slightly blue. We will come back on this subject. In fact, if we can easily record an IR B/W image, its quality will depend on several factors. The issue becomes technical and mainly concerns the image processing.
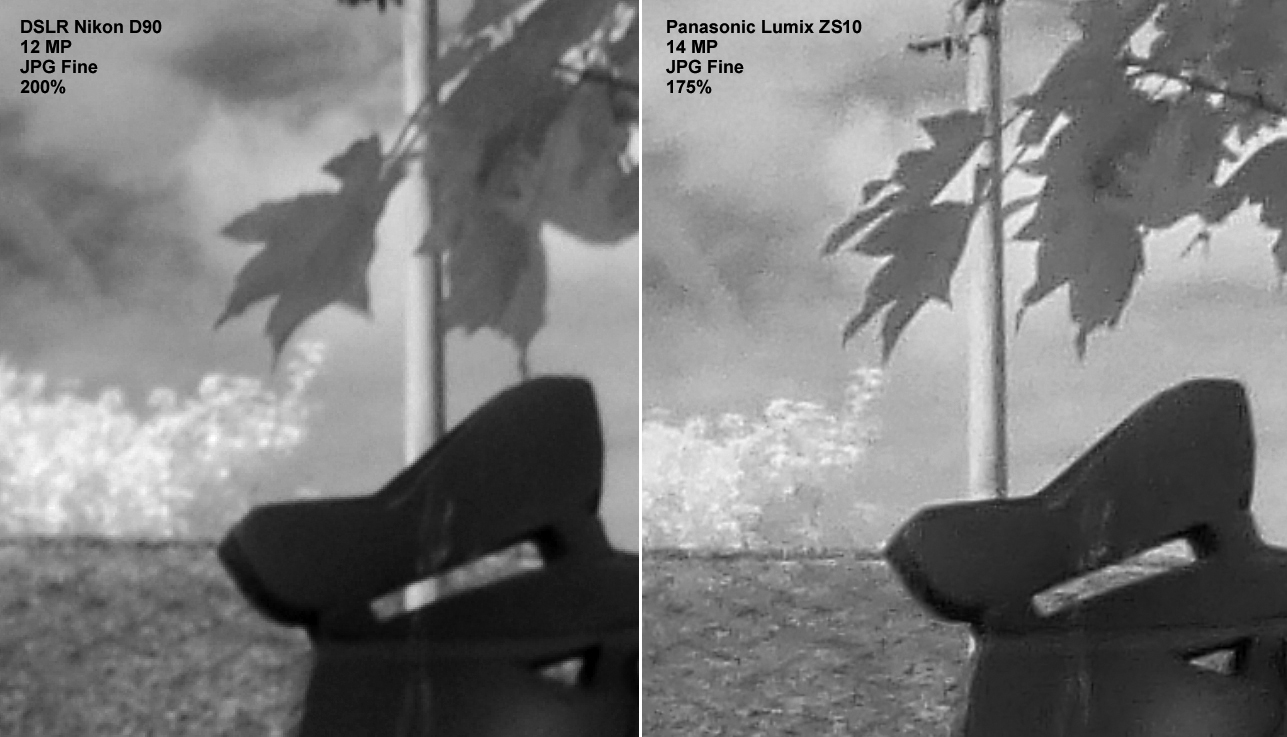
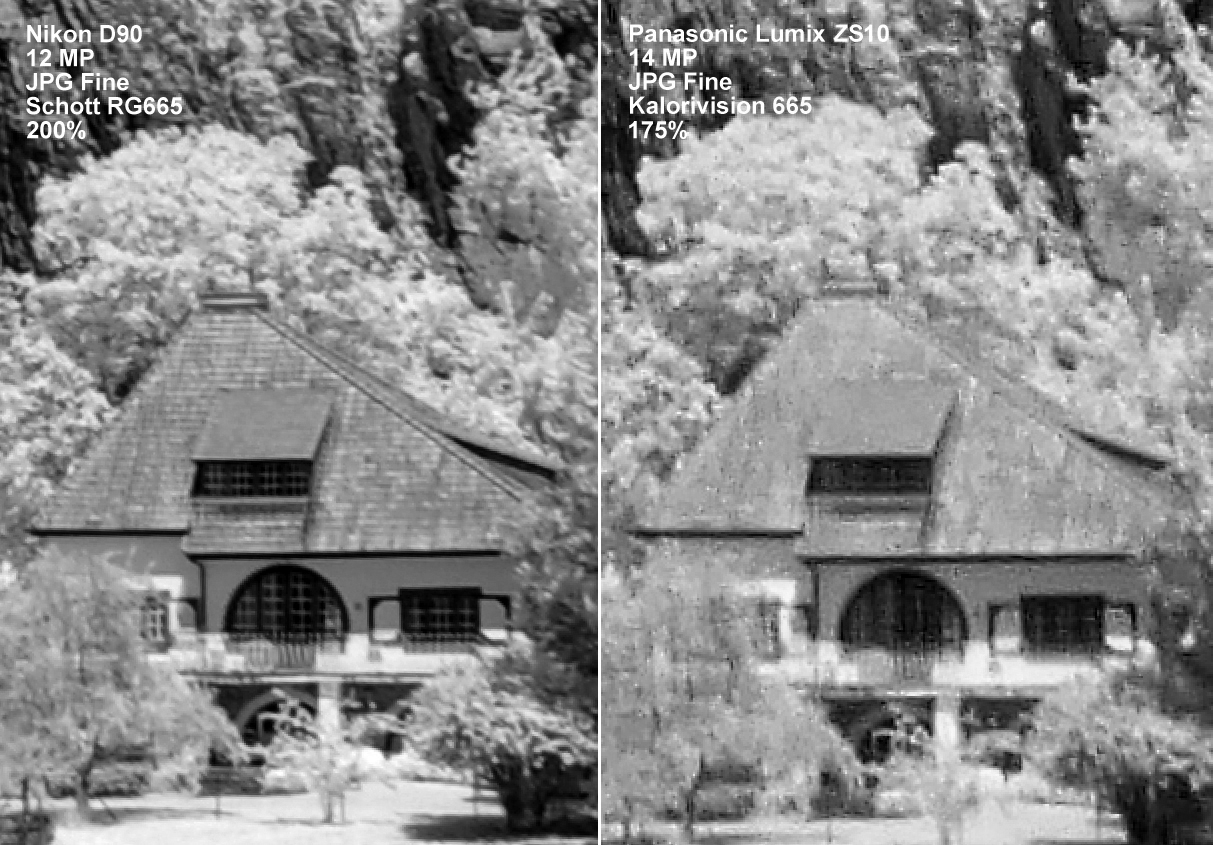
Image quality and thermal noise In B/W infrared photography, we cannot adjust colors (tint and saturation) of the image but only alter its luminance, its brightness. It is performed via a correction of gamma (the characteristic curve of the image) that affects the image grayscale (the brightness curve also called levels). It is thus useful to know characteristics of an image to know what parameters can be adjusted to get such or such effect. First of all note that if you work in JPEG format, the image has chances to lose its details in the compression algorithm. Indeed, the last generation of cameras can reach very high resolutions (16 Mpixels and more) but sometimes to the detriment of the definition. It is in particular the case of most compact cameras that show excellent resultats as long as you do not enlarge too much the image. But if you enlarge the image over 40% on screen (16x on the compact monitor) artifacts of the compression algorithm will appear as we can see on the below two images, both recorded in JPEG format with a "Fine" quality, the one expected to show the best definition.
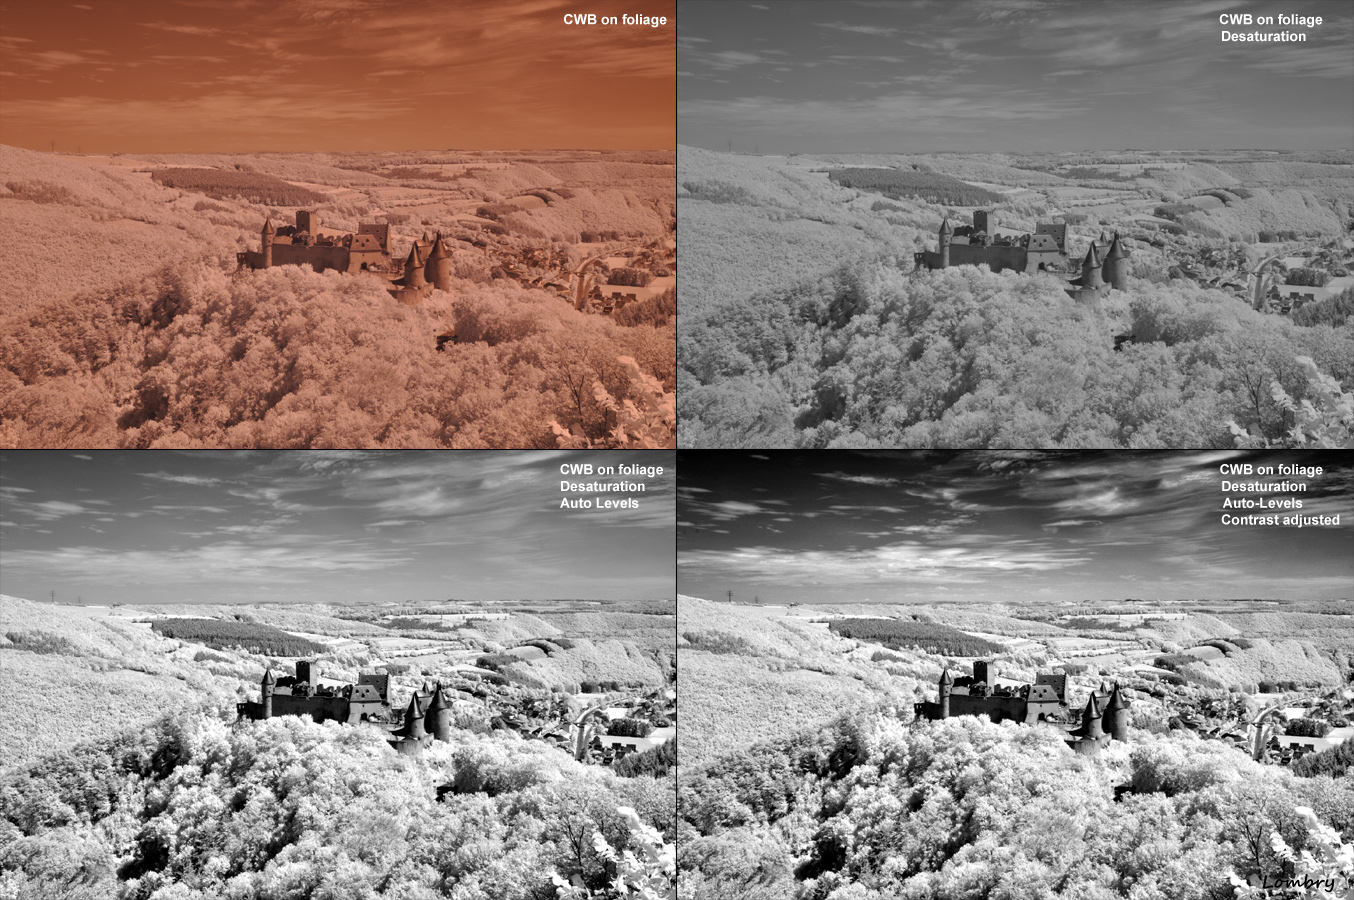
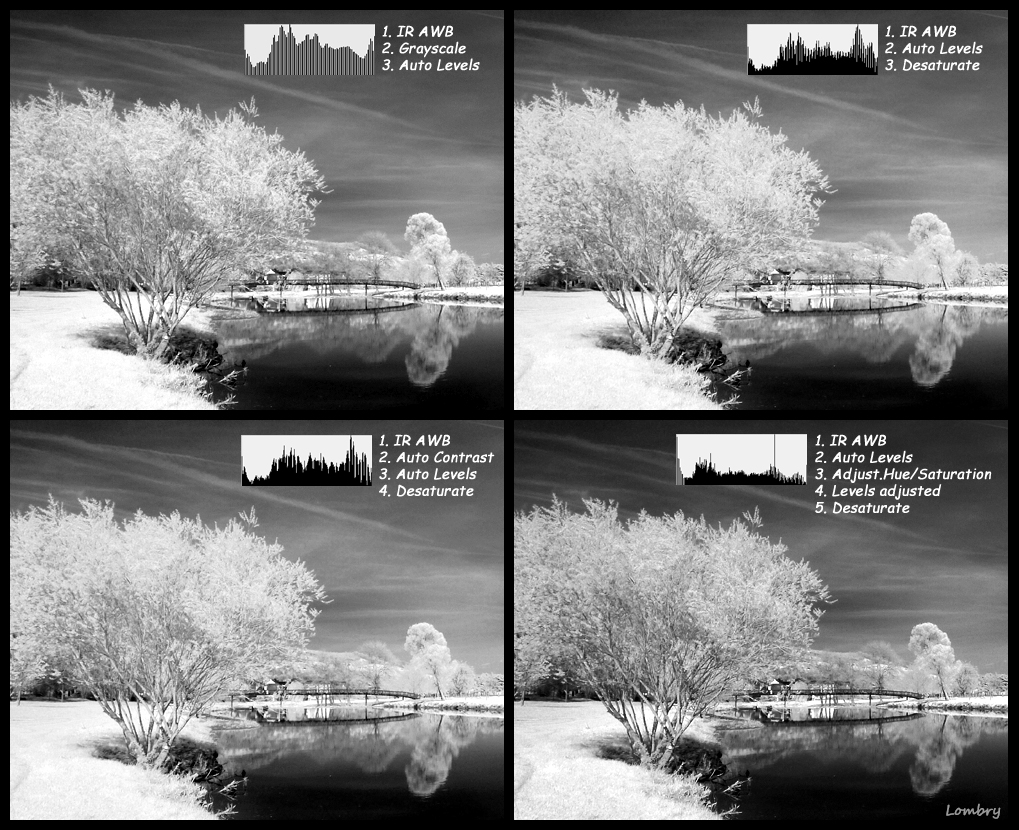
So, as long as you publish these images on the web in reduced size, these compression defaults will not appear. But this poor definition will appear on full size images and prints larger than A4. For this reason, better to work in RAW format if your DSLR or compact camera permits. You will be sure that the image will not be altered by the camera built-in image processing software, and you can still modify the image settings on computer, including the white balance, contrast and sharpness. Create a black & white image from a color IR image Does one have to take B/W pictures at shooting ? All depends on if you work in JPEG or RAW format, this last offering much more flexibility for the image processing. To get a B/W image in using the JPEG format, it is recommended to work without compression (100%) and in monochrom mode at shooting for several reasons related to the quality of the resulting image. As one see on the below mosaics, converting a color image in grayscale or to desaurate it during the postprocessing will have a different effect. Besides a variation of contrast according to the corrections made to RGB channels, the most unaesthetic effect is the rising of thermal noise on desaturated color images, mainly in gray or uniform area (sky). Where does this noise come form ?
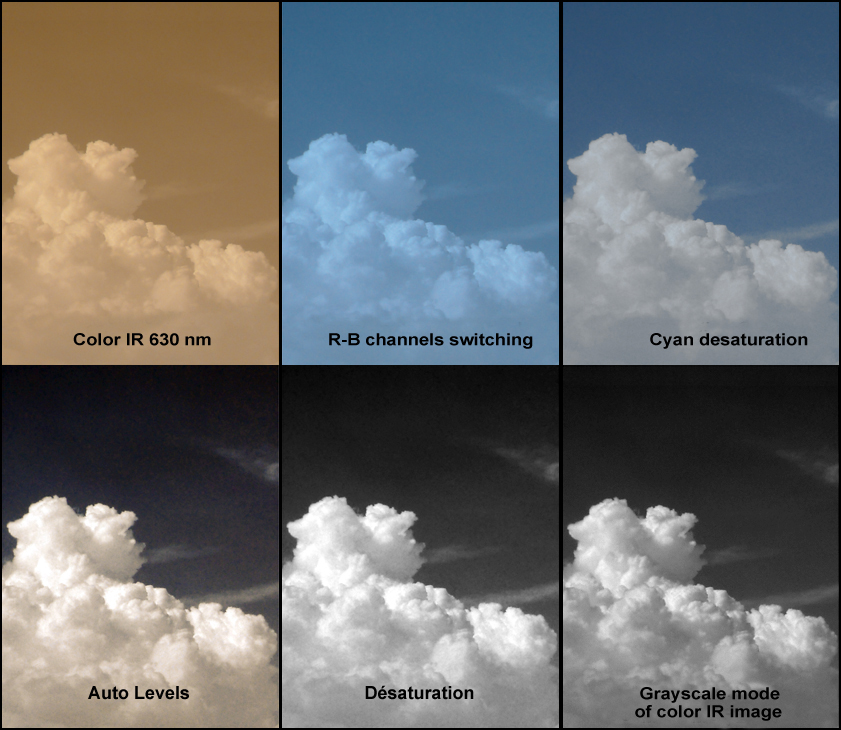
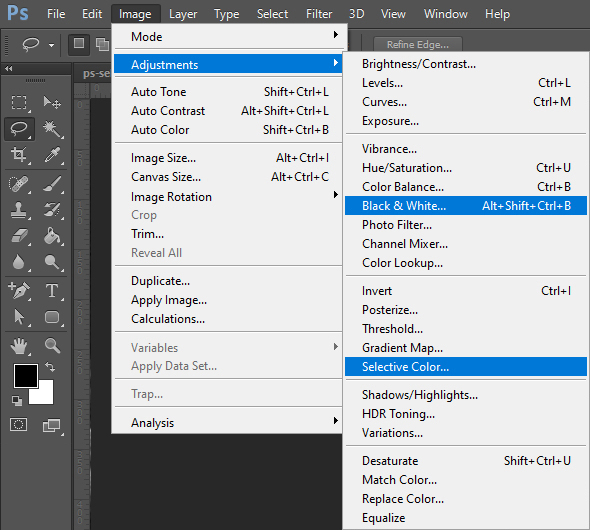
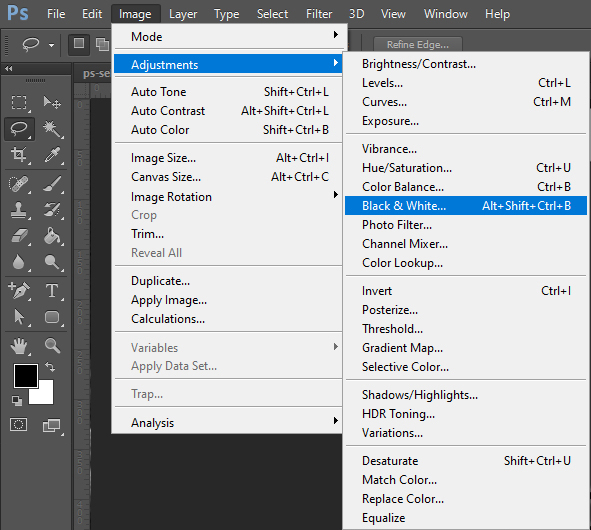
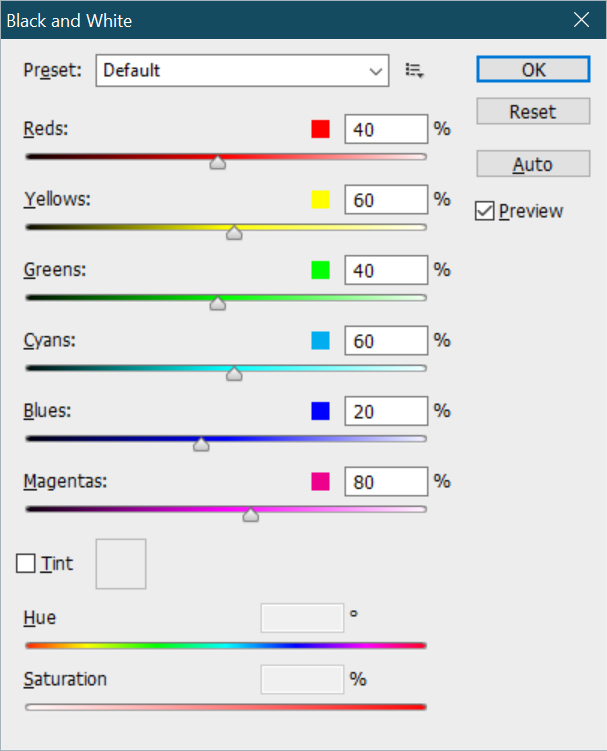
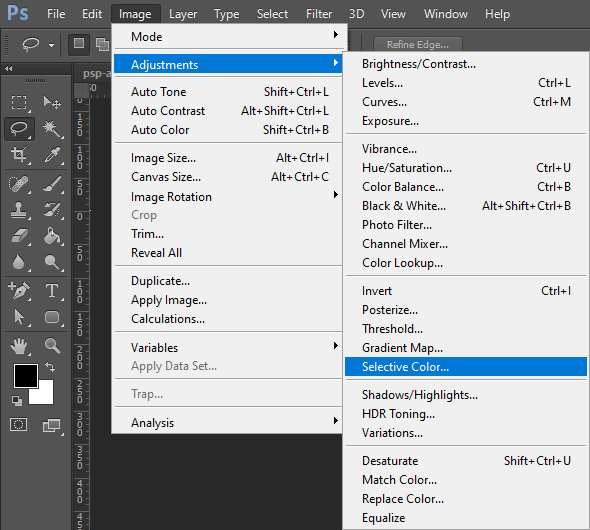
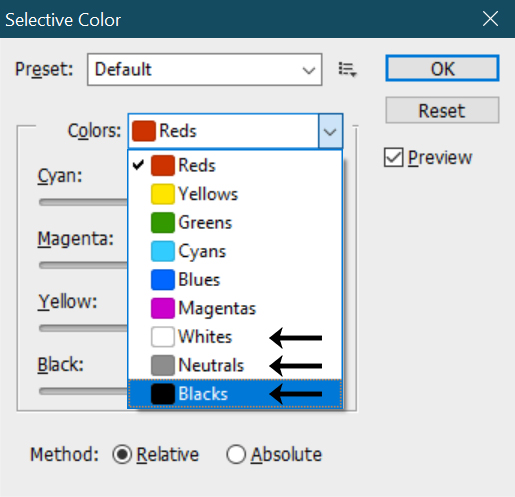
As we will see later about color IR photography, the spectral sensitivity of a defiltered CMOS or CCD sensor is unbalanced, the red channel recording 7 to 12% more IR energy than the two other channels that can be underexposed. The IR filter also blocks some light what induces a reduction of luminance (contrast) of colors. Add to this limitation the fact that an IR filter transparent to light (X-Nite 630, Schott RG665, etc) contents much more red, making that type of filter more sensitive to that type of noise. This phenomenon will increase if we switch R and B channels by image processing. So, as we see at left, by image processing, in modifying a color (tint, saturation) or the brightness (levels), the counter-effect can be an increasing of noise level in one or more RGB channels. This will go unnoticed as long as the other colors dominate or are not altered. It is in particular the effect that happens after have switched R and B channels and reduced the sky cyan dominance to give it a more neutral color. If one applies thereafter an automatic correction to levels (Auto-Levels in Photoshop), over a threshold the image becomes noisy. If you desaturate the image at that step, le lack of information in RGB channels will be translated by noise. An alternative to desaturate a color image and increase its contrast without accentuating the pixelation noise is to use Photoshop's Image >Adjustements tool and both functions Black and White and its adjustment sliders, and Selective Color and its adjustment sliders by only adjusting the brightness since the image has been desaturated. The Life Pixel web merchant explains this procedure in detail via the next link. To read : 3 Steps to a Black & White Infrared Image, Life Pixel
In conclusion, in B/W IR photography, it is preferable to work in RAW format and choose monochrome mode from the time of shooting or after shooting to invert the R and B channels and desaturate the image as soon as editing in an image processing software. In addition, as usually one searches for contrasted images, it is preferable to work with filters opaque to light, transmitting only the infrared from 750 or 830 nm to reduce the noise generated by colors and to focus on luminance. It is also important to remind that most software perform an automatic white balance when converting color images in B/W. This balance is optimised for images recorded in the visible spectrum and does not give good results in IR, the contrast being usually too pronounced. Next chapter
|
|||||||||||||||||||||||||||||||||||||||||||||||||||||||||||||||||||||||||||||||||||||||||||||||||||||


