|
|
|
Assembling your antenna system
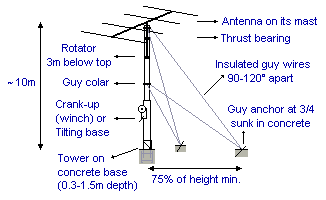
Installing of the antenna system (VI) Like the tower building, you must plan and think seriously about the way that you or maybe with your team will proceed to the assembling and installation of the antenna system, what includes the rotator, the supporting mast , the antenna and the cabling system. This procedure is probably useless to place a light antenna that you can carry alone in one hand and that does not require hours of preparation to know how to process, even if you have to place it on a sloping roof. This procedure rather concerns a typical bulky and large antenna that you cannot raise on top of a tower without assistance (both mechanical like adding a pulley, and human). See first if the tower or the antenna manufacturer has not left some instructions. In all cases, here also simulate at ground level the full installation. It is by far preferable to be warned before than have to say sorry after ! If you work with a team begin by assigning to each people a determined role according to their skills : what element of the antenna with what tool each people must assemble, who stands on ground, why for, who climbs on the tower, at what time, who install the rotator, the antenna, who check the security and clean the ground, etc, and repeat also who is the chief ! The job must be divided in several steps : - Assembling the antenna on the ground - Preparation of the area to raise the antenna and accessories - Installing the rotator and the mast - Installing the antenna - Connection and fixing of the cabling system (rotator and antenna).
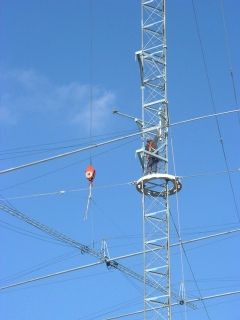
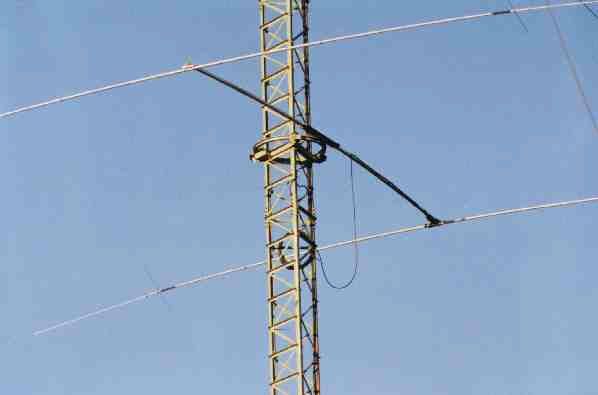
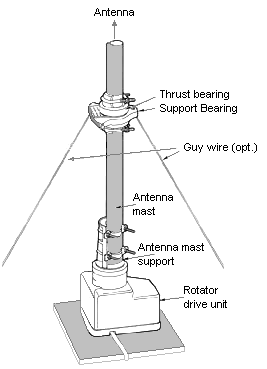
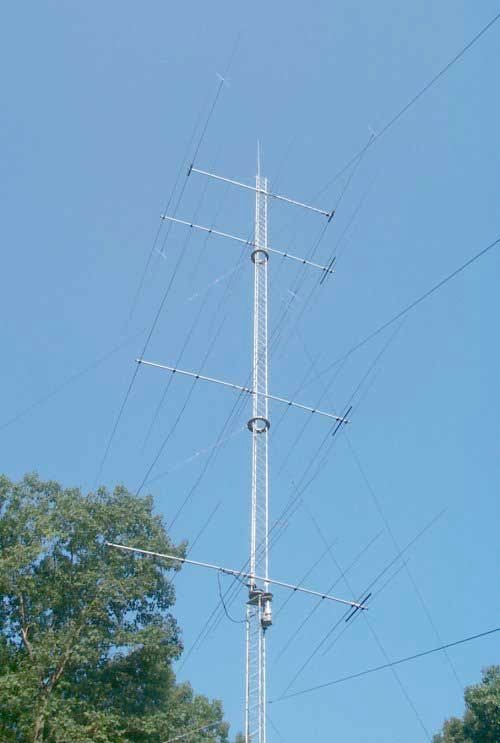
Assembling of an antenna is never a difficult task if you follow strictly the instruction manual. With a screwdriver, pliers and a wrench this a job that last between a few hours and...one or two days. When your antenna is assembled it is time to simulate the installation and imagine how you will raise this bulky antenna there up as well as its accessories. We will take the example of a standard antenna assembled on top of a mast. There are other solutions among which the installation of a rotating ring at any heigth of the tower coupled with a TIC ringrotor like on the picture displayed at left taken at N3RR. The antenna in fixed on the ring and all the tower rotates. For a ordinary pylon, begin first by installing a gin pole or a simple pulley on top of the mast. If necessary, to avoid to lift a load too heavy (over 30 kg, 60 lbs.) attach a second pulley at the base of the antenna so that you can use all your weight when pulling, rather than the sole strengh of your arms. In all cases use a rope at least twice as long as the height of the tower. Then install the rotator on its platform and place the mast as described in the instruction manual. To increase the resistance to wind and reduce the lateral force endured by the rotator you can add just above the rotator a thrust bearing as explained previously. You will attach all required cables later. Remember than the lower is the rotator the weaker are the constraints that it will have to support.
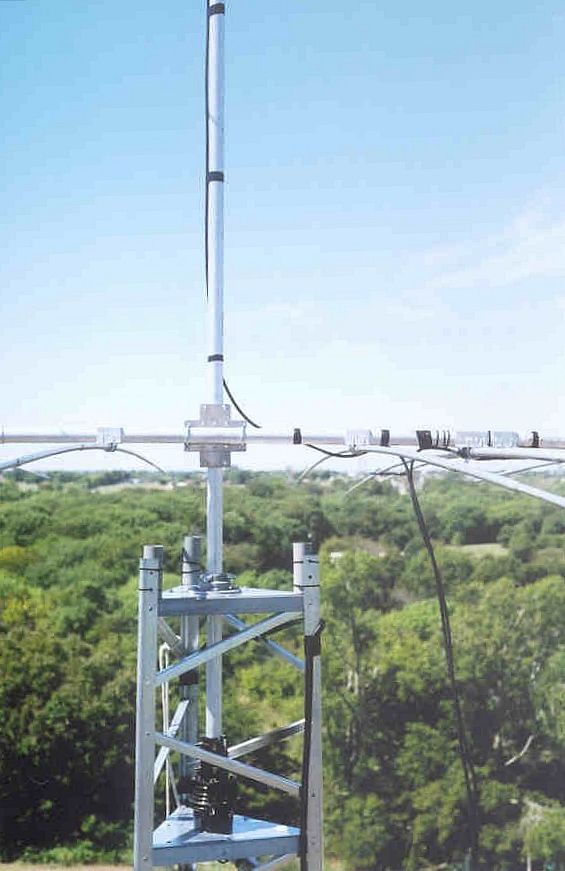
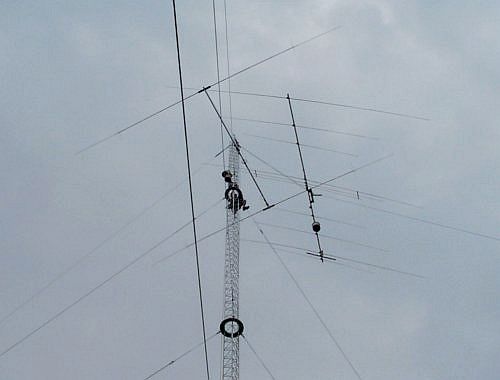
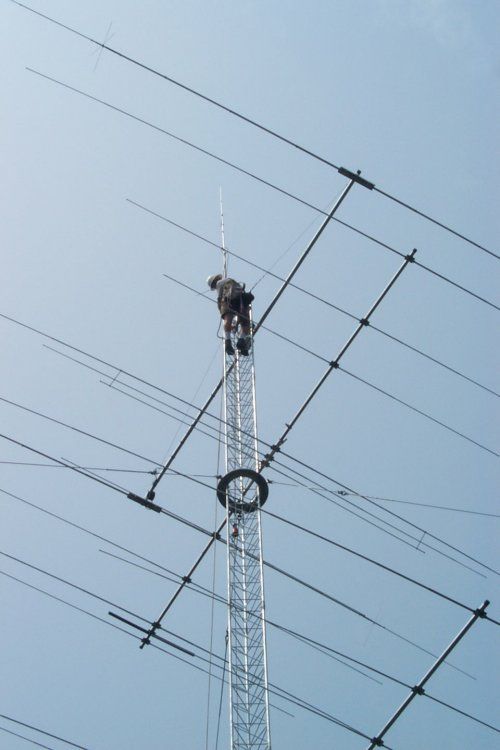
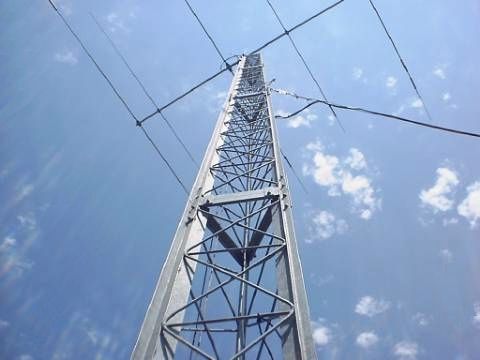
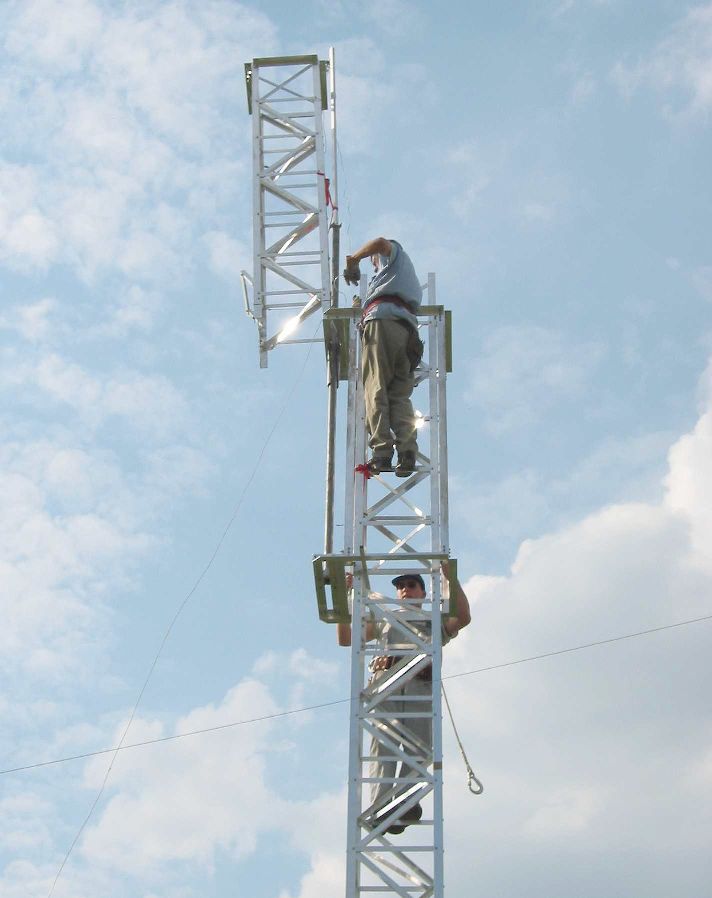
Raising and fixing of the antenna At last take the antenna. Tie a rope around the balance point of the boom (60 cm to 1m on each side or 2-3ft) so that the antenna will be lift in horizontal position using the pulley(s). If it is a long Yagi you can also lift it with the boom parallel to the tower but you will have more difficulties once arrived on top to rotate it in position in both the vertical and the horizontal planes. Before raising the antenna verify that during the ascent it will not hit the tower or will not be blocked by any obstacle like the guy wires or the insulators. In this case you can build a "track" made of two ropes joined over the tower (near the pulley) and tight more far than the guy anchors, thus forming a L over them, on which the antenna boom will slide to the top of the tower. But it is maybe easier to attach two additional ropes to both ends of the antenna boom so that you can pull on them to move the antenna away for any obstacle. When all is ready, clear the tower area from all useless tool and potential obstacle. Check that the ropes are not intermingled and place them well apart, out of the antenna area and the people's feet. Then lift the antenna just one meter up to see if the balance is correct. If necessary, let it back down and adjust the ropes. When all is safely attached and verify, start pulling the antenna up the tower. With a large antenna it is careful to ask someone to climb on top of the tower to check the climb and that the elements are not caught or jammed here or there.
Do never exert antagonist forces in the same time, like pulling strongly the boom toward you to avoid an obstacle and in the same time pulling it vertically. Balance your strains because the boom is vulnerable to horizontal forces and might break apart, all the more if it is made of fiber glass. Avoid also that the antenna rotates during the climb in using the two additional ropes tied and the ends of the boom to stabilize the antenna. Once arrived on top, one people is enough to place the antenna and bolt it on its mast. When the antenna system is properly attached you can proceed to the installation of the cabling system, the cables to power and control the rotator and the antenna feed line or coaxial. Reserve the installation of the ground system and the lightning protection for another day, but as soon as possible. After this first installation attach slightly the cabling system on top of the tower then let it runs freely to the ground. Take the time to place your cabling system in a flexible pipe 10-20 cm wide (4-8"), the ends being protected with a piece of insulation. Drive a narrow trench (excavation) less than 30 cm depth (<1') in the ground and bury inside the pipe to make it emerge near your station. Before stopping up properly the trench and fixing all cables make a first transmission test.
Do a first test of your installation before continuing. Test the rotator in all directions and check if the direction indicated on the control box and the heading of the beam are the same. In case of problem verify the rotator and the mast clamping. Make also some QSOs on each band covered by the antenna to check the transmission line SWR and other potential troubles. If all works properly it is time to achieve the job. Weatherproof all coaxials and connections (and optionally paint or coat unprotected hardware). Then secure all cables with fixings placed each 30 cm (1') all the way to the tower base. Fixings can be made either in wrapping tape along the cables running along the antenna boom and the tower rungs or better, using tie-wraps (autolocking plastic strips). Leave enough coax so that the antenna can rotate freely over 360° without pulling or binding the cable. But conversely to not let the cables flap in the wind as they can be damaged under high winds. Voilà, there we are, the antenna system and the tower are in place and work as expected ! I think having nothing forgot. Additional security
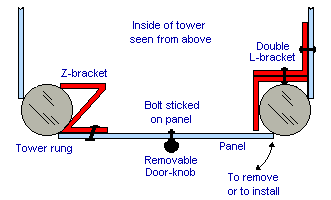
For security reasons, to prevent kids to climb on the tower, shield its lower part. ARRL published an article in the '80s suggesting to install panels between the base and about 1.5m (5 ft) high, and on a width as wide as the interval between two corners (say 50 cm, 20" between the structural rungs). These panels are made of galvanized steel sheets in 18-gauge size that are jammed in the tubular structure as displayed at right thanks to brackets in shape of Z. These brackets are made of aluminium or steel of about 15 cm long (6") and 3 cm wide (1.2"). They are fixed each 50 cm (20") on the left vertical side and inside each panel. Their size must be suited to the diameter of your rungs. You can also build these brackets in bolting together two L-brackets upside down. So, for a square tower your need either of 12 Z-brackets or 24 L-brackets. Then drill one hole in each plate and stick inside a bolt in order to screw a removable door-knob from the outside. To put the panels in place in the tower, move them from right to left and slightly tilted to you to jam the brackets around the vertical rungs then push them in position, they will stand up on their own weight. Then unscrew the door-knob. The panels must be difficult to extract for a kid although detachable in screwing the door-knob in the panels and taking the brackets out of rungs in moving the panels to the side opposite to the brackets (right) and slightly tilted to the outside. Do not forget also to ground your tower and the antenna, and to install a lightning protection. "Playing" with high voltage and current, this time this is not a job that has room for experimentation... To read: All about Lightning protection Remain the maintenance. Check the state of your installation regularly from top to bottom, the antenna of course, but also the rotator housing, the fixings (bolts, anchors, etc), the base of the tower and the tension of guy wires. Check whether an hardware is missing, spots of rust, structural defects like cracks or bindings. Fix immediately any problem, reinforce if necessary the concerned element before it becomes a danger. At last, think also to the dismantling of your tower. Proceed like we did but in reverse order. For the bulkiest installations it is preferable to entrust this task to a specialized company that will do the job using a crane to minimize the risks of accident. Good luck !
For more information Images of assembling K4JA's construction of the contesting station K6NR's crank-up tower installation K7EM's shack and antennas farm N3RR's tower and lightning protection installation Manufacturers CTA (F) De Kerf (Bazel, Belgium) Books and technical info Application Notes, Array Solution Tower
Climbing Safety & Rescue, ARRL bookshop QST Magazine, ARRL The website of major manufacturers of rotators and towers (see ads in ham magazines).
|
||||||||||||||||||||||||||||||||||||||||||||


